Posts in home
Insulated vs. Non-Insulated Garage Doors: Which Is Better?

When it comes to choosing a garage door, you might not think insulation matters much—it’s just a door, right? Well, not quite. Your garage door plays a crucial role in your home’s comfort, efficiency, and even security. In this article, we compare insulated and non-insulated garage doors to help you make an informed decision. 


No. 1

What Are Insulated Garage Doors?

First off, let’s talk about what makes a garage door insulated. Insulated garage doors have layers of material, usually with foam insulation sandwiched between them, which helps maintain temperature stability. Unlike non-insulated doors, these doors are designed to provide a buffer between the interior of your garage and the outside environment. 

Non-insulated garage doors, on the other hand, are typically made of a single layer of material, usually steel or aluminum. They’re simple, cost-effective, and get the job done, but they lack the benefits of thermal regulation and soundproofing.

No. 2

Energy Efficiency

If you’re concerned about energy efficiency, insulated garage doors have a clear advantage.

Your garage might not be your main living space, but it still affects your home’s overall energy use. Many garages are attached to the house, meaning air from the garage can easily find its way into your home. An insulated garage door helps regulate the temperature in your garage, keeping it warmer in the winter and cooler in the summer.

This temperature stability can make a big difference to your energy bills. By reducing the load on your HVAC system, an insulated door can lower your heating and cooling costs. If you’re someone who wants to cut down on monthly utility bills, an insulated door is a smart investment. In fact, this energy efficiency is why 40% of new garage doors are insulated, according to ADP Garage Doors.

No. 2

Comfort and Usability

Think about how you use your garage. Is it just for parking your car, or do you use it as a workshop, gym, or storage area? An insulated garage door can make your garage a much more comfortable space year-round.

During the colder months, an insulated door keeps the chill out, making it easier to work in the garage without freezing your fingers off. In summer, it helps keep the heat at bay, which is especially important if you’re storing temperature-sensitive items or using the space for hobbies.

A non-insulated garage door, however, offers no such comfort. The temperature in your garage can swing wildly, making it far less pleasant for any activities other than parking.

No. 3

Noise Reduction

If your garage is attached to your home, an insulated garage door can also reduce noise—both from outside getting in, and from inside getting out. This is especially handy if you live on a busy street or if you have teenagers practicing their drum solos in the garage. The foam or other insulating materials absorb sound, making your garage a quieter and more peaceful space.

Non-insulated doors, meanwhile, do very little to block noise. Every passing car, barking dog, or gust of wind is likely to echo into your space. So, if noise is a concern, an insulated garage door is the way to go.


hellolovelyliving-home-outdoor-gate-garage-hardware-accessories

Rejuvenation

Rejuvenation believes in the power of thoughtful design - explore their extensive range of garage and gate hardware, including stylish outdoor accessories that add character and charm to your home's exterior.


No. 4

Durability

Insulated garage doors tend to be sturdier and more durable than their non-insulated counterparts. The extra layers of insulation add weight and rigidity, making the door less susceptible to dents and damage. If you have kids who might use the garage door as a backstop for their soccer practice, you’ll appreciate the durability that insulation adds.

Non-insulated doors are often made of just one thin layer of metal, which can be prone to denting and bending. While they might cost less initially, the need for repairs or even an earlier replacement could make them less cost-effective in the long run.

No. 5

Cost Considerations

Now, let’s talk about cost—because, let’s face it, budget matters. Non-insulated garage doors are generally cheaper up front. If you’re looking for a basic, budget-friendly option, a non-insulated door might seem appealing.

However, it’s important to consider the long-term savings and benefits of an insulated garage door. The extra cost you pay initially can be offset by energy savings, less maintenance, and added comfort over time. Essentially, while insulated garage doors may require a bit more of an investment, they often pay off in the long run, making them a smarter choice for most homeowners.

No. 6

Curb Appeal and Value

An insulated garage door can also add to the value of your home. When it comes to curb appeal, an insulated door often looks more refined and feels sturdier. It’s a small upgrade that can make a big difference if you’re considering selling your home down the road. Potential buyers often see insulated garage doors as a sign of quality, making your property more attractive on the market.

Non-insulated doors might not offer the same level of visual appeal or give the impression of quality, which could impact buyer perception. If adding value to your home is part of your goal, insulated is definitely the way to go.

No. 7

Which One Should You Choose?

So, which type of garage door is better? If you’re prioritizing comfort, energy savings, durability, and long-term value, an insulated garage door is hands-down the best choice.

Sure, non-insulated doors have a lower initial price, but they fall short in areas that truly matter—like keeping your home comfortable and your energy bills in check. Whether you use your garage as a workspace, a place to store important items, or even just to keep your car in better condition, insulation makes a difference. And in the long run, that difference can translate into real savings and added comfort.

Takeaways

Choosing the right garage door might not be the most thrilling home decision, but it’s one that has a big impact on your daily life. An insulated garage door provides better energy efficiency, comfort, noise reduction, and durability, and even boosts your home’s value.

If you’re on the fence, consider how often you use your garage and what role it plays in your home. An insulated garage door is an investment, but it’s one that pays off in numerous ways—making it a better choice for most homeowners. So, if you’re still debating, think about the comfort and efficiency you’d like to enjoy, and let that guide your decision. Insulated is the way to go!

Looking For Home Resources?

Looking to enhance your living space and create a sanctuary that supports your well-being? Explore our home partners who offer a wide range of resources to elevate your home environment.



homeHLL x Editor


Essential Tips For Homebuyers: Navigating The Mortgage Process With Ease

Buying a home is one of the most significant milestones in life. The process, however, can feel daunting, particularly regarding securing the right mortgage. With countless loan types, terms, and lenders to consider, it’s easy to become overwhelmed.


With the proper guidance, you can navigate the mortgage process confidently. This guide will walk you through some essential tips to help you find the best mortgage for your situation and ensure a smooth home-buying experience. If you're looking for ways to consolidate mortgage and home equity loan, a solid understanding of the mortgage process is a significant first step.

No. 1

Understanding Your Financial Situation

Assessing your financial situation before searching for a mortgage is essential. This will not only assist you in setting a reasonable budget for your new home and make the mortgage process more manageable.

The first thing you should do is check your credit rating since it is the primary determinant of the mortgage rate you will be given. The higher the credit score, the better the interest rate one will be offered, which can mean a difference of thousands of dollars throughout a loan. This is an excellent time to work on your credit score if it could be better since this will be a determinant of the mortgage you can get.

Next, take a look at your present debts and monthly bills. Most lenders consider the debt-to-income ratio (DTI), the proportion of income used to pay debts. A low DTI ratio means you are handling your debts effectively, making you a better borrower. Lenders like to see the DTI ratio below 43%; therefore, if yours is higher, you must pay off some of the debt before applying for a mortgage.

No. 2

Getting Pre-Approved: Why It Matters

The best thing you can do in the mortgage process is get pre-approved for a loan. Pre-approval ensures that you know your house-hunting range and helps sellers understand that you have the financial capacity to purchase a home. In pre-approval, the lender will analyze your credit report, income and credit score, and debt to decide how much money they want to lend you. This process may require documents like pay slips, income tax returns, and bank statements, so it is wise to have them ready.

Pre-approval is not the same as pre-qualification; rather, pre-approval involves a more comprehensive and detailed analysis of your finances, serving as a preliminary check on your financial status. Even though pre-qualification helps you estimate your home-buying power, pre-approval is more reliable and valuable when negotiating with sellers.

No. 3

Choosing the Right Mortgage for Your Needs

There are various kinds of mortgages available, which means that one must be able to decide on the mortgage that is best suited for them. Several types of loans are available, including fixed-rate loans, adjustable-rate mortgages (ARMs), FHA loans, VA loans, and USDA loans.

A fixed-rate mortgage has a fixed interest rate, which means that the amount the borrower has to pay every month does not change. This option is especially favored by people who have decided to buy a home for an extended period and would like regular payments that will stay the same for quite a long time.

On the other hand, an adjustable-rate mortgage (ARM) usually has a relatively low initial interest rate that may be adjusted periodically concerning market trends. It is highly recommended for individuals who are considering selling their property or refinancing their mortgage before the upcoming interest rate changes to explore the option of Adjusting Rate Mortgages. This proactive approach can help you secure a more favorable rate and potentially save you money in the long run.


hellolovelyliving-home-furniture-decor

Arhaus

Modern indoor and outdoor furniture and décor sustainably sourced, lovingly made, and built to last


No. 4

Working with the Right Lender

Choosing your financier is one of the most important decisions you will make when purchasing your home. Do not rush; compare the rates offered by various lenders, such as banks, credit unions, and mortgage companies. Feel free to discuss the conditions; every point or two percent cut in the interest rate can amount to a lot of money in the long run.

Do not forget about the interest rates; instead, focus on the fees charged, the terms of the loan, and the quality of customer service. Ideally, you would like a lender willing to engage you throughout the process, especially when you are new to home buying. Consult with friends, family, and colleagues and find a lender who fits your financial situation and vision of homeownership.

Takeaways

Mortgage loans can often feel quite overwhelming when navigating the complex process of shopping for a new home. Still, you must assess your financial capacity, apply for pre-approval, select the correct type of mortgage, and consult the right lender. It is not only about searching for a house but also searching for the right financial solution that will suit you and is stable for the long term.

Completing your homework and being thoroughly well-prepared for each step of the home-buying process will help ensure you move seamlessly into your new home without any unnecessary worry or stress. Having a solid understanding of what to expect can make all the difference in this exciting journey.

By thoughtfully considering these helpful tips and insights, whether you are a first-time homebuyer entering the real estate market or someone in the process of refinancing a consolidated mortgage along with a home equity loan, you will be better equipped to navigate the complexities of the situation. This proactive approach will ensure that the entire process unfolds smoothly and seamlessly, empowering you to make informed and confident decisions every step of the way.

Looking For Home Resources?

Looking to enhance your living space and create a sanctuary that supports your well-being? Explore our home partners who offer a wide range of resources to elevate your home environment.



homeHLL x Editor


5 Easy Tips To Increase Your Backyard Privacy

Many people can undoubtedly agree that they often don’t experience true privacy in their backyards. This private space is ideally where you want to unwind, relax, and share quality moments with family and friends. Likewise, it is a space where you likely don’t want your neighbors watching you from their homes or while they stroll down the road—creating an uncomfortable feeling that disrupts the serenity you seek in this personal retreat.


Ideally, maybe you want to spend your time sunbathing and soaking up the warm and comforting rays of the sun, or perhaps you envision enjoying a playful afternoon engaging in fun activities with your dog. No matter what your chosen activity may be, it often feels unsettling and a bit creepy knowing that someone could be watching you from a nearby location. With these considerations in mind, in this article, we share four practical tips to help you create an added layer of privacy to your backyard space without compromising its overall appearance or aesthetic charm.

No. 1

Come Up With a Seating Shelter

A shelter for your outdoor seating area like a pergola, awning, or sunshade are excellent options to consider for enhancing your outdoor space. You don't need to make it look like an imposing fortress, though. Instead, you can opt for a charming and stylish wooden shelter that features two or three sides to provide adequate protection. Even if you choose to have just one side covered, that can still be sufficient if you feel particularly exposed from one direction only, allowing you to create a cozy and comfortable atmosphere.

Woven panels, Venetian panels, and many more options can be found in a wide array of shapes and intricate designs. Wood is particularly ideal for these structures because it lasts a long time if it is well looked after and maintained properly. Additionally, you have the flexibility to paint the wood according to the specific theme of your unique garden, allowing for personal expression and style. Having at least one open side will still allow you to experience a refreshing outdoor feel, bridging the comforts of your living space with the natural beauty surrounding you.

No. 2

Use Plants and Trees

If you face some restrictions in terms of how tall your fence can be due to local regulations or homeowner association rules, there are generally no limitations when it comes to the planting of trees. Adding some vibrant and strategically placed trees to your backyard is an excellent idea, especially if you have neighboring houses that overlook your private space.

Of course, it’s vital to remain considerate and not invade others’ personal space or property lines. However, if you have an ample amount of room to work with, placing a few well-chosen trees along the side of your yard can significantly enhance your privacy and create a more serene environment.

Opt for trees that are known for their thick, expansive crowns. Pleached trees are particularly ideal from this perspective, as their structure provides excellent coverage. Ultimately, the choice of trees also depends on your specific needs, the local climate conditions, and the overall size of your yard.

On the other hand, hedges can provide an even greater sense of privacy in the long term, creating a peaceful retreat from the outside world. However, they do require consistent upkeep, including periodic trimming to keep them looking neat and tidy, along with preventative care against diseases that may impact their health. If you’re considering this natural option, Splendid Landscaping Services in Langley can help you choose and maintain the best evergreen hedges for year-round privacy, so you can fully enjoy your outdoor space.

You can also opt for expandable faux ivy, which can be an excellent choice for adding greenery to your space. Since it’s artificial, it’s much easier to take care of compared to real plants. A simple dusting every now and then will suffice to keep it looking fresh and vibrant.

If the outdoor conditions happen to be poor, you could easily use a fine spray setting on your hose to gently clear away any debris or dirt. Just make sure it’s specifically made for outdoor use, as artificial plants designed for indoors may fade and lose their color when exposed to the elements.

No. 3

Consider the Privacy Breaches

Before turning your backyard into a cozy fortress, make sure you have a clear vision of where you want to sit, hang out, and truly relax. It’s pointless and counterproductive to cover every inch in trees if you only have a single breach on one side that detracts from the overall space. Take a moment to truly think about the most overlooked part of your backyard, as it may hold untapped potential just waiting to be discovered and transformed into your personal oasis.

Blocking the view in such places will provide you with significantly more privacy and seclusion. At the end of the day, it's truly all about effective zoning. Consider screening areas that are more exposed to public view, as well as those specific areas where you plan to sit and relax more frequently. This thoughtful approach will help create a more personal and serene environment.

For example, placing a seating area close to your house will give you at least one side of privacy, making it easier to protect it with just a pergola or canopy. The bottom line is that effective planning is essential for creating functional spaces.


hellolovelyliving-home-outdoor-curtains-patio-backyard-design-decor

The Hues

Transform your outdoor space with weather-resistant accessories designed to withstand the elements while adding style and comfort—ensuring your patio, garden, or balcony looks fabulous all year round.


No. 4

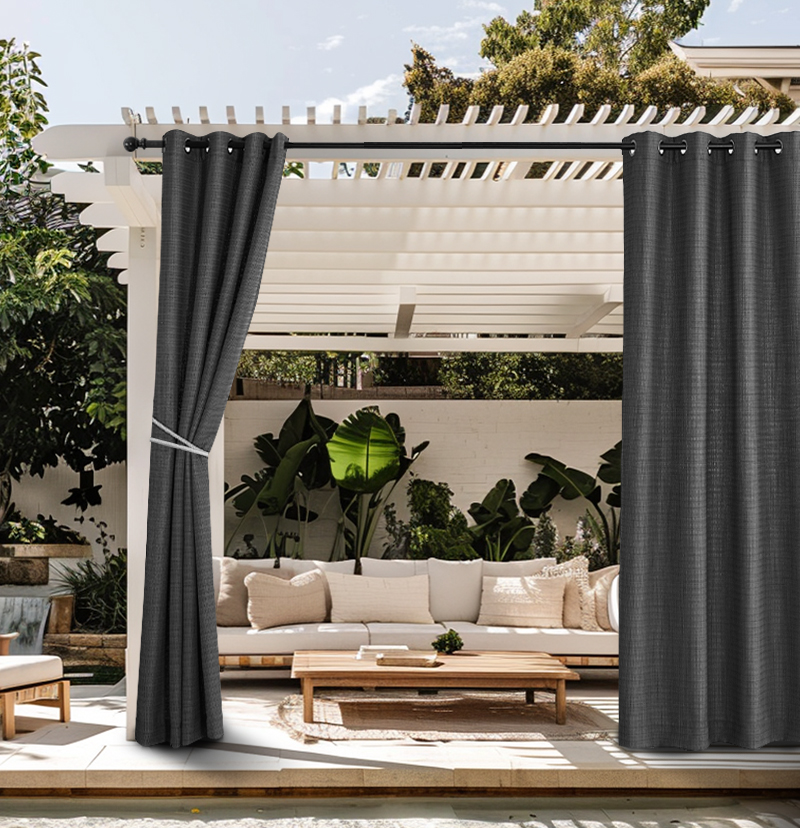
Install Outdoor Curtains

Outdoor curtains are a wonderful and stylish option to significantly enhance the elegance and privacy of your backyard space. They offer a soft and inviting aesthetic that can transform any outdoor area into a cozy retreat. Additionally, curtains are incredibly flexible and much easier to set up compared to many other options in this list.

With minimal effort, you can create a delightful ambiance that caters to your taste. Just remember to clean curtains regularly to maintain their charm, and ensure that you secure them during windy days to keep them looking their absolute best.

For some added flair, pick vibrant colors or fun patterns that match your outdoor decor. Decorative curtain rods and tiebacks can make your space look even more stylish. This way, you create a cozy, private haven perfect for relaxing and entertaining.

No. 5

Stone Retaining Walls Add Style

If walls for your outdoor space are your desired look but you wish to avoid the appearance of your backyard looking like an imposing fortress, certainly you can always choose to cover those walls with a variety of plants, whether it be natural greenery or artificial options. However, at the same time, you can also embrace a completely different aesthetic by incorporating beautifully crafted stone retaining walls, which can add elegance and character to your landscape.

If you like the idea of a natural and organic look, incorporating natural stones into your landscaping can be a fantastic choice. Not only do they provide a sense of privacy, but they also enhance the overall aesthetic appeal of your space. Natural stones can work wonders in both modern and traditional backyards, seamlessly blending with various design styles.

Additionally, you have the creative freedom to arrange them on different levels, allowing you to achieve the perfect balance of privacy and visual interest that you desire in your outdoor oasis. By choosing the right type of stone and design, you can create an outdoor space that meets your privacy needs. Flagstones and fieldstones are quite popular in this trend. 

Takeaways

Creating a beautiful and private backyard oasis can be an exciting endeavor. It requires thoughtful planning and the right solutions tailored to your personal preferences. By using these helpful tips, you can enjoy a tranquil and secluded space without losing the refreshing open feel of your yard.

However, before diving right in, take a moment to truly consider what you need and what you genuinely like. This reflective process will help you pick the best solutions that align perfectly with your unique lifestyle and vision for your outdoor sanctuary.

Looking For Home Resources?

Looking to enhance your living space and create a sanctuary that supports your well-being? Explore our home partners who offer a wide range of resources to elevate your home environment.


homeHLL x Editor


Why You Need Garage Door Motor Repair Services

Picture this: it's a Monday morning, and you're already running late for work. You rush to the garage, hit the button to open the door, and...nothing. The door doesn't budge. Frustration hits when you find out your garage door motor is broken.


Sound familiar? This kind of scenario is all too common for homeowners, and it's just one reason why you need garage door motor repair services as soon as possible.

In this article, we take a closer look and break down the most common telltale signs that indicate you need to consider garage door motor repair services. Understanding these signs can help you address issues promptly and maintain the smooth operation of your garage door system.

No. 1

What is a Garage Door Motor?

A garage door motor is the heart of your garage door system. It's the component responsible for the smooth operation of opening and closing the door. Think of it as the engine of your car—without it, you’re going nowhere! A malfunctioning motor can disrupt your entire day and pose significant safety risks.

No. 2

Why Do Garage Door Motors Fail?

Like any mechanical device, garage door motors are susceptible to wear and tear. Over time, components like gears, opener chains, and belts can deteriorate. Factors such as age, usage frequency, and even weather conditions can impact the motor's performance. Regular maintenance can help, but eventually, garage door motor repairs will be unavoidable.

No. 3

The Danger of Delaying Repairs

Ignoring a faulty garage door motor is like ignoring a check engine light. Sure, you might get by for a while, but eventually, things will go south.

Here’s why delaying repairs can be risky:

  • Safety Hazards: A malfunctioning garage door can become a safety hazard, potentially injuring someone or damaging vehicles.

  • Security Risks: Your garage is an entry point to your home. A compromised garage door can make your home vulnerable to break-ins.

  • Higher Costs: The longer you wait, the worse the problem can become, leading to more extensive and costly repairs.


hellolovelyliving-home-garage-door-opener

Lowe’s

Transform your garage with Lowe's—Discover a wide selection of stylish and reliable garage doors and openers to enhance your home's curb appeal and security.


No. 4

Signs Your Garage Door Motor Needs Repair

Not sure if your garage door motor is experiencing issues or facing potential trouble?

Here are some telltale signs to watch out for:

  • Unusual Noises: Grinding, squeaking, or other strange sounds can indicate a problem.

  • Slow Response: If your door takes longer than usual to open or close, it might be time for a check-up.

  • Intermittent Operation: A door that works only sometimes is a clear sign of motor issues.

No. 5

DIY vs. Professional Repair

While fixing things yourself can be rewarding, garage door motor repair is one task best left to the professionals.

Here's why you should seek professional repair:

  • Complexity: Garage door systems are complex, with numerous interconnected components.

  • Safety: Mishandling the repair can result in injury, especially with the door’s heavy weight and tension springs.

  • Tools and Expertise: Professionals have the necessary tools and expertise to diagnose and fix the issue correctly.

No. 6

Benefits of Hiring Professional Repair Services

Opting for professional repair services offers numerous benefits that go beyond just fixing the immediate issue.

Here are some of the benefits:

Expertise and Experience

Professional technicians bring a wealth of expertise and experience. They can quickly identify the root cause of the problem and implement effective solutions. Their knowledge ensures that the repair is done right the first time, saving you from further headaches.

Time and Convenience

Let's face it; life is busy enough without adding garage door repairs to the mix. Hiring professionals frees up your time, allowing you to focus on more important tasks. Plus, they can often complete the repair more quickly than a DIY approach.


Warranty and Peace of Mind

Many professional repair services offer warranties on their work. This means that if something goes wrong after the repair, you’re covered. Having that peace of mind is priceless, especially when it comes to home maintenance.

No. 7

How to Choose the Right Repair Service

Selecting the right repair service is incredibly crucial for ensuring that the job is completed to a high standard and meets your expectations.

Here are some tips to help you make the best choice:

Check Reviews and Reputation

Look for repair services with positive reviews and a solid reputation in your community. Online reviews and word-of-mouth recommendations can provide valuable insights into the quality of service you can expect.

Verify Credentials

Ensure the repair service is licensed, insured, and certified. This protects you in case of accidents or damage during the repair process. It also signifies that the technicians have undergone proper training.

Ask About Pricing

While cost shouldn’t be the only factor, it’s essential to understand the pricing structure. Get quotes from multiple services to compare, but be wary of prices that seem too good to be true. Quality work often comes at a fair price.

No. 8

Preventive Maintenance Tips

Regular maintenance can extend the life of your garage door motor and prevent future problems.

Here are some preventative maintenance tips:

  • Lubricate Moving Parts: Regularly lubricate the chain, hinges, and rollers to reduce friction and wear.

  • Inspect and Tighten Hardware: Periodically check for loose bolts and screws and tighten them as needed.

  • Test the Balance: Disconnect the opener and manually lift the door halfway. If it stays in place, the balance is good. If not, it may require adjustment.

No. 9

Common Myths About Garage Door Motors

There are several misconceptions about garage door motors that can lead to improper care and maintenance.

Let's debunk a few:

Myth 1: Motors Don't Need Regular Maintenance

Contrary to popular belief, garage door motors do require regular maintenance. Neglecting maintenance can lead to premature failure and costly repairs.

Myth 2: All Garage Door Motors Are the Same

Not all garage door motors are created equal. Different types of motors have varying lifespans, capabilities, and maintenance needs. Understanding your specific motor type is crucial for proper care.

Myth 3: DIY Repairs Are Always Cheaper

While DIY repairs might save money upfront, they can lead to mistakes and further damage, costing you more in the long run. Professional repairs ensure the job is done correctly and safely.

No. 10

The Environmental Impact of Garage Door Motors

Did you know that your garage door motor’s efficiency can impact your energy consumption? Modern, energy-efficient motors consume less power, reducing your carbon footprint. Investing in a high-efficiency motor can save you money on energy bills and contribute to environmental conservation.

Energy-Efficient Models

Look for garage door motors with energy-efficient ratings. These models often have features like standby mode to conserve power when not in use.

Recycling Old Motors

If you’re replacing an old motor, consider recycling it. Many components can be reused or recycled, reducing waste and benefiting the environment.

Takeaways

A well-functioning garage door motor is essential for the safety, security, and convenience of your home. Ignoring motor issues can lead to serious problems, making timely repairs crucial. By hiring professional repair services, you ensure the job is done correctly, saving you time, money, and stress.

Regular maintenance can extend the life of your garage door motor and prevent future issues. Don’t wait until you’re stuck with a non-functional door on a busy morning—take action today!

If you’re experiencing issues with your garage door motor or want to schedule a maintenance check, reach out to a reputable professional service in your area. Your garage door will thank you, and you will avoid headaches down the road!

Looking For Home Resources?

Looking to enhance your living space and create a sanctuary that supports your well-being? Explore our home partners who offer a wide range of resources to elevate your home environment.


homeHLL x Editor


7 Stunning Bathroom Renovation Ideas To Transform Your Space

A bathroom can be more than just a functional space. With the right design, it can become a sanctuary, a reflection of your personal style, or even a bold design statement. Thinking of hiring a pro to elevate your bathroom? In this article, we share seven stylish renovation ideas that will turn your bathroom into something truly special.


No. 1

Spa-Luxury Retreat

Ever wished your bathroom felt more like a high-end spa? The spa-luxury style is perfect if you want to create a calming, retreat-like atmosphere. Imagine soft lighting, natural stone tiles, and elegant fixtures that ooze tranquillity. Many people are going for this vibe when it comes to bathroom renovations Newcastle today! After all, we all deserve a bit of luxury.

One of the key features of this style is the use of earthy tones like soft greys, beige, and white. Complement these colors with natural elements like wooden accents or bamboo accessories.

Consider adding a freestanding bathtub, rain shower, or even a steam shower for that true luxury spa experience. Finish off with soft, fluffy towels and plants that thrive in humidity, such as ferns or orchids, to give your space that serene, nature-inspired vibe.

No. 2

Bold Colours and Statement Walls

If neutral tones aren’t your thing, bold colors could be the perfect way to inject some personality into your bathroom. This style is all about making a statement, whether through a dramatic color palette or an eye-catching feature wall.

Think deep navy, emerald green, or even black. These colors can add depth and sophistication to your bathroom when paired with metallic fixtures in gold or matte black.

A feature wall with bold, patterned tiles or wallpaper can also be a fantastic way to draw attention and create a striking focal point. Just make sure you balance the intensity with neutral tones elsewhere to avoid overwhelming the space.

No. 3

Minimalist Elegance

For those who prefer a clean, uncluttered look, minimalist elegance might be the way to go. This style is all about simplicity, using sleek lines and a neutral colour palette to create a sense of calm and order.

Opt for modern fixtures with clean, angular designs, and consider a floating vanity to give the illusion of more space. White, grey, and soft beige are the go-to colours here, complemented by materials like marble, glass, and brushed metal.

The key to nailing this look is in the details: streamlined storage solutions, frameless mirrors, and hidden lighting can all add to the minimalist feel without making the space feel cold.


hellolovelyliving-home-bathroom-hardware-upgrade-design-decor

Rejuvenation

Rejuvenation believes in the power of thoughtful design - explore their extensive range of home decor, including stylish accessories and hardware that add character and charm to your home


No. 4

Vintage Chic

Vintage style has been making a huge comeback, and it’s easy to see why. There’s something timeless about the charm of a vintage bathroom, whether it’s through the use of clawfoot bathtubs, pedestal sinks, or retro tiles. This style allows you to blend modern functionality with classic design elements.

Go for pastel colors like soft pinks, mint greens, or baby blues. Add vintage-style fixtures in polished chrome or brass for that authentic feel. Don’t forget about the little details, either—vintage-inspired mirrors, lighting fixtures, and patterned floor tiles can add the perfect finishing touches to complete the look.

No. 5

Scandinavian Simplicity

The Scandinavian style is perfect if you’re aiming for a cozy yet practical bathroom. Known for its emphasis on functionality and simplicity, Scandinavian design focuses on bright spaces, natural light, and organic materials.

White and light greys dominate the color scheme, with wooden accents to bring warmth to the room. Opt for sleek, modern fixtures, and keep things minimal with clean lines and uncluttered surfaces.

Incorporating elements like soft textiles (think cozy bath mats or plush towels), woven baskets, and houseplants can give your bathroom that signature Scandinavian hygge vibe, making it the ultimate cozy retreat.

No. 6

Industrial Edge

The industrial style is great for those who love raw, unfinished elements with a modern twist. It’s a look that works especially well in loft-style homes or urban spaces, but with the right touch, it can also fit beautifully into any modern home.

This style thrives on exposed materials—think concrete floors, brick walls, or even pipes left on display. Pair these rough elements with sleek metal fixtures in matte black or brushed steel to give the space a balanced look.

Concrete sinks or tubs can add to the industrial vibe, while Edison bulb lighting fixtures and metal shelving complete the look.

No. 7

Coastal Calm

Love the idea of bringing a seaside vibe into your home? The coastal calm style is perfect for creating a bathroom that feels like a breezy, relaxing getaway. It’s all about soft, beach-inspired colors like white, soft blues, and sandy neutrals.

To achieve this look, focus on materials that mimic the natural environment. Think weathered wood, wicker baskets, and textured towels. Add subtle nautical touches like rope mirrors or shell accents without going overboard (pun intended).

The goal here is to create a light, airy space that feels as relaxing as a day by the beach. Coastal calm is all about balance and creating an easygoing, refreshing atmosphere.

takeaways

Each of these bathroom renovation styles offers a unique way to transform your space, whether you’re after a calming retreat, a bold statement, or something in between. When hiring a professional, make sure to communicate your vision clearly. They can help bring your dream bathroom to life, tailored exactly to your taste.

Looking for Home Resources?

Looking to enhance your living space and create a sanctuary that supports your well-being? Explore our home partners who offer a wide range of resources to elevate your home environment.


homeHLL x Editor


Are You A Collector Or A Hoarder?

Collectors and hoarders both have a penchant for collecting stuff. However, they are not the same thing. Whereas collecting can be a healthy hobby, hoarding is categorized as a form of OCD


Many hoarders consider themselves collectors until things get out of hand and their condition becomes obvious. By this point, it can become difficult to tackle the problem alone, and professional outside help is often needed. Of course, it’s possible for a hoarder to become a collector and change their ways, however, this requires understanding the differences and making necessary changes.

To determine whether you are a collector or a hoarder, it could be worth asking yourself the questions in this article. They will give you a good idea as to how healthy your obsession with collecting is and whether you need to make adjustments. 

No. 1

Is your collection compulsive or curated?

A collector is fussy as to what items they collect and will often spend time hunting for specific items. Items are typically rare, valuable, or part of a set such as antique and vintage items, stamps, DVDs, vinyl, or sports memorabilia. Although they may still spontaneously buy items that they’ve stumbled upon, such purchases are usually items that they were planning on acquiring anyway.

A hoarder is more likely to buy items compulsively without having a goal or parameters. They may alternate between collecting various different things. The items they choose to collect may also not be of any value and may include mundane things like receipts, food cans, and shopping bags.

No. 2

Are your items organized?

A collector keeps their items carefully organized so that they know where to find each item and can easily retrieve it. They make an effort to keep each item in good condition by storing items in a certain way and cleaning them if necessary.

A hoarder is more likely to stack items willy-nilly or throw them in a pile. This can result in items getting lost—in some cases, a hoarder may buy the same item twice because they can’t find the one they already own. Items are generally not kept in good condition and no effort is made to maintain them. Items may even start to attract cobwebs, decay, get crushed, or get infested with pests in extreme cases. 

No. 3

Are you happy to show guests your collection?

A collector is proud of their collection. They may organize their collection in a way so that guests can marvel at it. In this modern era, many collectors have taken to social media or run blogs in which they show off their collection, networking with other collectors. Others may be more private but are still not embarrassed to show a fellow enthusiast if they meet one.

A hoarder is often more embarrassed about showing people their collection because it is not organized. They may tell people they collect certain items, but not be willing to show them. In fact, many serious hoarders don’t let anyone visit their home because they are aware of how messy it is and are ashamed. 


hellolovelyliving-home-lifestyle-storage-organizing-solutions-collections

The Container Store

Your ultimate destination for innovative storage and organization solutions for home or office—offering everything from stylish bins and shelves to custom closet systems


No. 4

Has everyday living become impaired?

A collection usually does not get in the way of everyday living. While some collectors may dedicate an entire room as a collectible library, it is not a room that they otherwise need and there is room to walk around it. If a collector needs extra space for their collection, they will usually look into storage units or move into a larger home. However, they will generally still have limits; they won’t let a collection overspill into other rooms where space is needed or put themselves into financial trouble to afford extra space. 

Hoarders generally collect stuff until it starts to make rooms inaccessible or becomes dangerous. Getting around the house can become difficult and surfaces like desks and tables may become unusable. In some serious cases, everyday tasks like cooking and bathing may become impossible.

Takeaways

In many cases, there are clear differences between being a collector and a hoarder. However, it is possible to ride the fine line between the two. If this is the case, it’s important to take steps to transition towards collecting, which could involve getting rid of some items, organizing your collection, carefully selecting new items and making sure that everyday life is not affected.

If you think you’ve already transitioned into a full-blown hoarder, understand that there is help out there. This includes therapists that specialize in hoarding and professional decluttering companies that can reduce and organize your hoard.

Looking for Home Resources?

Looking to enhance your living space and create a sanctuary that supports your well-being? Explore our home partners who offer a wide range of resources to elevate your home environment.



lifestyle, homeHLL x Editor


How Does Art Influence The Atmosphere Of A Room?

Never underestimate the transformative impact that art can have on the overall atmosphere of a room. Art significantly alters the ambiance within a space, affecting emotions and perceptions.


By thoughtfully selecting art pieces, you can dramatically transform an otherwise mundane room into a truly inspiring sanctuary that not only reflects your unique personal style but also deeply comforts the soul. In this article, we explore in depth how various forms of art possess the remarkable power to influence, enhance, and elevate the ambiance of any space within your home or workplace.

No. 1

The Emotional Impact of Art in Interior Spaces

You step into a room and immediately sense its mood. Art on the walls can evoke a strong emotional response, making the atmosphere feel uplifting, calming, or even exhilarating. Strategically chosen pieces can turn an otherwise neutral space into a dynamic environment brimming with personality.

The symmetry or chaos depicted in art can influence how organized or free you feel in the space. The emotional landscape curated by your artwork can motivate you, spark creativity, or provide a soothing backdrop for relaxation.

You may find that interacting with certain art pieces helps reduce stress and increase happiness, making your living space more enjoyable. Art's emotional resonance can transform a simple room into your personal retreat.

Careful selection of art ensures the emotional tone of your interior aligns with your desired atmosphere. Embrace the power of visual expression to craft an environment that speaks to your soul and radiates positive energy.


No. 2

Choosing the Right Artwork for Different Spaces

Choosing the right artwork for different spaces involves understanding the unique atmospheres each room requires. For instance, vibrant and energetic pieces are perfect for living rooms, while serene, nature-inspired art may be better suited for bedrooms or offices.

Matching your selections with the functional needs and aesthetic goals of each space is essential to cultivate harmony and visual appeal.


No. 3

Living Room

The Social Hub

Art sets a dynamic tone—stimulating interactions—an essential aspect of your living room's atmosphere.

Your living room thrives with the energy of chosen art, contributing significantly to its vibrancy and social dynamics. Opt for bold, colorful pieces that embody the collective energy of the space.

Art has the power to reflect and shape the character of your living room. By choosing pieces that inspire and invigorate, you effortlessly turn your space into the ultimate social hub.


hellolovelyliving-home-art-decor-minted

Minted

Discover the perfect blend of artistry and quality with Minted - the online marketplace showcasing a diverse collection of unique art from independent artists around the world.


No. 4

Bedroom

Creating a Personal Sanctuary

Your bedroom is your escape from the world, and art's impact on the room's atmosphere is undeniable.

Opt for pieces that evoke calmness, aiding you in unwinding after a long day. Consider nature scenes or abstract art with soothing colors, offering a sense of tranquility and refreshment. These choices not only enhance your room's aesthetic but also promote restful sleep and rejuvenation.

Additionally, thoughtful placement of art can serve as focal points that draw your eyes to peaceful imagery, helping reduce stress. Embrace the art that personally resonates with you. Envelop yourself in a sanctuary that is truly yours.

No. 5

Office or Study

Fostering Productivity

To stimulate your mind and spirit, consider selecting artwork that inspires, such as pieces with motivational quotes or vibrant abstract designs that energize the space. 

The colors in your artwork also play a crucial role in setting the tone. Opt for calming hues like blues and greens, which help foster a focused and serene environment, making it easier to concentrate on tasks. Incorporating art that depicts nature can further reduce stress and improve concentration, bringing a sense of peace into your workspace. 

Additionally, choosing artwork with personal significance can provide an extra layer of motivation, keeping you driven and focused on your goals. By aligning the artwork with your work objectives, you create a balance of ambition and calmness. 

No. 6

Business

Branding and Identity

Incorporating art in a business setting can significantly enhance ambiance and mood, fostering a more inviting and inspiring atmosphere for employees, clients, and customers. Thoughtfully selected artworks can reflect a company's values and culture, instilling a sense of identity and purpose within the work environment.

Vibrant colors and dynamic compositions can stimulate creativity and collaboration among staff, while calming pieces may help reduce stress and promote focus. Color can also serve to significantly reinforce branding by evoking and eliciting corresponding emotions that resonate deeply with the target audience. The choice of color can influence perceptions and create a lasting impression, ultimately shaping the overall identity of a brand in the minds of consumers.

Furthermore, art can serve as a conversation starter, encouraging connections—ultimately leading to increased engagement and community. By creating a visually appealing space, businesses can cultivate an environment that aligns with their mission and inspires those who inhabit it.

No. 7

The Role of Texture and Medium in Creating Ambiance

Texture's tactile appeal transforms a space, adding an essential layer of sensory experience. Selecting artworks with varied textures, such as a rough canvas or sleek metal, profoundly influences the ambiance. Moreover, the choice of medium, whether it's a delicate watercolor or a bold oil painting, contributes depth and dimension, elevating the room's atmosphere to new heights.

The Timeless Appeal of Oil Paintings

Have you ever observed the profound impact that oil paintings have on the atmosphere of any room? In recent years, a comprehensive, peer-reviewed academic study illuminated how traditional oil paintings evoke timeless elegance, enveloping spaces with rich textures and vibrant hues.

It's no surprise, then, that these classical artworks continue to dominate galleries and private collections, effortlessly transforming the ambiance of a room with their intricate detailing and deep, luscious tones.

Whether adorning the walls of a modern loft, bringing warmth to a suburban home, or gracing the halls of the finest museums, oil paintings imbue character, sophistication, and an unparalleled sense of history. The legacy of oil paintings endures, making them a coveted addition for those seeking to elevate their interior design.

No. 8

Combining Art with Lighting for Maximum Effect

Strategically pairing art with the right lighting can transform the entire atmosphere of a room, enhancing both the visual and emotional experience. 

Here’s how you can combine art with lighting for maximum effect:

  • Strategic Lighting: An artwork under carefully placed lighting in a contemporary setting showcases each exquisite detail, highlighting the textures and colors that are often lost in standard lighting.

  • Emotional Ambiance: Thoughtful lighting not only elevates the visual appeal but also enhances the emotional atmosphere, evoking feelings of warmth or excitement.

  • Natural Lighting: Utilizing natural light adds a dynamic dimension to art displays, as the shifting light throughout the day breathes life into the art pieces.

  • The interplay of Light and Art: The interaction between natural light and artwork introduces a sense of fluidity and vitality, changing the room’s atmosphere as daylight transitions.

  • Symbiotic Relationship: Mastering the balance between art and lighting is crucial for maximizing their combined effect, accentuating the qualities of each.

  • Curated Beauty: When done well, this combination turns any room into a sanctuary of curated beauty and inspiration, capturing the perfect intersection of art and illumination.

No. 9

Reflecting Personal Taste and Personality Through Art

Art is a profound expression of individuality, allowing your personality to shine through your living spaces. 

Here’s how you can reflect your personal taste and personality through art:

  • Personal Reflection: Choose art that showcases your personal tastes, passions, and interests, creating an environment that feels uniquely yours.

  • Visual Autobiography: Each piece serves as a visual narrative, telling your story to anyone who steps into the room.

  • Emotional Connection: Strategically place art to evoke memories, stimulate conversation, and deepen your connection to the space.

  • Identity Through Art: Curate pieces that resonate with you, turning your surroundings into a haven that mirrors your identity.

  • Exploration of Styles: Embrace various styles and mediums that speak to your soul, adding a unique and personal touch to your home.

  • Inspiration and Motivation: Your chosen artworks not only enhance the room's atmosphere but also inspire and motivate those who experience the space.

Takeaways

Art plays a transformative role in shaping the atmosphere of a room, impacting both its aesthetic appeal and emotional resonance. The careful selection of artwork, tailored to the mood and function of each space, allows you to create environments that inspire, calm, and reflect your personal identity. 

Whether through texture, color, or placement, art adds depth and personality to a room, turning any space into a unique expression of style and comfort. By integrating art thoughtfully, you enhance the overall experience within your home, office, or business.

Looking For Home Resources?

Looking to enhance your living space and create a sanctuary that supports your well-being? Explore our home partners who offer a wide range of resources to elevate your home environment.


home, businessHLL x Editor


5 Easy Steps To Protect Outdoor Furniture From Harsh Weather

Outdoor furniture is a fantastic addition to any home, allowing you to enjoy your outdoor space in comfort. But, have you ever thought about how the weather might be affecting it? Whether it’s rain, heat, or wind, your furniture can take quite a beating if it’s left exposed.


So, how do you keep your outdoor furniture looking its best for years to come? In this article, we share five easy steps to ensure your furniture survives the elements and stays in top shape!

No. 1

Furniture Covers

Your First Line of Defence

One of the simplest and most effective ways to protect your outdoor furniture is by using covers. Outdoor furniture covers are specifically designed to shield against rain, UV rays, dust, and debris.

Why leave your furniture exposed when you can easily cover it up? These covers are usually waterproof, helping prevent water damage, mold, and rust. Plus, they’re a great barrier against the harsh sun, which can fade colors and weaken materials over time. When you’re not using your furniture, simply pop on the cover, and you’re good to go. Easy, right?

If you're not already using them, investing in high-quality covers from the likes of The Cover Company NZ will give you peace of mind, knowing your outdoor setup is protected even during the most intense weather. You can find covers in different sizes to match various types of furniture, whether it's chairs, tables, or sofas. Make sure they fit snugly and are secured properly, so they don’t blow away when the wind picks up!

No. 2

Store Furniture During Extreme Weather

Sometimes, the best protection for outdoor furniture is simply moving it out of harm’s way. While covers do a good job, extreme weather like hail, storms, or high winds can still pose a threat.

Do you have a garage, shed, or covered patio? If so, consider moving your outdoor pieces there when you know bad weather is coming. This is especially important for lightweight items that could easily be swept away or damaged by strong winds.

For heavier items like larger tables or benches, you could opt to place them under a sturdy pergola or in a covered area, reducing their direct exposure, and diy 5 degree pergola brackets can be used for that. Even if you don’t have the luxury of indoor storage, keeping them under some kind of shelter can make a huge difference.

No. 3

Apply a Weather-Proof Sealant

Furniture covers and proper storage are great, but what if you want to go the extra mile? Adding a weather-proof sealant can provide additional protection, especially for wooden or metal furniture.

Wooden furniture, in particular, can suffer from cracking, splitting, and swelling when exposed to fluctuating weather. A good outdoor sealant acts as a barrier, preventing water from penetrating and reducing the risk of damage. It also helps to maintain the natural color and beauty of the wood.

Metal furniture, especially wrought iron, is susceptible to rust, which can weaken the structure and ruin its appearance. By applying a sealant, you can help prevent corrosion and prolong the life of your furniture.

How often should you apply the sealant? Ideally, once a year should do the trick, depending on the type of furniture and the climate where you live. It’s an extra step, but one that will save you time and money in the long run!


hellolovelyliving-home-outdoor-furniture-decor-curtains-pergola

The Hues

Transform your outdoor space with weather-resistant accessories designed to withstand the elements while adding style and comfort—ensuring your patio, garden, or balcony looks fabulous all year round.


No. 4

Regular Cleaning and Maintenance

It might seem obvious, but regular cleaning can go a long way in preserving your outdoor furniture. Dirt, grime, and mildew can build up, especially after rain or a storm. These can cause your furniture to deteriorate faster if left unchecked.

For metal and plastic furniture, a simple mix of mild soap and water can do wonders. Wipe it down with a soft cloth, making sure to get into all the nooks and crannies. For wood, use a cleaner that’s specifically designed for the type of wood you have.

Is your fabric furniture starting to show signs of wear? Give it a proper clean with fabric-friendly solutions and let it air dry completely before using or covering it up again.

By keeping your outdoor furniture clean, you’re not only making it look better, but you’re also removing harmful substances that could shorten its lifespan. It’s an easy habit to form, and it doesn’t take much time!

No. 5

Use Outdoor-Friendly Materials

If you’re still in the process of purchasing outdoor furniture or thinking about upgrading your current setup, opt for weather-resistant materials. Choosing the right materials in the first place can save you a lot of trouble later on.

Look for furniture made from materials like teak, aluminum, or high-quality synthetic wicker. These are known to withstand the elements better than more delicate options like untreated wood or lower-grade metals.

Teak, for example, is a type of wood that naturally resists water and doesn’t warp easily. Aluminium is lightweight but durable, and won’t rust like iron or steel. Synthetic wicker is another good option, as it looks great and is built to handle exposure to both rain and sun.

Choosing outdoor-friendly materials gives you a head start when it comes to protecting your investment. And don’t forget, even the best materials still benefit from covers, cleaning, and sealants.

Takeaways

Protecting your outdoor furniture doesn’t have to be complicated or expensive. With just a few simple steps, you can make sure your furniture stays in great condition, rain or shine. From using covers and storing items during bad weather to applying a weather-proof sealant and choosing the right materials, you’re well on your way to ensuring your outdoor space stays stylish and functional.

Looking For Home Resources?

Looking to enhance your living space and create a sanctuary that supports your well-being? Explore our home partners who offer a wide range of resources to elevate your home environment.


homeHLL x Editor


Cordless Leaf Blowers: Lightweight, Quiet, And Powerful Options

Looking for a tool to make garden work less of a hassle? Cordless leaf blowers might just be what you need. They’ve become a favorite for those wanting efficiency without the hassle of power cords or the noise of petrol models. But with so many options out there, which one should you choose?


In this guide, we cover everything you need to know about cordless leaf blowers, from their benefits to some top considerations when choosing one. If you’re tired of dealing with cumbersome garden tools and want something practical yet powerful, read on for some helpful tips.

No. 1

Why Choose a Cordless Leaf Blower?

So, why are more people opting for cordless over traditional leaf blowers? Well, there are a few standout reasons.

  • Freedom of Movement – One of the biggest benefits of a cordless leaf blower is the lack of a power cord. No more being tethered to an outlet or worrying about extension leads. You can move freely around your garden without limitations.

  • Lightweight Design – Forget heavy, back-straining equipment. Most cordless models are designed to be light, making them easy to carry and use for extended periods.

  • Quiet Operation – Let’s face it, no one loves the deafening roar of a petrol blower. Cordless models tend to be much quieter, so you won’t be disturbing your neighbors (or your peace).

  • Eco-friendly – With no emissions from petrol, cordless leaf blowers are far better for the environment. Plus, you won’t need to worry about storing and handling fuel.

  • Powerful Performance – Don’t be fooled by their size. Today’s cordless leaf blowers pack quite the punch, offering power that can rival even some of the more traditional models.

No. 2

Important Features to Look For

When choosing a cordless leaf blower, it’s essential to know what features matter.

Here are the key factors that will help you decide on the right one:

Battery Life

This is probably one of the most critical factors. The last thing you want is for your blower to run out of juice halfway through a job. Check the runtime on the cordless leaf blower you’re considering and think about how large your garden is. Bigger areas will require a longer battery life, so aim for a model that offers at least 30 minutes of continuous use per charge.

Charging Time

It’s not just about how long the battery lasts, but also how quickly it can be recharged. Some cordless leaf blowers come with fast-charging batteries, but others might take a few hours. If you want to tackle your garden work in one go, it’s worth finding a model with a faster charging option.

Power and Airspeed

Just because a blower is cordless doesn’t mean it should lack power. Look for models that offer good airspeed and air volume, typically measured in miles per hour (mph) and cubic feet per minute (CFM). Higher numbers mean more powerful leaf-clearing ability. You’ll want something with at least 100 mph airspeed for most average-sized gardens.

Weight

One of the main reasons to go cordless is ease of use, so make sure the model you choose is light enough to comfortably handle. Most cordless blowers weigh between 2 to 4 kilograms. If you’re looking for something even lighter, compact models designed for smaller jobs can weigh less than 2 kg.

Noise Levels

A big reason people choose cordless is for a quieter experience. Check the decibel levels listed on the product specifications. Ideally, you want something around 60-70 dB, which is significantly quieter than a typical petrol blower.

Versatility

Some cordless leaf blowers come with added functions, such as the ability to convert into a vacuum or mulcher. If you want more from your blower than just clearing leaves, it might be worth looking into a 2-in-1 or 3-in-1 model.

No. 3

The Best Uses for Cordless Leaf Blowers

Cordless leaf blowers are incredibly versatile, making them suitable for various tasks beyond just clearing fallen leaves.

Here’s where they can really shine:

  • Clearing Leaves and Debris from Lawns and Driveways – This is the primary function, of course, but their lightweight design means you can easily move around large spaces without getting worn out.

  • Tidying Patios and Outdoor Furniture – Blow away dirt and dust from hard-to-reach corners, or give your outdoor furniture a quick clean-up before guests arrive.

  • Cleaning Gutters – Some models come with attachments designed specifically for clearing out gutters, making it safer and easier to keep them free from debris.

  • Drying Vehicles – After washing your car, a cordless blower can help dry it off quickly and efficiently, saving you time and effort.


hellolovelyliving-home-garden-outdoor-living-yard-patio

Terrain

Indoor and outdoor living, garden, and entertaining essentials that are well-designed, lasting, and beautiful


No. 4

Maintenance Tips to Keep Your Blower in Top Condition

To ensure your cordless leaf blower stays in great working order, a little bit of regular maintenance is essential.

Here are a few tips to keep it running smoothly:

  • Clean the Air Intake – Dust and debris can clog up the air intake, reducing the blower's efficiency. Regularly clean this area to keep air flowing freely.

  • Check the Battery – Over time, batteries can degrade. If you notice your blower isn't holding a charge as long as it used to, it might be time for a replacement.

  • Store Properly – When not in use, store your blower in a dry place, preferably indoors. Avoid leaving it outside or in damp areas where moisture can damage the electronics.

  • Inspect the Fan – The fan inside the blower can sometimes get blocked with leaves or small twigs. Make sure to inspect and clean this part regularly to prevent it from becoming jammed.

  • Keep the Nozzles Clear – If your blower has interchangeable nozzles, make sure they're always clean and free of obstructions.

Takeaways

So, are you ready to upgrade to a cordless leaf blower for all your outdoor clean-up needs? If you truly value convenience, enhanced mobility, and quieter operation in your gardening tools, then the answer is probably a resounding “yes.” With a wide range of powerful options available on the market today, you’ll discover that even without the hassle of a cord or the need for petrol, these innovative blowers can efficiently handle just about anything you throw at them, making yard work easier and more enjoyable than ever before.

Looking For Home Resources?

Looking to enhance your living space and create a sanctuary that supports your well-being? Explore our home partners who offer a wide range of resources to elevate your home environment.


homeHLL x Editor


Drain Cleaning: Why It's Essential For A Healthy Home

When was the last time you thought about your drains? It’s not exactly something that makes it onto most people’s to-do lists, right? But if you’re like many homeowners, you’ve probably dealt with a slow or clogged drain at least once.


A blocked sink or shower can quickly turn into a much bigger problem, which is why regular drain cleaning is one of the most essential maintenance tasks for any home. In this article, we explore the numerous benefits of drain cleaning and explain why it is essential for maintaining the health and functionality of your home.

No. 1

Preventing Clogs and Slow Drains

We’ve all been there: standing in a few inches of water while taking a shower or watching the water pool up in the sink as you brush your teeth. Slow drains are often the first sign of a clog forming. Hair, soap scum, grease, and food particles slowly build up over time, narrowing the pipes and causing water to drain more slowly.

Regular drain cleaning keeps those clogs from happening in the first place. Instead of waiting for a full blockage that could result in a plumbing emergency, cleaning your drains as part of your home’s regular maintenance can ensure water flows freely down the pipes.

By addressing the issue promptly, you’re essentially stopping the problem before it has a chance to escalate into something larger and more complicated, thereby saving yourself considerable time, unwanted stress, and potentially avoiding a costly and inconvenient call to a plumber in the future.

No. 2

Avoiding Foul Odors

One of the less obvious (but equally important) reasons to keep your drains clean is to prevent bad smells from taking over your home. Think about all the stuff that goes down the drain—food, grease, hair, soap residue—it can all lead to bacteria build-up. This build-up then produces foul odors that can start creeping into your home through the drains.

If your kitchen starts to smell like last week’s leftovers, no matter how much cleaning you do, it’s time to check those drains. A thorough cleaning can eliminate the odor at the source, leaving your home smelling fresh.

No. 3

Protecting Your Pipes

Blocked drains aren’t just a nuisance—they can also cause serious damage to your plumbing system if left untreated. When water can’t pass through the pipes properly, it creates pressure that can lead to leaks, cracks, or even burst pipes. That’s the last thing you want, especially since fixing or replacing damaged pipes can be incredibly expensive.

By making sure your drains are clean, you’re protecting the pipes from unnecessary wear and tear. Regular maintenance from professionals like Milestone Electric, A/C, & Plumbing reduces the risk of future damage and extends the lifespan of your home’s plumbing.


hellolovelyliving-home-cleaning-ph-alkaline-water-benefits

Kangen Water

From cooking and cleaning to laundry and self-care, as well as gardening and caring for your pets, utilize the remarkable power of antioxidant-rich alkaline water to promote optimal health and green your home.


No. 4

Promoting a Healthy Home Environment

Did you know that dirty drains can actually affect your health? When clogs are left to fester, they can become a breeding ground for bacteria, mold, and mildew. These microorganisms thrive in moist environments, and a blocked drain provides the perfect conditions for them to multiply. Over time, this can lead to poor indoor air quality and potential health risks, particularly for people with allergies or respiratory issues.

Keeping your drains clean is a simple yet effective way to prevent these harmful substances from spreading through your home. It’s one of those small tasks that can have a big impact on the overall health of your living space.

No. 5

Preventing Major Plumbing Disasters

Imagine you’re in the middle of cooking a big family dinner, and suddenly, the kitchen sink refuses to drain. Or worse, you wake up to find a flooded bathroom because the toilet backed up overnight. Plumbing emergencies are not only inconvenient, but they can also cause significant water damage to your home.

Regular drain cleaning helps you avoid these kinds of plumbing disasters. By taking preventative action, you’re reducing the chances of an unexpected blockage that could disrupt your day-to-day life or leave you with expensive repair bills.

No. 6

DIY or Call a Professional?

When it comes to keeping your drains clean, you might be wondering if you should tackle it yourself or call in a professional. The answer really depends on the severity of the issue and your comfort level with basic plumbing tasks.

For minor clogs or slow drains, there are plenty of DIY methods you can try:

  • Baking Soda and Vinegar – A natural solution that can break down build-up.

  • Boiling Water – This can help dissolve grease in the kitchen sink.

  • Plunger – An effective solution for minor blockages.

  • Drain Snake – A tool that can physically remove debris stuck in the pipes.

However, if you’re dealing with frequent clogs or the problem persists despite your efforts, it’s probably time to call in a professional. A licensed plumber has access to specialized tools like hydro jetting machines that can clear out even the most stubborn blockages, leaving your pipes spotless.

No. 7

How Often Should You Clean Your Drains?

There’s no one-size-fits-all answer when it comes to how often you should clean your drains. The frequency largely depends on how heavily the drains are used and whether or not you’ve experienced issues in the past. However, as a general rule of thumb:

  • Kitchen drains should be cleaned every 3 to 6 months due to the build-up of food, grease, and soap.

  • Bathroom drains (particularly in the shower) should be cleaned every 3 months to remove hair and soap scum.

  • Toilets and laundry drains may need cleaning once a year or as needed.

Staying consistent with these routines can prevent small issues from escalating into major plumbing headaches.

Takeaways

Drain cleaning is one of those maintenance tasks that’s easy to overlook—until you’re dealing with a clog that’s too big to ignore. But staying proactive can save you so much hassle down the line. By keeping your drains clean, you’re protecting your pipes, avoiding unpleasant smells, and ensuring your home remains a healthy place to live.

Looking For Home Resources?

Looking to enhance your living space and create a sanctuary that supports your well-being? Explore our home partners who offer a wide range of resources to elevate your home environment.


homeHLL x Editor


How To Repair Your Home Flooring: Easy DIY Solutions For A Fresh Look

Home flooring often endures significant wear and tear, but revitalizing its appearance is possible. With a few simple DIY solutions, you can breathe new life into your floors without extensive renovations or a hefty budget. In this article, we explore effective techniques to repair and refresh your flooring, whether it's scratched hardwood, stained carpets, or dull tiles.


No. 1

Understanding Your Laminate Flooring

Laminate flooring is a popular choice for many homes. It's made up of several layers and can face some common problems over time. Let's look at what makes up laminate flooring and the issues you might run into.

Components of Laminate Flooring

Laminate flooring has four main parts:

  1. Wear Layer: This clear top coat protects against scratches and fading.

  2. Design Layer: It's a photo-realistic image that gives the flooring its wood-like look.

  3. Core Layer: Made of fiberboard, this provides stability and strength.

  4. Backing Layer: This bottom layer acts as a moisture barrier.

The underlay goes beneath these layers. It helps smooth out small floor imperfections and reduces noise. Remember to leave an expansion gap around the edges of your room. This space lets the flooring expand and contract with temperature changes.

Common Issues and Their Causes

Here are some common problems you might face with your laminate flooring:

  • Scratches: These can happen from moving furniture or pet claws.

  • Bubbling: This is often due to moisture getting under the flooring.

  • Lifting or Separating: Poor installation or moisture can cause this.

  • Warping: Too much water or humidity is usually the culprit.

To avoid moisture damage, clean up spills quickly. Use doormats to catch dirt and water. Don't mop with lots of water - use a damp cloth instead. By taking good care of your laminate, you can keep it looking great for years.

No. 2

Assessing the Damage

Before fixing your floor, you need to figure out what's wrong with it. Take a close look at the problems, and decide if you can fix them yourself or if you need to hire a pro.

Identifying Types of Damage

Start by checking for scratches. Look for thin lines on the surface that catch your finger. Gaps between boards are another common issue. You might see spaces where the boards don't meet.

Water damage is serious. Look for swelling or buckling in the wood. The boards might feel spongy or look warped. Lifting is when boards start to come up at the edges.

Make a list of all the damage you find. This will help you plan your repairs. Take pictures, too. They can be useful if you need to show someone else.

When to Repair vs. Replace

Small scratches are easy to fix yourself. You can often fill gaps with wood putty. For water damage, it depends on how bad it is. If only a few boards are affected, you might be able to replace just those.

Big problems like lots of buckling or widespread water damage usually mean it's time for new flooring. If more than a third of your floor is damaged, replacing it all is often smarter.

Consider your skills and tools. Simple repairs are DIY-friendly, but if you're not sure, it's okay to call a pro. They can help you decide what's best for your floor.

No. 3

Preparing for Repairs

Getting ready for floor repairs is key to a smooth process. With the right tools and setup, you'll be able to fix your flooring like a pro.

Gathering Your Repair Kit

Your repair kit is crucial for fixing floors. For laminate flooring, grab a laminate floor repair kit. It usually has putty, a putty knife, and color-matching markers. Wood filler works well for deeper scratches or holes. Don't forget sandpaper in fine and medium grits.

You'll also need:

  • Cleaning supplies

  • Glue (for loose boards)

  • A utility knife

  • A hammer and nails (for wood floors)

For bigger jobs, add a circular saw and drill to your kit. These tools help with removing damaged boards. A pry bar can be useful, too.

Prepping the Work Area

Clear the room of all furniture. This gives you space to move and prevents damage to your stuff. Vacuum the floor to remove dirt and dust. Clean the damaged area with a damp cloth.

Mark the spots that need fixing with painter's tape. This helps you keep track of all repair areas. Cover nearby surfaces with drop cloths to catch dust and debris.

Make sure you have good lighting. A work lamp can help you see details better. Open windows for fresh air, especially if you're using strong-smelling products.

Lastly, put on safety gear like gloves and goggles. Your eyes and hands need protection during repairs.


hellolovelyliving-home-lifestyle-floor-cleaner-steam-mop-technology

Aircraft

Hard floor cleaners that deliver powerful and safe cleaning and polishing all in one


No. 4

Repair Techniques

Fixing your home flooring doesn't have to be hard. With the right tools and know-how, you can tackle many common problems. Let's look at some key repair methods for different issues.

Fixing Scratches and Chips

Got scratches on your wood floor? Try this easy fix: Mix baking soda with a few drops of olive oil. Rub this paste into the scratch with a soft cloth. Wipe off the excess, then buff the area.

For deeper scratches, use wood filler. Pick a color that matches your floor. Apply it with a putty knife, and let it dry. Sand it smooth, and apply a coat of finish.

Chips in wood or laminate can be fixed, too. Use wood putty for wood floors. For laminate, try a repair kit made for that type of flooring. Follow the kit's instructions carefully.

Addressing Gaps and Warping

Gaps between boards can be filled with wood strips or rope. Cut thin strips of matching wood to fit the gaps. Glue them in place. For a quick fix, buy rope that matches your floor color. Push it into the gaps with a screwdriver.

Warping often happens due to moisture. First, find and fix the source of moisture. Then, try to flatten the board. Put a damp cloth over the warped area and iron it. Be careful not to burn the wood.

For severe warping, you might need to replace the board. This is a bigger job, so you may want to call a pro.

Solving Buckling and Lifting

Buckling happens when the floor lifts up from the subfloor. It's often caused by moisture or poor installation. To fix it, you need to remove the buckled boards. Check for moisture issues under the floor and fix them.

Then, replace the damaged boards. Make sure to leave space for the wood to expand. Use flooring nails to secure the new boards.

For lifting laminate, you might be able to glue it back down. Use a special laminate floor glue. Inject it under the lifted part with a syringe. Put weight on the area until the glue dries.

If the lifting is bad, you may need to replace that section of flooring. Cut out the damaged part, and install new pieces. Use transition strips to blend the new and old sections.

No. 5

Handling Water Damage

Water damage can wreak havoc on your flooring. Quick action and proper repairs are key to saving your floors. Knowing how to fix the damage and prevent future issues will keep your floors looking great.

Repairing Water Damaged Areas

Start by removing any standing water with towels or a wet vacuum. Dry the area completely using fans and dehumidifiers. For laminate flooring, check for bubbles or warping. If you see these signs, you'll need to replace the damaged planks.

To replace damaged laminate:

  1. Remove baseboards

  2. Take out damaged planks

  3. Clean and dry the subfloor

  4. Install new planks

  5. Put baseboards back

For hardwood floors, sand down raised areas and refinish if needed. If the damage is severe, you might need to replace some boards. Always let wood floors dry fully before refinishing or replacing parts.

Preventing Future Water Damage

. Look under sinks, around toilets, and near appliances that use water. Fix any plumbing issues right away. Small leaks can cause big problems if left unchecked.

Use rugs or mats in areas prone to spills, like near sinks or entryways. Clean up spills quickly to prevent water from seeping into the floor. Make sure your floors have proper expansion gaps around the edges. These gaps let the floor expand and contract without warping.

For basements or areas at risk of flooding, consider water-resistant flooring options. Vinyl or tile can handle moisture better than wood or laminate. You can also apply a waterproof sealant to your existing floors for extra protection.

No. 6

Finishing Touches

After fixing your flooring, it's time to add those final touches. This includes protecting your newly repaired floor and keeping it in great shape going forward.

Sealing and Protecting Your Floor

Start by sealing your floor to shield it from damage. For wood floors, apply a thin coat of polyurethane sealer. Use a foam brush for even coverage. Let it dry completely. For laminate floors, use a specialized laminate sealer. This helps guard against moisture and scratches.

Don't forget about the expansion gap around the edges of your floor. This space lets the flooring expand and contract. Fill it with a flexible caulk that matches your floor color. This keeps dirt and moisture out while still allowing movement.

Maintaining Your Flooring Post-Repair

Regular care keeps your floor looking great. Sweep or vacuum often to remove dirt that can scratch the surface. Use a damp mop for deeper cleaning, but avoid soaking the floor.

For wood floors, use a cleaner made just for hardwood. Laminate floors need their own special cleaners, too. Don't use wax or polish on laminate— it can make the floor slippery.

Place mats at entrances to catch dirt. Put felt pads under furniture legs to prevent scratches when moving items. Trim pet nails to avoid floor damage. With these simple steps, your repaired floor will stay beautiful for years to come.

Takeaways

Repairing your home flooring can be a straightforward and rewarding DIY project that enhances both the aesthetic appeal and functionality of your space. By utilizing easy-to-follow solutions such as patching damaged areas, refinishing hardwood surfaces, or replacing worn-out tiles, you can achieve a fresh look without the need for professional help.

Additionally, embracing these DIY methods not only saves on costs but can also empower you to take control of your living environment, achieving a deeper sense of satisfaction with your home. With the right tools and a little patience, you can transform your flooring and create a completely revamped living environment.

Looking For Home Resources?

Looking to enhance your living space and create a sanctuary that supports your well-being? Explore our home partners who offer a wide range of resources to elevate your home environment.


homeHLL x Editor


How To Create The Perfect Bathroom: Easy Tips For Your Dream Space

Creating the perfect bathroom is more than just a design project; it's an opportunity to transform a functional space into a personal sanctuary that reflects your style and enhances your well-being. A thoughtfully designed bathroom can become a tranquil retreat, a place for relaxation and rejuvenation amid the busyness of everyday life.


In this article, we provide easy, actionable tips to help you achieve your dream bathroom, whether you're aiming for a minimalist aesthetic, a spa-like atmosphere, or simply improved organization. Dive in to discover how small changes can lead to significant impacts, ultimately allowing you to enjoy a serene and inviting space.

No. 1

Designing Your Dream Bathroom

Creating your perfect bathroom starts with careful planning and design choices. A well-designed bathroom balances style and function to meet your needs.

Choosing a Theme: Modern vs Traditional

Modern bathrooms feature clean lines and minimal decor. They often use materials like glass, chrome, and sleek tiles. Floating vanities and frameless mirrors are popular in modern designs.

Traditional bathrooms have a classic, timeless feel. They may include ornate fixtures, detailed woodwork, and vintage-inspired elements. Clawfoot tubs and pedestal sinks are common in traditional bathrooms.

You can also mix modern and traditional styles for a transitional look. This blends the best of both worlds, like combining a vintage vanity with sleek modern lighting.

Laying Out Your Space

Start by measuring your bathroom. Make a simple sketch showing doors, windows, and existing plumbing.

Think about how you use the space. Do you need extra storage? Double sinks? A separate shower and tub?

Keep at least 30 inches of clear space in front of fixtures. This allows easy movement around the bathroom.

Consider these layout ideas:

  • Three-quarter Bath: Toilet, sink, shower

  • Full Bath: Toilet, sink, tub/shower combo

  • Master Bath: Double sinks, separate tub and shower, private toilet area

Selecting a Color Scheme

Choose colors that make you feel calm and relaxed. Light colors can make small bathrooms feel bigger.

Some popular bathroom color schemes:

  • All-white for a clean, spa-like feel

  • Soft blues and greens for a soothing vibe

  • Warm neutrals like beige or gray for a cozy atmosphere

Use a 60-30-10 rule: 60% main color, 30% secondary color, 10% accent color.

Add pops of color with towels, rugs, or artwork. These are easy to change if you want a new look later.

No. 2

Lighting and Ambiance

Good lighting can make your bathroom feel cozy and welcoming. It helps you see clearly for grooming tasks and sets the right mood for relaxing baths. Let's look at how to light up your bathroom in the best way possible.

Creating Mood with Lighting

You can use lighting to change how your bathroom feels. Bright lights work well for getting ready in the morning. Softer lights are nice for a relaxing soak in the tub.

Try using dimmer switches on your lights. This lets you adjust the brightness to fit your needs. You could also add a few small lamps around the room. These give off a warm glow that's perfect for unwinding.

Consider using different colored bulbs too. Warm white light feels cozy, while cool white light is good for putting on makeup. Some LED bulbs even let you change colors with a remote control.

Maximizing Natural Light

Natural light makes your bathroom feel bigger and brighter. It's also great for seeing colors clearly when you're getting dressed.

If you have a window, keep it as open as possible. Use sheer curtains or frosted glass for privacy without blocking light. You could also add a skylight if your bathroom is on the top floor.

Mirrors can help bounce natural light around the room. Try hanging a large mirror opposite your window. This will make the whole space feel brighter.

Selecting Lighting Fixtures

Choose fixtures that fit your bathroom's style and size. For small bathrooms, wall sconces save space and look nice. In bigger rooms, you might want a pretty chandelier over the tub.

Make sure to put lights where you need them most. Good spots include above the mirror, near the shower, and by the toilet. You can use a mix of ceiling lights, wall lights, and even under-cabinet lights.

Look for fixtures that can handle moisture well. This is important in bathrooms where there's lots of steam. Sealed light fixtures or those marked "wet-rated" are good choices.

No. 3

Selecting Fixtures and Features

Picking the right fixtures and features can make your bathroom both beautiful and functional. The choices you make will set the tone for the entire space.

Choosing the Right Vanities

Vanities are key pieces in your bathroom. They provide storage and set the style. Single vanities work well in smaller spaces. Double vanities are great for shared bathrooms.

You can pick from many styles:

  • Modern floating vanities

  • Classic wood cabinets

  • Sleek metal designs

Think about the size of your bathroom when choosing. Make sure there's enough room to move around. Pick a countertop material that fits your needs. Quartz is tough and easy to clean, while marble looks fancy but needs more care.

Freestanding Tub vs Built-In Bath

Freestanding tubs are eye-catching and can be the star of your bathroom. They come in many shapes and styles:

  • Classic clawfoot tubs

  • Modern oval designs

  • Square-shaped soaking tubs

Built-in baths are more common and can save space. They're often cheaper and easier to clean around. Some have shower combos, which is handy in smaller bathrooms.

Think about how you'll use the tub. Do you want long soaks? Or quick showers? Your choice will affect your bathroom's look and feel.

Innovative Shower Designs

Showers have come a long way. You can now pick from many cool designs:

Glass enclosures make your bathroom look bigger. Sliding doors save space in tight spots. Tile choices can make your shower pop.

Think about who will use the shower. Older folks might like a bench seat. Meanwhile, families might want a hand-held sprayer. Pick features that work for you.


hellolovelyliving-home-lifestyle-bathroom-design-fixtures

Rejuvenation

Rejuvenation believes in the power of thoughtful design - explore their extensive range of bath fixtures, including stylish accessories and hardware that add character and charm to your space


No. 4

Materials and Surfaces

Picking the right materials and surfaces can make or break your bathroom design. The choices you make will affect both looks and function for years to come.

Flooring Options: Wood and Stone

Wood floors can add warmth to your bathroom. Try teak or cedar for water-resistant options. Seal the wood well to protect it from moisture. Stone floors like slate or limestone are another great choice. They're durable and give a natural, spa-like feel.

Floor tiles are popular too. Ceramic and porcelain tiles come in many styles. They're easy to clean and can handle water. For a luxury look, try marble tiles. They need more care but look stunning.

Natural materials like bamboo or cork can work if sealed right. They feel soft underfoot and add an eco-friendly touch.

Elegant Backsplashes and Wall Treatments

Your walls can show your style. White subway tiles are a classic. They’re straightforward and never go out of style. Change the pattern for a new look.

For a bold statement, try colorful mosaic tiles. They can create a fun focal point behind your sink.

Marble walls ooze luxury. Use large slabs for a seamless look. Or try marble tiles for a more budget-friendly option.

Don't forget about paint! A fresh coat can transform your space. Pick a water-resistant formula made for bathrooms.

Choosing Durable Countertops

Your countertop needs to stand up to daily use. Granite is tough and comes in many colors. It resists stains and scratches well.

Quartz is another great pick. It's man-made but looks like natural stone. It's very hard-wearing and doesn't need sealing.

For a sleek look, try glass countertops. They're easy to clean and can be backlit for a cool effect.

If you love marble, use it on your counters. Just know it needs more care to stay looking good. Seal it often to prevent stains.

No. 5

Organizing with Style

A tidy bathroom looks great and makes your daily routine easier. Smart storage keeps everything in its place while adding style to your space.

Strategic Built-In Storage

Built-in storage is a game-changer for bathrooms. You can add shelves above the toilet or next to the mirror. These give you extra room without taking up floor space. Built-in cabinets are perfect for hiding away cleaning supplies and extra toilet paper.

Try adding a recessed medicine cabinet. It gives you more storage without sticking out into the room. You can also build a niche in your shower wall. This is great for holding shampoo and soap.

For a sleek look, install drawers under your sink. They make it easy to organize your hair tools and makeup. You can even add dividers to keep everything neat.

Finding the Perfect Bathroom Furniture

The right furniture can make your bathroom both stylish and practical. A vanity with drawers gives you lots of hidden storage. Look for one with a countertop that matches your style.

Freestanding shelves are great for small bathrooms. They give you extra storage without taking up much space. Choose a metal or wood shelf that fits your decor.

An over-the-toilet cabinet is a smart way to use empty wall space. It's perfect for storing extra towels and toilet paper. Pick one with closed doors to hide clutter.

A pretty stool or small chair can add style and function. It gives you a place to sit while doing your hair or makeup. Plus, it can hold a stack of fresh towels.

Smart Storage Solutions for Small Spaces

In a small bathroom, every inch counts. Use the back of your door for storage. Hang an over-the-door organizer for toiletries or towels. This frees up cabinet space.

Magnetic strips are great for keeping small metal items handy. Stick one inside a cabinet door to hold tweezers and nail clippers.

Lazy Susans work well in deep cabinets. They make it easy to reach items in the back. Use them for skincare products or cleaning supplies.

Mason jars can be both cute and useful. Hang them on the wall to hold cotton balls and Q-tips. Or use them on your counter for toothbrushes and makeup brushes.

Don't forget about vertical space. Tall, narrow cabinets fit in tight spots. They're perfect for storing extra toilet paper and towels.

No. 6

Personal Touches

Your bathroom can become a relaxing retreat with a few thoughtful additions. The right decor, accessories, and spa-like elements will make the space uniquely yours.

Selecting Art and Decor

Choose bathroom art that speaks to you. Framed prints of nature scenes or abstract pieces can add color and personality. Hang a small gallery wall above the toilet or tub.

Plants bring life to your bathroom. Try low-maintenance options like aloe vera or snake plants. Place them on shelves or in hanging planters.

Decorative mirrors serve double duty. A unique shape or frame adds style while reflecting light. Try a round mirror or one with a metallic finish.

Colorful towels are an easy way to refresh the look. Pick plush towels in shades that complement your decor. Display them rolled up in a basket or hung on stylish hooks.

Adding Functional Accessories

Storage containers keep essentials tidy and stylish. Use glass jars for cotton balls and swabs. Woven baskets hold extra toilet paper or toiletries.

A tray on the counter organizes items prettily. Set perfumes, hand lotion, and a small vase of flowers on a metallic or wooden tray.

Upgrade your shower with a caddy that matches your style. Choose bamboo for a natural look or sleek metal for a modern vibe.

A heated towel rail adds luxury to your daily routine. Warm, fluffy towels make getting out of the shower more enjoyable.

Creating Spa-Like Experiences

Soft lighting sets a relaxing mood. Install a dimmer switch or use candles for a gentle glow. LED strips under cabinets create a soothing ambiance.

Bring in calming scents with essential oils. Use a diffuser or place scented soaps by the sink. Lavender and eucalyptus promote relaxation.

Plush bath mats feel great underfoot. Choose a soft, absorbent material in a color you love. Add a small stool or chair for comfort while getting ready.

Invest in quality robes and slippers. Hang a cozy robe on a hook by the shower. Keep soft slippers nearby for after your bath.

Takeaways

Creating the perfect bathroom is an achievable endeavor when approached with thoughtful planning and attention to detail. By incorporating practical tips such as maximizing storage, selecting the right color palette, and prioritizing effective lighting, you can transform your bathroom into a serene retreat that reflects style and functionality and enhances daily routines.

Your space should not only be functional but also a sanctuary for relaxation and rejuvenation. With a blend of creativity and care, you can design a bathroom that truly becomes your dream space, inviting you to indulge in self-care and tranquility.

Looking For Home Resources?

Looking to enhance your living space and create a sanctuary that supports your well-being? Explore our home partners who offer a wide range of resources to elevate your home environment.


homeHLL x Editor


Moving Essentials Checklist: Your Friendly Guide To A Stress-Free Relocation

Preparing for a move can often feel overwhelming, but with the right guidance, it can transform into a smooth and stress-free experience. In this article, we break down the moving process into manageable steps, ensuring that you stay organized and focused.


This comprehensive checklist covers everything from packing essentials and organizing your belongings to making logistical arrangements and settling into your new space. With our expert tips and supportive resources, you'll find clarity and confidence as you navigate this exciting new chapter in your life.

No. 1

Getting Started with Your Move

A smooth move starts with good planning. Focus on two key areas: picking the right movers and mapping out your timeline.

Choosing the Right Moving Company

Start your search for movers early to give yourself ample time to find the best options available. Ask friends and family for personal recommendations, as their experiences can provide insights that online listings might miss.

Additionally, look up online reviews to gather a broader perspective on potential moving companies. Be sure to get at least three estimates from different moving companies to compare their offerings and prices effectively. It's essential to ensure that the movers you consider are both licensed and insured, as this protects your belongings in case anything goes wrong during the move.

To further verify their legitimacy, ask to see their credentials and documentation. Take the time to check each company's reputation thoroughly; look for any complaints filed against them, as a reputable moving company should ideally have mostly happy customers and positive feedback.

Avoid the temptation to simply pick the cheapest option available. Instead, consider the overall value and quality of service you will receive. Sometimes, paying a bit more is indeed worth it for the peace of mind and assurance it can bring during this transitional time.

Creating Your Moving Timeline

Make a comprehensive list of all the essential tasks you need to complete. Begin by working backwards from your scheduled move date. This methodical approach helps you clearly see what needs to happen and when it all needs to occur.

Start with the larger, more significant tasks, such as notifying your landlord or selling your home. Once those are managed, transition to the smaller, yet still important jobs like packing your belongings and updating your address with various institutions.

It’s wise to give yourself more time than you initially think you will need. Moving often takes longer than expected, so building in a few extra days for unexpected surprises can make a big difference.

Additionally, set reminders on your phone for crucial dates and deadlines. This could include remembering when to cancel utilities or scheduling the movers. By staying on top of your deadlines, you can make the entire moving process much less stressful and more organized.

No. 2

Organizing and Decluttering

Getting organized before a move makes the process much smoother. You'll save time and stress by sorting your belongings and deciding what to keep or let go. This also gives you a chance to make some extra cash or help others through donations.

Sorting Household Items

Start by going room by room. Make three piles: keep, sell, and donate. Be honest about what you really need and use. Check expiration dates on food and toiletries. Toss anything that's expired or broken beyond repair.

For clothes, try everything on. If it doesn't fit or you haven't worn it in a year, add it to the sell or donate pile. Look through books, movies, and games. Keep favorites and let go of the rest.

In the kitchen, sort through appliances and cookware. Do you have duplicates? Keep the best and pass on the rest. Go through papers, and shred what you don't need. Scan important documents to save space.

Planning a Garage Sale or Donations

Once you've sorted your items, plan a garage sale. Pick a date and advertise in your neighborhood and online. Price items clearly and be ready to negotiate. Group similar things together to make shopping easy.

Can't sell everything? Many charities will pick up donations. Call local shelters, thrift stores, or organizations like Goodwill. They often need clothes, furniture, and household goods. Some even take cars or boats.

For electronics, look for recycling programs. Many stores offer trade-ins or recycling for old phones and computers. Libraries might take book donations. Schools or daycares may want art supplies or toys.

No. 3

Packing Up Your Home

Getting your belongings ready for the big move is a crucial step. With the right approach, you can make packing less stressful and more efficient.

Start by collecting all the supplies you'll need. Get boxes in different sizes—small ones for heavy items and larger ones for lighter stuff. Don't forget packing tape to seal everything up tight. Bubble wrap and packing paper are must-haves to keep fragile items safe.

Cargo strapping can quickly tie multiple boxes or items together for a one-time move, thus improving moving efficiency. Markers are great for labeling boxes. You might also want furniture pads to protect your bigger pieces.

Make a list of what you need and buy extra. It's better to have too much than to run out mid-pack. You can always return unused supplies later.


hellolovelyliving-home-lifestyle-move-storage-organize-tools-guide

The Container Store

Your ultimate destination for innovative storage and organization solutions for home or office—offering everything from stylish bins and shelves to custom closet systems


Strategies for Efficient Packing

Begin packing early to avoid last-minute rush. Start with items you use less often, like seasonal clothes or decor. Pack room by room to stay organized. Use smaller boxes for heavy items like books, and bigger ones for lighter things like pillows.

Label each box with its contents and the room it belongs in. This will make unpacking much easier. Make an inventory list as you go—it'll help you keep track of your stuff.

Don't forget to clean items before packing them. It's nice to unpack clean things in your new home!

Special Considerations for Fragile Items

Wrap each of your breakables individually in bubble wrap or packing paper to ensure maximum protection. Utilize dish packs that come equipped with dividers specifically designed for safely storing glasses and dishes. Additionally, fill any empty spaces in your boxes with packing peanuts or crumpled paper to effectively prevent shifting during transit.

For mirrors and framed artwork, it's best to use special picture boxes or, as an alternative, make an X with strong tape across the glass before wrapping them securely. Always pack these items vertically rather than flat to avoid damage. Remember to label fragile boxes clearly on all sides to alert movers and anyone else handling them.

Finally, be sure to place these fragile boxes on top of other boxes—never stack heavy items on top of them—to safeguard their integrity. With thoughtful care and attention, your delicate items will arrive safely and soundly at your new home.

No. 4

Preparing for Moving Day

Getting ready for the big day takes some planning. A few key steps will help make your move go smoothly. Let's look at what you'll need to do.

Essentials for the Moving Day Kit

Pack a box with things you'll need right away. Include toiletries, a change of clothes, and important papers. Don't forget phone chargers and any medicines you take. Throw in some snacks and water bottles too. You'll be glad to have these handy.

Make sure you have cleaning supplies ready. You might want to wipe things down in your new place. Pack some trash bags, paper towels, and all-purpose cleaner.

Keep your moving checklist where you can see it. This will help you stay on track during the busy day.

Managing Utilities and Services

Call utility companies at least a week before you plan to move into your new home. It’s important to set up essential services such as electricity, water, and heating to ensure a smooth transition. If you wish to have internet and cable TV to stay connected and entertained, don't forget to arrange those services too.

Additionally, remember to stop all services at your old residence by picking a date that is just after you move out. This strategic approach helps you avoid unnecessarily paying for utilities you no longer need.

To make the transition even smoother, create a comprehensive list of places and entities that require your new address. This should include important institutions such as banks, your workplace, and schools.

Finally, send out change-of-address forms promptly to ensure you continue receiving your mail without interruptions.

Handling Children and Pets

To minimize stress, plan engaging activities to keep kids busy on moving day. Consider packing a special box filled with their favorite toys and beloved books to provide comfort. This thoughtful gesture can help them feel more at ease in what may otherwise be a chaotic environment. If possible, ask a trusted friend or family member to watch your kids. This arrangement allows you to focus entirely on the move without the added worry of entertaining little ones.

For pets, it’s essential to set up a quiet room equipped with their food, water, and some familiar comfort items. Keep them in this safe space while the movers are coming in and out to help ensure they stay calm and secure during the busy transition. Make sure to pack a bag with pet food, tasty treats, and any necessary medicines they require for the day. Additionally, don’t forget to include their leash and favorite toy, as these familiar items can provide comfort during the journey to your new home.

No. 5

Finalizing Your Move

The final steps of moving involve tying up loose ends and ensuring a smooth transition. You'll need to update important information, leave your old home in good condition, and double-check your new place.

Updating Legal and Financial Information

Start by promptly notifying your bank and credit card companies about your new address to ensure that all your financial communications are sent to the correct location.

Additionally, it is essential to update your driver's license and vehicle registration with the new address to comply with local regulations. Don't forget to change your address with the United States Postal Service (USPS), either online through their website or by visiting your local post office in person.

Furthermore, contact your insurance providers to transfer your existing policies or inquire about obtaining new ones that reflect your current address. Remember to update your voter registration as well, and notify your children's schools about the move to keep their records accurate.

Finally, make a comprehensive list of all subscriptions and services that require your new address information. This should include not just magazines, but also streaming services, online shopping accounts, and any other pertinent subscriptions that may need updating.

Cleaning and Repairing Your Old Home

Clean your old home thoroughly to ensure you receive your security deposit back in full. Make sure to fix any damage you might have caused, such as nail holes, scuffs on the walls, or any other imperfections that may have arisen during your stay.

Additionally, don't forget to:

  • Dust all surfaces

  • Vacuum and mop floors

  • Clean appliances inside and out

  • Wipe down windows and mirrors

Take pictures of the clean, repaired home as proof of its condition when you leave.

Conducting a Final Walk-Through

Before moving day arrives, take the time to do a thorough final check of your new home. This step is crucial to ensure that any agreed-upon repairs have been completed satisfactorily. As part of this process, it’s important to test all appliances, lights, and faucets to confirm they are functioning well.

Additionally, check that all electrical outlets work correctly and that doors lock properly for your security and peace of mind. Taking these precautions can help make your transition smoother and more enjoyable.

Look for any signs of damage that weren't present during your initial visit to the property. If you discover any issues or concerns, be sure to contact your landlord or realtor without delay to address them promptly.

Don't forget to gather all the necessary keys, secure your garage door openers, and obtain entry codes for your new place to ensure a smooth transition.

No. 6

Settling into Your New Home

Moving into a new space truly marks the beginning of creating an environment that feels like home. Getting everything set up efficiently and discovering your rhythm in this fresh setting are essential steps in this rewarding process. Embracing these initial stages can significantly contribute to your overall sense of comfort and belonging as you settle into your new life.

Unpacking and Organizing

Start by unpacking the essential basics you need right away to settle into your new space comfortably. Begin by setting up your bed first, as it provides you with a cozy and peaceful place to rest and recharge after a long day. Next, focus on unpacking your kitchen items so that you can quickly prepare and enjoy nutritious meals, making your new house feel like home.

Put clothes away in closets and dressers, taking a moment to organize them by type or color for easy access. Set up your bathroom thoughtfully with toiletries and neatly arranged towels for a refreshing atmosphere. As you unpack each item, take the time to consider where things should go for maximum efficiency and harmony in your space. Use boxes and bins to keep small items tidy and prevent clutter, making your environment feel both serene and well-organized.

Find ideal spots for your furniture and decor to ensure a harmonious and functional layout. Don't rush the process—take your time to thoughtfully figure out what works best for your space and lifestyle. Consider utilizing storage units for items you’re not quite ready to unpack yet, as this can help you maintain an organized environment while you settle in.

Establishing a New Routine

Create a thoughtful plan for how you will structure your days in your new home. Begin by setting up a dedicated spot for your keys and mail by the front door to ensure they are easily accessible. Additionally, make a comprehensive grocery list, and take the time to stock your pantry with essential items that will support your cooking and meal preparation needs.

Set up your essential utilities and home services to ensure a smooth transition into your new living space. Don’t forget to change your address for all your subscriptions and bills to avoid any disruptions in service. Take the time to meet your new neighbors and familiarize yourself with the area to help you feel more at home and connected in your community.

Make your bed each morning and take the time to tidy up daily. Establishing this simple routine helps your new place feel more like home, creating a sense of comfort and order. Additionally, make an effort to try new things in your neighborhood, whether it's a quaint café or a local park, to truly immerse yourself and feel more settled in your surroundings.

It takes time to fully settle in and feel completely at home in your new environment. Be patient with yourself as you navigate the adjustments to your new space and routine. Embrace this transition period as an opportunity for growth and self-discovery.

Takeaways

A well-organized moving essentials checklist is the key to a smooth and stress-free relocation. By carefully planning and prioritizing your tasks, you can alleviate the anxiety often associated with moving. Remember to tailor your checklist to your unique needs and circumstances, ensuring you cover everything from packing to setting up your new space.

Embracing this structured approach not only helps you stay focused but also allows you to enjoy the excitement of new beginnings. With the right preparation, your transition can lead to a fulfilling experience in your new home.

Looking For Home Resources?

Looking to enhance your living space and create a sanctuary that supports your well-being? Explore our home partners who offer a wide range of resources to elevate your home environment.


lifestyle, homeHLL x Editor


Home Theater Building Guide: Create Your Dream Cinema Experience

Transforming your living space into a personal sanctuary for film and entertainment can be exciting. In this article, we share essential steps and tips to help you design the ultimate cinematic environment right at home.


From selecting the perfect room location to optimizing acoustics, choosing the right equipment, and creating a cozy atmosphere, in this guide, we equip you with everything you need to bring your vision to life. Whether you're a movie aficionado or simply looking to enhance your family's movie nights, this comprehensive resource will inspire and empower you to create an immersive viewing experience.

No. 1

Planning Your Home Theater Space

Planning your home theater space is key to creating an awesome movie-watching experience. The right room and good acoustics will make a big difference in how your setup performs.

Choosing the Right Room

Pick a room that can be darkened easily. Basements work great for home theaters. They're usually away from outside noise and have few windows. If you can't use a basement, look for a room with minimal windows.

Your room should be big enough for your screen and seating. Measure the space carefully. A good rule is to sit about 1.5 times the screen width away from the screen. So for a 10-foot wide screen, you'd want about 15 feet of room depth.

Consider a dedicated room if possible. This lets you control light and sound better than a shared space.

Understanding Room Acoustics

Room shape affects sound quality a lot. Square rooms can create sound issues. Rectangular rooms usually work better for home theaters.

Hard surfaces like bare walls bounce sound around. This can make dialogue hard to understand. Add some soft items to absorb sound. Curtains, carpets, and fabric wall panels all help.

Think about where you'll put speakers. Keep them away from corners and walls if you can. This helps prevent bass buildup and gives a clearer sound.

Ceiling height matters too. Higher ceilings often sound better, but very high ceilings can create echoes. Aim for 8-12 feet if possible.

No. 2

Visual Components

A great home theater needs amazing picture quality. The right screen or display can make movies and shows come to life in your living room.

Selecting a Screen

Screen size matters a lot for your home theater. Bigger screens give a more immersive experience. Measure your room to see how large you can go. A 100-inch or larger screen works well for most spaces.

Think about screen material too. White screens are common, but gray screens can improve contrast. Acoustically transparent screens let you put speakers behind them for better sound.

Don't forget about the resolution. 4K screens show incredible detail. 8K is new but has limited content right now. Match your screen's resolution to your video sources for the best picture.

Projector vs TV

Projectors can give you a huge screen size for less money. They work great in dark rooms. But they need more setup and maintenance than TVs.

TVs are brighter and work better in rooms with some light. Smart TVs have built-in streaming apps. OLED and QLED TVs offer amazing picture quality with deep blacks and vivid colors.

4K TVs are standard now. They show super sharp images, even up close. 8K TVs exist but are very pricey. Most content isn't in 8K yet, so 4K is plenty for now.

Think about where you'll put your screen. TVs are easier to set up anywhere. Projectors need careful placement and a good screen or wall.

No. 3

Audio Essentials

Great sound is key to an awesome home theater. Let's look at the most important parts of your audio setup.

Choosing Speakers

You'll want to pick speakers that fit your room and budget. For the best sound, go with a 5.1 or 7.1 setup. This means 5 or 7 main speakers plus a subwoofer.

Place your front left and right speakers on each side of your TV. Put the center channel speaker right above or below your screen. This speaker is crucial for clear dialogue.

Surround speakers go to the sides or behind your seating area. They create an immersive sound field. For Dolby Atmos, add height speakers on the ceiling or use up-firing modules.

Match your speakers for a balanced sound. Many brands sell complete sets that work well together.

The Importance of a Subwoofer

A subwoofer handles the low bass sounds that other speakers can't. It adds depth to music and makes movie explosions feel real.

Place your sub in a corner for more bass. But try a few spots to find where it sounds best in your room. Some people use two subs for even coverage.

Look for a powered subwoofer with at least a 10-inch driver. Bigger rooms need bigger subs. A good sub can play down to 20 Hz or lower.

Don't crank the volume too high. The sub should blend with your other speakers, not overpower them.

Receiver and Sound System Integration

Your receiver is the brain of your audio system. It takes all your audio sources and sends them to the right speakers.

The connection between the receiver and the speakers is usually made using specific connectors. These connectors are responsible for transmitting the audio signals and ensuring that the signals are efficiently passed from the receiver to the speakers. 

In a home theater system, speaker wires are usually simple wires, but to facilitate the connection and reduce the risk of poor contact, banana plugs or other types of connectors are used to connect these bare wires to the speaker output terminals of the receiver.

Pick a receiver with enough power for your speakers. Look for one with at least 80 watts per channel for most setups.

Make sure it has all the inputs you need for your devices. HDMI is key for modern systems. Some receivers offer Wi-Fi and Bluetooth for streaming.

Use the auto-setup feature to calibrate your speakers. This sets the right volume levels and delays for your room.

Many receivers support Dolby Atmos and DTS for 3D sound. These formats add height to your audio for a more lifelike experience.


hellolovelyliving-home-tech-electronics-appliances

Best Buy

Your go-to destination for the latest in electronics and home appliances. With a wide selection of products, from cutting-edge gadgets to essential home tech, they have you covered with expert advice and unbeatable prices.


No. 4

Tech Specs and Features

Home theaters today offer amazing picture and sound quality. You'll want to understand the latest display technologies and audio formats to get the most immersive experience.

HDR, Dolby Vision, and More

HDR (High Dynamic Range) makes images pop with brighter highlights and deeper blacks. You'll see more details in both dark and bright areas. Dolby Vision is an advanced form of HDR that adjusts the picture frame-by-frame.

HDR10 is the basic HDR standard, while HLG (Hybrid Log-Gamma) works well for live TV. For the best picture, look for a 4K Blu-ray player and TV or projector that supports multiple HDR formats.

Dolby Atmos adds height channels to surround sound, creating a 3D audio bubble. You'll hear sounds move around and above you. It's great for movies and gaming.

Understanding 4K and 8K Resolutions

4K resolution (3840 x 2160 pixels) gives you incredibly sharp images with four times the detail of 1080p HD. Most new TVs and many projectors now offer 4K. You'll need to sit closer to really see the difference, especially on smaller screens.

8K (7680 x 4320) is the next step up, with 16 times the pixels of HD. It's impressive but very expensive. There's also little 8K content available yet. For most home theaters, 4K is plenty.

4K gaming is becoming more common on new consoles and PCs. You'll need a TV or projector with low input lag and fast response times for the best gaming experience.

No. 5

Home Theater Sources and Content

A great home theater needs awesome content to show off its capabilities. You have lots of options to feed your system with high-quality movies, shows, games, and music.

Streaming Services

Streaming is super popular for home theaters now. You can get an Apple TV, Roku, or Amazon Fire Stick to access tons of content. Netflix, Hulu, and Disney+ offer 4K HDR movies and shows. For the best picture, look for Dolby Vision titles. Don't forget about music - Spotify and Tidal sound amazing on a good system.

Some TVs have streaming apps built-in. But a separate box often works better. They're faster and get more updates. Plus, you can take them with you to hotels or friends' houses.

Gaming Consoles and Media Players

Gaming consoles double as great media players. The Xbox Series X and PlayStation 5 can stream 4K content. They also play 4K Blu-rays.

If you're not into gaming, dedicated media players are another option. The Nvidia Shield TV Pro is a popular choice. It streams 4K HDR content and can upscale older shows.

For music lovers, there are hi-res audio players. They can play lossless files that sound better than MP3s or streaming.

Physical Media - Blu-ray and Beyond

Don't count out discs yet! Blu-rays still offer the best picture and sound quality. A good 4K Blu-ray player is a must for movie buffs. They can also play regular Blu-rays, DVDs, and CDs.

Ultra HD Blu-rays give you an amazing 4K picture with HDR. The audio is often better than streaming too. You'll hear details you never noticed before.

For classic movie fans, some players can upscale DVDs to look better on 4K TVs. It's a great way to enjoy your old collection.

No. 6

Setting Your Budget

The key first step is deciding how much to spend on your home theater. You'll want to think about what matters most to you. Is it picture quality? Sound? Comfort?

Start by looking at your finances. Figure out how much you can comfortably set aside for this project. Remember, you don't have to buy everything at once.

A basic setup can cost as little as $1,000. This might include a decent TV, a soundbar, and a streaming device. For $2,000-$3,000, you can get a larger 4K TV and better speakers.

High-end systems can run $5,000 or more. These often have top-of-the-line TVs, surround sound, and fancy seating.

Don't forget to budget for extras like:

  • Cables and wires

  • Wall mounts

  • Furniture

  • Room treatments

You can save money by shopping sales and looking for refurbished gear. Also, consider upgrading parts of your system over time as your budget allows.

Remember, a great home theater doesn't have to break the bank. With smart choices, you can create an awesome setup that fits your budget and needs.

Takeaways

Building your dream home theater is not just about technology; it's about creating a sanctuary that reflects your unique tastes and enhances your viewing experience. By considering factors such as room layout, soundproofing, seating, and equipment selection, you can design a space that elevates both casual movie nights and epic cinematic events.

Embrace your creativity and allow your personality to shine through your choices, ensuring that your home theater becomes a cherished space for relaxation and entertainment. With careful planning and thoughtful execution, you’ll transform your vision into reality, inviting friends and family to share in the magic of your personal cinema experience for years to come.

Looking For Home Resources?

Looking to enhance your living space and create a sanctuary that supports your well-being? Explore our home partners who offer a wide range of resources to elevate your home environment.


homeHLL x Editor


A Deep Dive Into Deep Cleaning: Why It's Essential For Your Home

When it comes to maintaining a clean and healthy living environment, the terms "cleaning" and "deep cleaning" often arise, yet they are frequently misunderstood or used interchangeably. To foster personal growth through a nurturing space, it is essential to understand not just the importance of keeping our homes tidy but also the deeper layers of cleaning that contribute to our overall wellness.


In this article, we explore the key differences between standard cleaning practices and the more thorough process of deep cleaning. Understanding these distinctions can help you choose the most appropriate cleaning method for your specific needs and preferences.

No. 1

What is Deep Cleaning?

Deep cleaning involves a comprehensive cleaning process that goes beyond the surface level. It targets areas of your home that are often overlooked or neglected during regular cleaning sessions. While standard cleaning focuses on maintaining cleanliness by removing visible dirt and clutter, deep cleaning dives into the hidden corners and cracks, ensuring every area is sanitized and rejuvenated.

In essence, deep cleaning encompasses:

  • Thoroughly Cleaning Appliances: This includes scrubbing the inside of ovens, refrigerators, and dishwashers.

  • Clearing Out Storage Areas: From closets to garages, deep cleaning encourages you to sift through items and eliminate unnecessary clutter.

  • Attention to High-touch Surfaces: Light switches, doorknobs, and remote controls receive extra care, reducing germ spread.

  • Cleaning Carpets and Upholstery: This may involve steam cleaning or shampooing fabrics to eliminate dust mites and allergens.

  • Taking Care of Air Vents and Filters: Ensuring that the air circulating in your home is clean and healthy.

No. 2

Differentiating Deep Cleaning from Standard Cleaning

Understanding the key difference between deep cleaning vs regular cleaning allows you to create an effective cleaning schedule that promotes both cleanliness and well-being.

Deep cleaning and regular cleaning serve distinct purposes in maintaining a healthy and organized environment. Regular cleaning involves routine tasks such as dusting surfaces, vacuuming floors, and sanitizing frequently touched areas, typically performed weekly or bi-weekly to keep your space tidy.

In contrast, deep cleaning focuses on a more thorough approach that targets less visible areas, such as behind appliances, inside cabinets, and grout lines, and may involve scrubbing, washing, or even decluttering. This intensive process is generally recommended every few months to eliminate built-up grime, allergens, and bacteria, ensuring a healthier living space and a refreshed home overall.

Standard Cleaning

  • Frequency: Typically done weekly or bi-weekly.

  • Focus Areas: Surface-level tasks such as sweeping, vacuuming, dusting, and wiping down countertops.

  • Time Investment: Generally, a standard clean takes less time and can be quickly accomplished with routine maintenance.

  • Result: A visually appealing space, but it may harbor hidden dust, allergens, and bacteria.

Deep Cleaning

  • Frequency: Recommended every 3 to 6 months or as needed, based on lifestyle and living conditions.

  • Focus Areas: Every nook and cranny, including baseboards, ceiling fans, behind appliances, and inside drawers.

  • Time Investment: Requires significantly more time and effort due to its in-depth nature.

  • Result: A thoroughly sanitized environment that contributes to long-term health benefits.


hellolovelyliving-home-lifestyle-deep-cleaning-wellness-non-toxic-natural

Force of Nature

Force of Nature’s formula, made from only three natural ingredients: water, salt, and vinegar, is an EPA-registered medical-grade disinfectant and sanitizer that kills 99.9% of germs* including mold and mildew


No. 3

The Importance of Deep Cleaning for a Healthy Living Environment

  1. Reduces Allergens and Pollutants: Deep cleaning tackles dust, mold, and allergens that accumulate in hard-to-reach places. It’s crucial for maintaining respiratory health, especially for those with allergies or sensitivities.

  2. Prevents Illness: By sanitizing high-touch surfaces and areas that collect bacteria, deep cleaning can reduce the likelihood of illness in your home. This is particularly important during cold and flu seasons, as well as in households with young children or elderly members.

  3. Enhances Mental Well-Being: A clean space is often synonymous with a clear mind. Engaging in deep cleaning can be a transformative experience, fostering feelings of accomplishment and serenity. It sets the tone for a more balanced and harmonious living environment.

  4. Increases Lifespan of Household Items: Regular deep cleaning of appliances, carpets, and other furnishings can prolong their lifespan. By removing grime and buildup, you prevent wear and tear, leading to more sustainable living.

  5. Encourages Personal Reflection: The act of deep cleaning can serve as a meditative practice. As you clear out physical clutter, you might find yourself reflecting on emotional baggage and personal goals, aligning with the essence of self-discovery.

Takeaways

While standard cleaning is essential for daily upkeep, deep cleaning is a powerful self-care practice that promotes a healthy, hygienic living space and supports your overall wellness journey. Embracing this more intensive approach not only enhances the physical environment but also fosters personal growth and mindfulness within your home. Consider scheduling regular deep cleaning sessions to unlock the full potential of your living space and, in turn, your personal freedom.

Looking For Home Resources?

Looking to enhance your living space and create a sanctuary that supports your well-being? Explore our home partners who offer a wide range of resources to elevate your home environment.



homeHLL x Editor


Elevate Your Space: Choosing A Stylish Dog Crate For Your Home

In today's design-savvy world, pet owners increasingly seek functional yet stylish solutions for their furry companions. A dog crate no longer needs to be an eyesore that disrupts the flow of your home. Instead, opting for a modern dog crate that seamlessly fits into your décor can enhance your living space while providing your pet with a safe haven. In this article, we share how to choose a crate that aligns with your home’s aesthetic.


No. 1

Assess Your Space

Before you start shopping, take a moment to evaluate the area where you plan to place the crate. Consider the size and layout of the space, as well as the existing color palette and design elements. This assessment will help you determine the style, size, and material of the crate that will work best.

No. 2

Materials Matter

Modern dog crates come in a variety of materials, from wood to metal to durable fabric. Wooden crates, for instance, can offer a rustic charm while providing the stability your dog needs. Look for large dog crates crafted from high-quality, sustainable wood finishes that blend with your furniture. Alternatively, stylish wire or metallic crates can add an industrial touch, especially in urban settings.

No. 3

Design Style

Identify a design style that resonates with your home. If you lean toward minimalism, consider sleek, geometric crates that have clean lines and muted colors. For a homier feel, select crate designs that incorporate soft curves and natural finishes. Vintage-inspired crates can also make a statement, merging old-world charm with contemporary materials.


hellolovelyliving-dog-pet-crate-health-cbd-anxiety

CBD Dog Health

CBD DOG is proud to share a growing line of holistic products for the well-rounded health of your dog, cat, horse, or any other pet


No. 4

Color Coordination

Choose a crate that complements your home’s color scheme. Neutral colors such as whites, greys, and beiges offer versatility, making it easy to coordinate with various decor styles. If you’re feeling adventurous, a bold-colored crate can serve as a vibrant accent piece, drawing attention while still serving a functional purpose.

No. 5

Multi-Functionality

Look for crates that offer more than just a nesting spot for your dog. Some modern designs double as stylish end tables, coffee tables, or benches, allowing you to maximize your space. These multi-functional furniture pieces not only create a cozy environment for your pet but also integrate seamlessly into your daily living.

No. 6

Customization Options

Many brands now allow for customization, letting you choose finishes, colors, and accessories that suit your unique taste. This personalization can elevate your dog crate from simple functionality to a bespoke piece that genuinely fits your home.

No. 7

Lighting and Placement

Once you’ve selected the perfect crate, consider its placement relative to natural light and traffic flow in your home. Positioning the crate in a well-lit area can make it an inviting space for your dog while creating a picturesque corner of your home.

Takeaways

Investing in a modern dog crate that matches your home's aesthetic not only ensures your furry friend has a safe and comfortable space but also enhances your overall decor. By considering your space, material, design style, color coordination, and functionality, you can select a crate that delights both you and your pet. Embrace the harmony of stylish living and pet ownership, and let your dog’s crate be a functional yet beautiful addition to your home.

Looking For Home Resources?

Looking to enhance your living space and create a sanctuary that supports your well-being? Explore our home partners who offer a wide range of resources to elevate your home environment.


homeHLL x Editor


How To Choose A Sofa Bed That Combines Comfort With Practicality

Have you ever looked through home magazines or scrolled through Pinterest, wondering how people design such elegant and functional rooms, even in small spaces? Maybe you’ve tried to do the same but ended up with more clutter instead. If so, you’re in the right place.


The secret behind those picture-perfect homes often lies in multifunctional furniture. But choosing the right piece isn’t always easy. There are several factors that you must consider.

For the ease of this article, we’ll focus on one key piece: the sofa bed. We’ll walk you through everything you need to know to find the perfect one for your space so you can create a beautiful and practical home. Let’s begin!

No. 1

Prioritize Comfort

A Bed and Sofa Combined

Comfort should be your top priority when choosing furniture that doubles as a bed. You want a cozy sofa for lounging that also offers the support of a real mattress when it’s time to sleep. Look for models that combine comfort and functionality, offering the best of both worlds.

Some Sofa Bed options even provide the luxury and style of a handmade Italian sofa, giving your living space a touch of elegance. These designs include high-quality mattresses, such as memory foam, ensuring you or your guests enjoy a restful sleep.

Choosing a piece that excels in seating and sleeping comfort ensures you get maximum value and satisfaction from your purchase.

No. 2

Measure Your Space

Functionality Without Sacrificing Space

Before falling in love with a sofa bed, measuring your space is essential. The last thing you want is to bring home furniture that doesn’t fit or overcrowds your room, right?

So, measure the space where you plan to place it, including the area needed when the bed is pulled out. You’ll want to ensure enough room to move around comfortably, even when the bed is extended. 

In addition, consider how often you’ll be using it as a bed and whether it will be easy to convert from a sofa to a bed in your available space.

Don’t just measure the floor space—look at the room’s height and layout, too! If your room is small, opting for a sofa bed with a compact design and minimal footprint can help maintain a more open, spacious feel.

No. 3

Look for Easy Conversion

Practicality Matters

No one wants to struggle with converting a sofa into a bed, especially if you’re expecting guests or need to use it frequently. Look for a sofa bed with a smooth and simple conversion mechanism. Some models feature a click-clack design where the back folds down easily, while others pull out from underneath.

For frequent use, choose a model that doesn’t require too much effort. A sofa bed with a fold-down system or one easily transformed with a single pull will save you much time and frustration. Ease of use is essential if you regularly switch between bed and sofa.

Also, check that the conversion doesn’t compromise the overall durability of the sofa. You want something practical and long-lasting, so you won’t need to replace it after just a few uses.


hellolovelyliving-home-lifestyle-sofa-bed-mattress-blanket

Hilu

Ensure you and your loved ones enjoy a deeper, more restful sleep with the only blanket that actively adapts to keep your temperature perfect


No. 4

Pay Attention to Hygiene

Easy Cleaning and Freshness

When choosing a sofa bed, hygiene is an important factor to consider. Some models come with removable covers, allowing you to easily clean or replace them in the future, keeping your sofa fresh and clean. This is especially useful for families with kids or pets.

Additionally, models with a separate mattress offer even more flexibility. The mattress can be replaced over time, extending the life of your sofa bed. Since the mattress is separate from the seating area, you won’t sleep on the same surface where people have been sitting or snacking.

For added convenience, some designs include a Lift’ N Wheel feature, which lets you easily move the sofa to vacuum underneath or reposition it in your living space. This ensures both cleanliness and longevity.

No. 5

Focus on Material and Durability

A Long-Term Investment

Lastly, your sofa bed must withstand daily wear and tear, especially if you have kids or pets.

Look for high-quality, durable materials that can last for years without showing too much wear. Leather and microfiber are two popular options due to their durability and ease of cleaning. Microfiber is great for homes with children or pets since it resists stains and can be wiped down easily.

A well-built sofa bed is an investment that should last for many years, so it’s worth paying attention to the materials used.

Takeaways

With the right sofa bed, you can maximize your space without sacrificing style or functionality. Whether you’re hosting guests or simply looking to make the most of a smaller room, a well-chosen sofa bed can be the perfect solution. Take your time, do your research, and you’ll find a comfortable and practical sofa bed for your needs.

Looking For Home Resources?

Looking to enhance your living space and create a sanctuary that supports your well-being? Explore our home partners who offer a wide range of resources to elevate your home environment.


homeHLL x Editor


Three Key Reasons To Install A Deck On Your Aussie Property

Carrying out any type of DIY or improvement project on your Australian property can give you an amazing chance to enhance the functionality and aesthetics of a particular exterior environment. Indeed, given the outdoor lifestyle that is prominent across Australia, improving the exterior of your Aussie property is always a worthwhile endeavor, and one of the most effective ways to achieve this objective is through the installation of a hardwood deck.


Regardless of whether you enjoy hosting lively barbecues with friends and family or if you simply seek a comfortable area in which to truly relax and unwind, the thoughtful addition of a deck can remarkably transform any outdoor space into a versatile and aesthetically pleasing extension of your residential property. Similarly, there are several compelling reasons why you should seriously consider making this valuable addition to your Aussie property.

Not only can a deck lead to an increased property value, but it also fosters an improved lifestyle by providing a wonderful space for leisure and enjoyment. Moreover, it creates a low-maintenance entertainment area that all members of the family can delight in for many years to come. In this article, we explore three key reasons why you may want to consider installing a beautiful deck on your Aussie property. A deck can significantly enhance your outdoor living space, offering you a perfect spot for relaxation, entertainment, and enjoyment of the outdoors.

No. 1

Enhanced Property Value

To start with, the addition of hardwood decking in Brisbane to your Australian property could potentially increase its resale value. In contrast, for people living in the state of Queensland who are looking to boost their home’s market appeal, the addition of this type of outdoor feature is a solid investment that could potentially pay off significantly in the long term.

Moreover, any potential buyers will often appreciate the additional living space that a well-designed deck can provide, making your residential property significantly more attractive in the increasingly competitive housing market in your area of Australia. This added feature not only enhances the overall appeal of your home but also offers an inviting atmosphere for outdoor gatherings and relaxation, further boosting the property's desirability.

No. 2

Improved Lifestyle

In addition to financial gain, the installation of a hardwood deck could also offer you and your family an improved lifestyle by extending your living space into the great Australian outdoors. Just imagine basking in the warm Australian sun, or enjoying a cold one with your family and friends on your very own deck. The addition of this structure can also help to create a seamless flow between the indoor and outdoor living areas, allowing you to embrace the natural beauty of Australia without leaving the comfort of your back garden.


hellolovelyliving-home-outdoor-deck-project-australia-houzz

Houzz

Make your home project a reality. Find inspiration, products and the pros to make it happen - all in one place.


No. 3

Several Practical Advantages

Finally, one of the most significant benefits that you could enjoy by installing a deck on your Aussie property is that it can provide you with a low-maintenance solution for all types of outdoor entertaining. Very different from traditional lawns or gardens that require a constant level of maintenance, the installation of a well-built hardwood deck requires a minimal amount of care, making it the perfect choice for busy homeowners across Australia. Similarly, given the various materials that are available that have been designed to withstand the harsh Australian climate, you will spend less time undertaking maintenance and more time enjoying this amazing outdoor area.

Takeaways

Installing a deck on your beautiful Aussie property provides numerous benefits, making it a truly worthwhile investment for homeowners. From substantially increasing your home’s overall value to greatly enhancing your lifestyle and offering a convenient low-maintenance solution for various outdoor activities, a well-designed deck is a fantastic addition to any property. It serves not only as a functional space but also as an inviting area for relaxation, entertaining friends, and enjoying the stunning Australian weather.

Looking For Home Resources?

Looking to enhance your living space and create a sanctuary that supports your well-being? Explore our home partners who offer a wide range of resources to elevate your home environment.



homeHLL x Editor


Why Hurricane Windows And Doors Are The Best Investment For Your Home

Hurricanes are no joke. If you live in an area that is prone to these intense and often devastating storms, you’ve probably witnessed your fair share of flying debris, powerful winds, and heavy, relentless rain. It's not just about enduring the storm itself—it’s about effectively protecting your home and safeguarding your family in the process. Preparing for such natural disasters requires careful planning and consideration to minimize potential risks and ensure everyone's safety during the chaos.


Enter hurricane windows and doors, a vital choice for homeowners in coastal areas. These specially designed barriers are more than just an upgrade to your home—they’re a significant investment in safety, enhanced longevity, and invaluable peace of mind. In this article, we break down why hurricane windows and doors are worth every penny and how they can protect your home during severe weather conditions.

No. 1

Fortify Your Home Against the Elements

Standard windows and doors simply aren’t built to effectively withstand the immense force of a hurricane. While they may hold up decently during a heavy storm, when it comes to the overwhelming impact of a hurricane, it’s a completely different ballgame. Hurricane windows and doors are meticulously engineered and specifically designed to endure the most extreme conditions imaginable, from powerful winds to dangerous flying debris that can occur during such fierce weather events.

  • Strength and Durability – Unlike regular glass, hurricane windows are made with impact-resistant materials. This usually involves a layered glass system with a plastic interlayer that keeps the glass intact, even if it shatters. The frame is reinforced too, which means the entire structure can take a hit without failing.

  • Wind Resistance – When a hurricane hits, the pressure outside your home skyrockets. If one of your windows or doors fails, the air pressure inside your house changes suddenly, potentially causing structural damage. Hurricane windows and doors are designed to keep that wind pressure out, ensuring your home stays intact.

No. 2

More Than Just Storm Protection

Hurricane windows and doors aren’t just there to keep your house safe during storms; they offer a wide array of year-round benefits that make them an incredibly smart investment, whether a hurricane is looming on the horizon or not. With these resilient features in place, homeowners can enjoy peace of mind, improved energy efficiency, and enhanced protection against various weather conditions all year round.

  • Energy Efficiency – Because these windows and doors are built to be sturdy and airtight, they naturally improve your home’s energy efficiency. They help keep cool air in during the summer and warm air in during the winter, which could lower your energy bills. Over time, this adds up to significant savings. Who wouldn’t want that?

  • Noise Reduction – Tired of hearing every car that drives by or the neighbor's dog barking at all hours? Hurricane windows and doors provide excellent sound insulation. The extra layers of material and airtight seals block out a surprising amount of outdoor noise, making your home a quieter and more peaceful place to be.

  • UV Protection – If you’ve ever noticed your furniture fading over time, it’s likely due to UV rays from the sun. Hurricane windows are often coated with a UV filter that helps protect your home’s interior from sun damage. So not only are you protecting your house from storms, but you’re also preserving your valuable possessions.

No. 3

Increased Home Value

Another significant perk of installing hurricane windows and doors? You’re not just enhancing your home’s safety; you’re also increasing your home’s overall market value. Homebuyers in hurricane-prone areas are becoming increasingly vigilant about finding properties that already have these crucial protections thoughtfully in place. Not only does this feature provide them with added peace of mind during storm season, but it can also lead to lower insurance premiums, making the property more financially appealing.


hellolovelyliving-home-windows-doors-design

Houzz

Make your home project a reality. Find inspiration, products and the pros to make it happen - all in one place


No. 4

Potential Insurance Savings

Many insurance companies offer discounts for homes with hurricane windows and doors installed. After all, these additions significantly reduce the risk of damage during a storm. It’s a win-win situation—you get a more secure home, and you might pay less for insurance.

If you haven’t looked into it yet, it’s definitely worth taking a few moments to call your provider to see if you might qualify for a discount on your service. The potential savings could significantly offset some of the initial installation costs you may incur, making the investment even more appealing.

No. 5

Long-Term Cost Savings

At first glance, hurricane windows and doors might seem like a hefty investment, but when you look at the bigger picture, they pay for themselves in several ways:

  • Lower Maintenance – You won’t have to deal with boarding up your windows every hurricane season. No more worrying about whether your shutters will hold, or if they’ll fly off and cause damage. Hurricane windows and doors offer constant protection, so you’re always prepared.

  • Reduced Damage Costs – In the event of a hurricane, you’ll likely face fewer repairs compared to homes with traditional windows and doors. No shattered glass to clean up, no leaks to deal with, and less overall damage to your home.

  • Increased Lifespan – Because these windows and doors are built to be tough, they tend to last longer than their standard counterparts. This means fewer replacements over time, which adds to your long-term savings.

No. 6

Peace of Mind – The Priceless Benefit

There’s something incredibly reassuring about knowing your home is protected. With hurricane windows and doors, you don’t have to scramble to board up your house every time a storm threatens. You’re already prepared. That peace of mind? It’s priceless. Whether you’re at home during the storm or away, you can rest a little easier knowing your property is as secure as it can be.

Takeaways

Hurricane windows and doors aren’t just a seasonal upgrade—they’re a year-round investment in your home’s safety, energy efficiency, and value. They protect against the worst mother nature has to offer, and they come with the added benefits of noise reduction, UV protection, and potentially lower insurance premiums.

When you take a moment to really think about it, the decision to install hurricane windows and doors becomes an undeniably easy one to make. It stands as a significant investment in not only your future but also in your overall safety and well-being, as well as in your peace of mind during the stormy seasons ahead.

Looking For Home Resources?

Looking to enhance your living space and create a sanctuary that supports your well-being? Explore our home partners who offer a wide range of resources to elevate your home environment.


homeHLL x Editor


The Significance Of Liability Insurance For Carpentry Businesses

Running a carpentry business is no small feat. From sourcing quality materials to delivering exceptional craftsmanship, there's a lot that goes into ensuring your projects meet client expectations. However, amidst the daily hustle of managing operations, one crucial aspect that often gets overlooked is liability insurance.


This type of insurance isn’t just an optional safety net; it’s an essential component of any business, especially one that involves physical labor and potential hazards like carpentry. In this article, we explore why carpenter insurance is so vital for carpentry businesses, how it can protect you from unforeseen circumstances, and why making the right investment in coverage is crucial for long-term success.

No. 1

Understanding Liability Insurance for Carpenters

Liability insurance is designed to shield your business from financial loss due to claims of bodily injury, property damage, or other types of liabilities that can arise from your operations. For carpenters, the risks are particularly pronounced because your work often involves the use of tools, heavy materials, and working on client properties. Even the most careful carpenter can’t entirely eliminate the risk of accidents or damages.

General liability insurance, the most common type of coverage for businesses, is therefore the bedrock of your protection plan. It typically covers legal fees, medical costs, and any settlements or judgments if you’re found liable for an incident.

When considering liability insurance, it’s essential to understand what your policy covers and what it doesn't. Standard policies generally cover incidents like a client tripping over your tools or damage to a client's home during installation.

However, they may not cover everything, such as damages caused by faulty workmanship or injuries to your employees. Knowing these details allows you to complement your liability insurance with other necessary coverage, such as professional liability insurance for workmanship issues or workers' compensation for employee injuries.

No. 2

Common Risks in Carpentry

Carpentry is a profession that inherently comes with risks. These can range from minor accidents to significant incidents that could jeopardize your business’s financial health.

For example, imagine you're installing custom cabinetry in a client’s kitchen, and a heavy piece of wood accidentally falls, causing damage to the countertop. Or, a visitor to the job site might trip over an electrical cord, resulting in a serious injury. These scenarios are not far-fetched and illustrate why having liability insurance is critical.

In addition to property damage and bodily injury, there’s also the risk of personal injury claims. These occur when your business activities lead to reputational harm, such as slander or libel. While these might seem less likely in a carpentry context, misunderstandings can arise, especially when dealing with high-value projects or discerning clients. Liability insurance can cover the costs of defending against these claims and any damages awarded, ensuring that a single incident doesn’t lead to financial ruin.

No. 3

The Financial Impact of Not Having Liability Insurance

The financial repercussions of operating without liability insurance can be devastating. Legal fees alone can quickly escalate, even if you are ultimately found not liable. Imagine a client sues you because they believe your work caused damage to their property, and the case drags on for months.

Without insurance, you would be responsible for paying for legal representation, court fees, and any settlements out of pocket. This could easily amount to tens or even hundreds of thousands of dollars, depending on the case’s complexity.

Moreover, even if the lawsuit is frivolous, the time and resources required to defend yourself can drain your business. You might have to take time away from work to attend court hearings or consult with lawyers, leading to lost income. And if the worst happens and you lose the case, you could be ordered to pay significant damages.

In some instances, a single claim could bankrupt a small carpentry business, forcing it to close its doors permanently. Liability insurance protects against this by covering these costs, allowing your business to continue operating without significant financial strain.


hellolovelyliving-business-carpentry-build-materials-home-finances

Houzz

Make your home project a reality. Find inspiration, products and the pros to make it happen - all in one place


No. 4

How Liability Insurance Can Save Your Business

In the event of an accident or a claim, liability insurance acts as a financial buffer. For instance, let’s say a client sues you after slipping on a slick floor at a job site, claiming you were responsible for the unsafe condition.

Without insurance, you would be on the hook for medical bills, legal fees, and any damages awarded by the court. However, with liability insurance, your policy would cover these expenses, up to the policy’s limit, sparing you from a potentially crippling financial burden.

Liability insurance also plays a crucial role in maintaining your business’s reputation. In industries like carpentry, where word-of-mouth referrals are vital, a single lawsuit can harm your reputation, even if you’re not at fault.

By quickly and efficiently handling claims, liability insurance helps protect your reputation, ensuring that your business remains trusted and respected in the community. This can be particularly important for small businesses that rely heavily on repeat customers and local referrals.

No. 5

Choosing the Right Liability Insurance for Your Business

Selecting the right liability insurance requires careful consideration of your business’s specific needs. Not all policies are created equal, and the coverage that’s right for one carpentry business might not be sufficient for another. Several factors should be considered when choosing a policy, including the size of your business, the types of projects you undertake, and the level of risk associated with your work.

When assessing policies, look at the coverage limits to ensure they’re adequate for your potential risks. You don’t want to be underinsured, as this could leave you exposed to significant financial loss in the event of a large claim.

Additionally, pay attention to any exclusions in the policy—these are specific situations or types of claims that the policy won’t cover. Understanding these exclusions can help you avoid unpleasant surprises if you ever need to file a claim.

It’s also wise to compare different insurance providers to find one that offers the best combination of coverage and cost. Some insurers specialize in coverage for small businesses or trades like carpentry, offering tailored policies that address the unique risks of the industry. Working with an insurance advisor who understands the specific needs of carpentry businesses can also be beneficial, as they can help you navigate the complexities of different policies and choose the right coverage.

No. 6

Maintaining and Updating Your Insurance Policy

Once you have liability insurance in place, it’s important not to take a set-it-and-forget-it approach. Your business is likely to grow and evolve over time, and your insurance needs will change along with it. For example, if you expand your services, take on larger projects, or hire more employees, you’ll need to review your policy to ensure it still provides adequate coverage.

Regularly reviewing and updating your insurance policy ensures that your coverage remains appropriate for your business’s current situation. Failing to do so could leave you underinsured, which can be just as risky as not having insurance at all. It’s a good idea to schedule an annual review of your policy with your insurance provider or advisor to discuss any changes in your business and adjust your coverage as needed.

Takeaways

Liability insurance is not just an optional add-on for carpentry businesses—it’s a necessity. The risks associated with running a carpentry business are real and can lead to significant financial losses if not adequately managed. By understanding the importance of liability insurance, recognizing the risks it mitigates, and choosing the right policy, you can protect your business from potential disaster.

Don’t wait until an accident or claim occurs—invest in the right liability insurance today to ensure your business’s continued success and stability. With the proper coverage in place, you can focus on what you do best: delivering quality craftsmanship to your clients without the constant worry of financial risks.

Looking For Home Resources?

Looking to enhance your living space and create a sanctuary that supports your well-being? Explore our home partners who offer a wide range of resources to elevate your home environment.


business, homeHLL x Editor