Posts in home
Maintaining A Lovely Home Despite Water Damage

Are you dealing with water damage in your home? It's a common challenge that accounts for nearly a quarter of all home insurance claims. 


Whether from a flood causing overflow, or a simple leak, water has an uncanny way of finding where it shouldn't be, inevitably resulting in varying degrees of damage. A crucial thing to remember is that your reaction to this issue plays a key role in protecting your home despite the mishap. 

In this article, we share effective strategies for approaching the challenges posed by water damage. Prompt and professional water damage treatment can often mean the difference between minor cleanup versus widespread structural ruin.

To avoid any potential damages, consider professional help from https://www.waterdamagespecialist.com.au/. Their team is dedicated to providing swift and effective recovery methods to help maintain the beauty of your home, even after water damage.

No. 1

Identifying Water Damage Signs

Water damage in your home can be a serious issue, often cloaked behind walls or under carpets. Uncovering it early is crucial.

Signs may include mustiness, discolored walls, or an increase in your water bill. If ignored, these issues could lead to significant structural problems.

  • Persistently Damp Carpets: Soft furnishings and carpets damp for no apparent reason could indicate a hidden leak.

  • Musty Smell: A stale, musty odor that persists might be a sign of moisture lingering behind your walls.

  • Changes in Color: Spots or dark patches on your walls often signal moisture seeping through the paint and drywall.

  • Rising Water Bill: A sudden increase in your water expenses could suggest an unidentified leakage. It's always worth checking once you notice any signs.

Detecting water damage early can significantly simplify the repair process and prevent further complications. Seeking expert assistance ensures an accurate diagnosis and the most effective remediation strategies, helping to protect your property from long-term damage.

No. 2

Immediate Actions to Take

Water damage demands swift action. A prompt response can help preserve your home and belongings, preventing the onset of rot and mold, which can lead to costly, long-term repairs if left unchecked.

Taking immediate steps not only mitigates the damage but also reduces the risk of more severe structural and health-related issues down the line.

Start With Safety

First and foremost, prioritize your safety and the safety of others. Avoid interacting with electrical appliances or exposed wires in waterlogged areas, as this poses a serious risk of electric shock.

Once it's safe to do so, disconnect all electronic devices and carefully clear the surrounding area. To mitigate further damage, promptly remove valuable items from the affected area and relocate them to a dry, secure location.

Initiate Damage Control

If possible, immediately stop the source of the water. For example, if the issue stems from burst pipes or malfunctioning appliances, shut off the main water supply to prevent further flooding.

To minimize additional property damage, promptly remove furniture and other belongings from the affected area. For items that cannot be moved, place aluminum foil or wooden blocks under furniture legs to prevent water from seeping into the wood and causing stains on wet carpets.

Contact Professionals

Reach out to certified water restoration professionals as soon as possible to conduct a thorough assessment and develop a tailored recovery plan.

In the meantime, you can begin the drying process by using fans and dehumidifiers to reduce moisture levels and prevent further damage. Taking these initial steps while waiting for expert assistance can help minimize the risk of mold growth and structural deterioration.

No. 3

Safe Water Removal Techniques

Your home is your sanctuary, but water damage can quickly disrupt this sense of comfort and security. To restore peace of mind, it's essential to act swiftly and safely.

Here are effective water removal techniques to help you manage the situation and protect your home from further harm:

Step 1: Inspection

Expert professionals perform an in-depth analysis using moisture detectors and hygrometers. This provides a snapshot of the extent of water infiltration.


hellolovelyliving-home-improvement-lowes

Lowe’s

Transform your home with confidence! From tools to materials, Lowe’s has everything you need to tackle your next project.


Step 2: Water Removal

This is achieved through the usage of powerful pumps and portable extraction units to remove mass quantities of water.

The drying and dehumidification step ensures that leftover moisture is properly dealt with. By utilizing air movers and dehumidifiers, your home returns to a dry state.

Step 3: Cleaning and Sanitizing

With specialized cleaning agents, your home is not just restored to a pre-water intrusion state but sanitized thoroughly.

No. 4

Handling Damaged Materials

Water damage can severely impact the beauty and integrity of your home. It’s essential to tackle the problem promptly and decisively to prevent further deterioration and costly repairs down the line.

Assess the Situation

After experiencing water damage, take a moment to carefully assess the situation. Determine the extent of the damage and create a detailed plan of action.

Ensure that your response is tailored to the specific circumstances for maximum effectiveness. Once your plan is in place, follow it diligently to ensure a smooth and efficient recovery process.

Salvaging Valuables

It's natural to be concerned about your belongings during such a stressful time, but many items can still be salvaged. Start by prioritizing irreplaceable items such as important documents, antiques, and sentimental possessions.

For absorbent materials like paper or wood, time is of the essence. Begin drying them out as quickly as possible to prevent mold growth and further deterioration. Swift action can make a significant difference in preserving these valuable items.

Hiring Professionals

In more severe cases, it’s essential to enlist the help of professionals. Their expertise in water damage restoration ensures that no detail is overlooked, from hidden moisture to potential structural issues.

While hiring professionals may feel overwhelming at first, their intervention can ultimately save you from far greater losses down the road, ensuring a thorough and effective recovery process.

No. 5

Preventing Mold Growth

Water damage in your home can quickly lead to mold growth, which poses significant health risks and can cause extensive property damage. Acting swiftly and strategically is crucial to prevent these issues.

Mold thrives in damp environments, making water-damaged areas the perfect breeding ground. By taking immediate action, you can prevent mold from taking hold and keep your home both healthy and beautiful.

Key Steps to Prevent Mold Growth

  • Eliminate Moisture: Mold prevention starts with removing excess moisture. Use a dehumidifier to accelerate the drying process in water-affected areas. This simple step can drastically reduce the risk of mold growth.

  • Maintain Cleanliness: Regular cleaning is essential for detecting early signs of mold and discouraging its growth. Vacuum carpets frequently and wipe down walls, especially in areas prone to moisture.

  • Ensure Proper Ventilation: Adequate airflow is critical in keeping mold at bay. Make sure your home, particularly damp-prone areas like bathrooms and kitchens, is well-ventilated to reduce humidity levels.

  • Invest in Mold-Resistant Products: Consider using mold-resistant materials, such as mold-resistant drywall, paints, or sealants. While these products may come at a higher initial cost, they provide long-term protection and peace of mind.

Safeguarding your home from water damage isn't just about protecting the structure—it's also about ensuring the health and well-being of the people living in it. Mold can often go unnoticed in its early stages, but it poses serious health risks, particularly for those with allergies or respiratory issues. Proactive prevention measures will help you maintain a safe, mold-free home for everyone.

No. 6

Effective Home Repair Strategies

Water damage can be a serious threat to the charm and integrity of your home. Swift and strategic repair methods are essential to preserving your beautiful space and preventing long-term issues.

Here are some effective strategies to help you navigate the process:

What’s the First Step to Handle Water Damage?

The first and most critical step is to immediately identify and stop the source of the water intrusion. Whether it’s a burst pipe, a leaking roof, or a faulty appliance, shutting off the water supply or fixing the leak is paramount.

Once the source is controlled, assess the extent of the damage and contact a professional water restoration service for a thorough evaluation and recovery plan.

How Important is Speed in this Process?

Speed is crucial when dealing with water damage. A rapid response can significantly limit further deterioration, prevent mold growth, and restore your home to normalcy faster. The quicker you act, the lower the repair costs will be, as you’ll minimize the risk of extensive structural damage and health hazards.

Should You Try Some DIY Methods?

While some minor repairs, such as drying small areas or cleaning up surface water, can be handled with DIY methods, it’s important to recognize your limits. Improper handling of water damage can exacerbate the problem, leading to more extensive and costly repairs.

For major water damage, always leave it to professional restoration services, as they have the expertise and equipment to handle the situation effectively.

What About Future Prevention Measures?

Prevention is key to avoiding future water damage. Installing early detection devices, such as water sensors, can provide prompt alerts in case of leaks or flooding. Additionally, regular maintenance checks on plumbing, roofing, and appliances can help minimize the risk of recurring water damage.

What if Insurance is Involved?

If you have home insurance, notify your provider as soon as possible. Many insurance companies work directly with restoration professionals to coordinate repair activities, ensuring that the process is handled efficiently and that you receive the coverage you’re entitled to.

What Role Does Dehumidification Play?

Dehumidification is a critical part of the water damage repair process. Removing excess moisture from the air and affected materials helps prevent mold growth and reduces the risk of structural instability. Proper dehumidification ensures that your home dries out thoroughly, preventing future issues related to lingering moisture.

Long-Term Monitoring Tips

Water damage can be a persistent problem if not addressed properly. To maintain the beauty and integrity of your home, regular monitoring and preventive measures are essential.

Here are some tips to help you stay ahead of potential water damage:

  • Maintain a Moisture-Free Environment: Keep indoor humidity levels low, especially in areas prone to moisture like basements and bathrooms. Investing in a dehumidifier can help maintain optimal humidity levels and prevent mold growth.

  • Monitor Your Plumbing System: Regularly inspect your plumbing for leaks, clogs, or any signs of wear. Early detection of plumbing issues can prevent them from escalating into major water damage problems.

  • Beware of Ceiling Stains: Yellowish or brownish stains on your ceiling are often a sign of a hidden water leak. Don’t ignore these warning signs—investigate the source immediately to prevent further damage.

  • Take Immediate Action: If you notice any signs of water damage, such as damp walls, warped flooring, or musty odors, act quickly. Address the issue right away to prevent it from worsening. When in doubt, contact a professional for an expert assessment.

By adopting these habits, you can make it much easier to maintain your home’s beauty and prevent water damage from becoming a recurring issue.

No. 7

Prevent Future Water Damage

Your home is your sanctuary, and protecting it from water damage is essential for maintaining a comfortable, worry-free living environment.

Here are some proactive steps you can take to safeguard your home against future water damage:

Crucial Inspections

Regular inspections of your plumbing system, roof, and foundation are vital for preventing water damage. It’s always better to be proactive than reactive when it comes to your home’s condition. Catching potential issues early can save you from costly repairs down the road.

  • Gutter Maintenance: A well-maintained gutter system is crucial for directing water away from your home. Clean your gutters regularly to prevent clogs that can lead to water pooling around your foundation, which could cause leaks or flooding.

The Power of Sealing

Ensure that your home is properly sealed to prevent water intrusion. This includes checking windows, doors, and other areas susceptible to leaks. Sealing these areas properly can prevent unwanted moisture from entering your home and causing damage.

  • Waterproof Materials: Whenever possible, opt for waterproof materials in your home’s construction and renovation projects. Waterproof paints, sealants, and flooring can provide an additional layer of protection against water damage.

Proactive Landscaping

Did you know that landscaping can help protect your home from water damage? Grading the terrain around your home to slope away from the foundation can prevent water from pooling near the structure.

  • Plant Deep-Rooted Vegetation: Plants with deep root systems can absorb excess water, reducing the risk of water pooling around your home. This not only enhances the aesthetics of your property but also helps prevent water damage.

Takeaways: Securing Your Haven

Your home’s condition is a reflection of your diligence and care. By promptly detecting water damage, employing effective removal techniques, managing damaged materials, preventing mold growth, and initiating efficient repairs, you can protect your home from long-term harm.

Additionally, long-term monitoring and preventive measures will help you maintain a safe and beautiful living environment.

Remember, water damage doesn’t have to spell disaster. With the right strategies and proactive habits, you can safeguard your home and ensure it remains a comfortable, worry-free sanctuary for years to come.

If needed, don’t hesitate to seek expert help for services like carpet drying or mold remediation. Taking these steps will ensure that your home stays in top condition, no matter what challenges arise.

Looking Home Resources?

Looking to enhance your living space and create a sanctuary that supports your well-being? Explore our home partners who offer a wide range of resources to elevate your home environment. From innovative cleaning products to interior and exterior additions to create a mindful living space, our partners are here to support you on your journey towards a harmonious and nurturing home.


homeHLL x Editor


Rental Kitchen Makeover Ideas: A Landlord's Guide

Upgrading the kitchen of your rental property can help attract high-quality tenants. On top of that, it can help increase your rental income as well. The good thing about rental kitchen upgrades is that you can do it without breaking the bank.


In this article, we share some of the most inspiring and creative rental kitchen makeover ideas that you can easily try in your own space. Whether you are looking to enhance the aesthetic of your kitchen or simply want to create a more functional environment, these ideas will help you transform your rental kitchen into a beautiful and personalized area.

No. 1

Prioritize Durability and Tenant-Friendly Design

When remodeling a rental kitchen, it's important to choose durable materials that can withstand the tenant’s daily use. High-quality finishes also communicate to tenants that they should care for the space.

Look for scratch-resistant countertops like quartz that maintain their sleek look even in high-traffic areas. Stainless steel appliances are also durable through years of use. For floors, water-resistant vinyl plank flooring or tile backsplashes make kitchens rental-friendly.

Design choices should also make the space easy for tenants to clean and maintain. For example, avoid crevices near stoves and sinks that can accumulate grime. Opt for under-sink cabinets with easily removable facades to access pipes when needed.

Consider adjustable shelves and drawers so tenants can customize storage to fit their needs. Additional specialty pull-out shelves and slide-out trash/recycling bins also maximize convenience.

While style is important, functionality and durability ensure your beautiful new kitchen retains its value and doesn't need repairs every time tenants change. Investing a bit more upfront in enduring materials and tenant-focused design pays off long-term.

No. 2

Update Cabinets for a Fresh Look

Kitchen cabinets make a major visual impact, but completely replacing built-in cabinetry can demolish your budget. The good thing is these updates are easy DIY ways to update existing cabinets for a fraction of the price.

Painting tired oak or dated laminate cabinets transforms the whole room with updated color. For a sleek finish, use a bonding primer followed by semi-gloss cabinet paint. White, gray, and navy are sophisticated neutral tones.

Wood stain refinishing can beautifully restore and enhance the appearance of cabinets for as little as $100. Pick an on-trend espresso or whitewash look. This light sanding and re-staining works wonders for cabinets with good bones.

For under $40, you can replace bulky hardware with modern brushed nickel or matte black pulls. Sleek handles give a luxury, high-end look. Add soft-close adapters so drawers shut smoothly.

Crown molding trim along the cabinet tops completes the built-in look for a custom aesthetic. Extend new laminate countertops to reduce seams. Add glossy subway or mosaic tile backsplashes as an inexpensive accent.

Together, these quick and affordable cabinet updates allow landlords to give rental kitchens a magazine-worthy style without needing full-scale remodels. Tenants will be impressed and will care better for renovated spaces they admire.

No. 3

Enhance Countertops Without Replacing

For rental owners, replacing countertops with natural stone or quartz can be costly. Luckily, existing countertops like laminate can be affordably refinished.

Resurfacing kits only cost around $50 and require no special tools. They contain materials to etch laminate for proper adhesion. Simply roll on new paint or acrylic finishes to completely transform the look.

This works best for laminate countertops without major flaws. It allows landlords to upgrade to the look of granite, slate, marble, or other high-end materials. Add coordinating wall tile backsplashes.

Countertop resurfacing is also an eco-friendly way to avoid sending old countertops to landfills. The durable new finish resists scratches, stains, and water damage.

For pennies per square foot, landlords can give rental kitchens the hottest new countertop looks each season. White, two-toned, and patterned finishes modernize dated countertops.

With a little creativity, existing laminate can look like extravagant new stone surfaces. Trusted property managers in Northern Virginia highlight that simple, affordable upgrades can make a significant difference in a rental kitchen’s appeal.


hellolovelyliving-home-kitchen-hardware-upgrade-rejuvenation

Rejuvenation

Elevate your kitchen design with Rejuvenation's exquisite hardware and decor collection - where style meets functionality.


No. 4

Add Modern Hardware for an Instant Refresh

A simple hardware update brings impressive visual impact to rental kitchens for very little money. Swapping outdated brass knobs for on-trend brushed nickel or oil-rubbed bronze pulls makes cabinets look pricier.

Match new poles and handles to existing finishings, like stainless steel appliances. Or create an eye-catching contrast with black hardware against white cabinetry. If the space allows, suggest adding a kitchen island as a versatile feature for tenants, providing extra prep space, dining, or storage.

Look for solid metal construction, especially for frequently used drawers and doors. For an ergonomic grip, consider rounded handles or sleek angled pulls.

Don’t forget to remember often-overlooked areas. Update tired sliding tracks on drawers with easy-grip chrome replacements. To unify the space, install matching racks, rings, and hooks for hand towels.

For $20-50 per handle, new hardware professionally styles out plain rental kitchens. Sophisticated metals like antique copper or brushed gold complement neutral wall colors.

With so many affordable hardware options available, it's one of the savviest upgrades for landlords seeking to elevate kitchens on a budget. The difference between quality handles is incredible.

No. 5

Improve Lighting for Better Functionality and Ambiance

Many outdated rental properties still rely on a single harsh overhead fixture. Modernizing the lighting updates kitchens for better aesthetics and functionality.

Consider adding recessed can lights to brighten main work areas and increase ambient fill. Dimmable LED cans provide long-lasting, energy-efficient illumination. Install a row over the countertop, stove, and sink.

Swapping an old ceiling fixture for a contemporary drum pendant adds stylish task lighting over an eat-in dining table or kitchen island. Choose an adjustable height model to customize.

For extra brilliance, under-cabinet lighting illuminates countertops, which is ideal for food prep. Battery-powered LED strip lights are installed with adhesive backing for a brilliant modern style.

Proper kitchen lighting eliminates shadows and makes tasks like cooking safer. It also lets tenants showcase beautiful new renovations while prepping meals and socializing. Plus, it adds a major style to rentals, allowing landlords to demand higher rental rates.

No. 6

Flooring Options for High-Traffic Rental Kitchens

Kitchen floors see heavy use and abuse in rentals. Traditionally, landlords turned to resilient vinyl tiles, which show dirt and wear over time. Today's market offers better options to withstand tenant turnover.

Waterproof vinyl plank flooring resembles wood but withstands spills and scratches. It clicks together for DIY-friendly installation. For a bright and clean look, glossy porcelain tiles add upscale style even on tight budgets. Lighter tones like white or gray hide grime between cleanings. Add coordinating wall tile backsplashes.

Inexpensive sheet vinyl comes in stone, wood, and abstract looks. Seamless installation is perfect for covering existing floors. High-quality sheets feel cushy underfoot but shed dirt easily.

Consider prep work like floor leveling and proper seam sealing to prevent moisture from seeping below new floors. This protects subfloor integrity.

Affordable new floors let landlords boost rental income through kitchen upgrades without detracting value through damage or leaks in the long term. Protect investments via durable, high-traffic flooring.

Takeaways

Kitchen makeovers are one of the smartest investments that you can make as a rental property owner. Focus on affordable and high-impact upgrades, as mentioned above. It will help you enjoy years of returns from smart renovations.

Looking for Business Resources?

Are you seeking ways to elevate your business to new heights? Dive into the array of resources provided by our esteemed business partners designed to empower your ventures.


business, homeHLL x Editor


Living Room Lighting: The Role Of A Local Electrician

Your living room lighting plays an integral role in the overall ambiance and aesthetics of your space. However, choosing and installing the right types can be challenging without professional help.


With the help of a local electrician, you are guided through various lighting options suitable for your living room. They keep in mind your aesthetic preferences, functionality, and safety concerns.

Trusting a local electrician ensures a bright yet cozy living room ambiance. For more information, visit them at: https://www.thelocalelectrician.com.au/melbourne/

In this article, we share how an electrician’s expertise enables them to handle any complex installation easily while providing you with energy-saving tips that ultimately save on your electricity bills.

No. 1

The Basics of Living Room Lighting

You may think of lighting as merely functional. However, the right lighting can enhance your living room's ambiance and highlight your decor.

Investing in superior lighting puts you in control of brightness levels, color temperature, and even the direction of lights. It's about creating the mood you want.

Relying on local electricians assures professional services; they comprehend the complexities involved and ensure safe installations, replacements, or fixes.

 
hellolovelyliving-home-lighting-types
 

A good electrician will help you identify potential hotspots for each type of lighting. They can also implement dimming functionalities for added versatility.

Your customized lighting plan promises an enlivening visual effect and functionality that enhances your living space. Smarter lighting propels desired moods while fulfilling your needs effectively.

No. 2

Importance of a Local Electrician

Your local electrician plays a paramount role in ensuring your living room is well-lit, comforting, and safe. They design light patterns to enhance room beauty.

Safe Electrical Systems

Professionals avert potential accidents, by setting up reliable systems. Your safety and peace of mind are their priority. Their expertise is irreplaceable in household setups.

Local electricians' regular maintenance helps prevent electrical malfunctions, which can lead to unprecedented hazards. They rectify electrical faults in a timely and efficient manner.

Energy Efficiency

Employ the skills of a local electrician to help optimize your energy consumption. They possess the capability of installing energy-efficient lights for sustainable use.

Besides, they can recommend adjustments to how you utilize your light systems. Decisions made based on their advice can result in significant savings on bills.

Improving Home Aesthetics

Their expertise breathes life into your living rooms through lighting mastery techniques. Skillful installation and balancing of lights can positively impact your room's aesthetics.

Explore more merits of employing a local electrician here. It's an investment you wouldn't regret considering the array of benefits that await you.

No. 3

Room Size and Layout Considerations

Understanding your living room's size and layout can influence your lighting choices immensely. Correctly placed lights enhance room utility, making it more inviting.

Small rooms demand strategic lighting. Instead of a single light source, integrated solutions like table lamps or sconces can help avoid overwhelming brightness.

In contrast, larger rooms have the flexibility for grander lighting options. You could incorporate both ambient lighting and accent fixtures to establish a balanced feel.

  • Prioritize Layered Lighting: This includes task, ambient, and accent lighting. It gives you control over your space's brightness—vital for varied activities.

  • Incorporate Dimmer Switches: They allow flexibility in controlling the illumination level, offering energy efficiency while setting the desired ambiance.

  • Add Controllable Zones: Separating your room into zones enables different lighting arrangements suitable for reading, entertaining, or movie nights.

  • Involve Spotlighting: Highlight artworks or special decor with focused beams of light. It brings attention to these pieces while enhancing the overall appeal.

Your local electrician holds the key to exploring these options. With their expertise, you can transform your living room into a comforting retreat.

Their firsthand knowledge of safety standards ensures that all installations are compliant and secure for everyone in the household.


hellolovelyliving-home-lighting-modern-aesthetic

Lulu and Georgia

Lulu and Georgia provides a thoughtfully curated collection of modern light fixtures perfect for your home, beautifully blending form and function.


No. 4

Layering Light for Functionality

Your living room lighting is not just about brightening the space. It's about achieving functionality and aesthetics. You can accomplish this by layering light.

Light Layering Basics

Most electricians recommend a combination of ambient, task, and accent lighting. This trifecta balances illumination, offers versatility, and creates the right mood.

The process is not as daunting as it seems. Systematically arrange these layers to cater to different needs and occasions in your living space.

Ambient Lighting Aspect

Ambient lighting forms the basic layer. It's the general illumination offering an even spread of light across the room. This forms the backbone of layered lighting.

Typically, your electrician would leverage ceiling lights, wall sconces, or track lighting for ambient light. This provides a consistent base that can be manipulated with other layers.

Focus on Task Lighting

Task lighting, as the name suggests, is specific and functional. Electricians use this to illuminate areas for specific tasks like reading or sewing.

Table lamps, under-cabinet lights, and pendant lights are common examples. Make sure your electrician focuses it directly on work surfaces to avoid shadows.

Accent Lighting for Decor

The final layer is accent lighting. This enhances certain features in your room such as artwork or architectural details, lending a theatrical touch.

You may wish to discuss with your electrician options like picture lights or uplighters creatively positioned for maximum effect. Learn more in this HomeBuilding guide.

No. 5

Energy Efficiency Options

Knowing your lighting options can significantly reduce your energy expenditure in the living room. But how? Here's a little insight.

What are Some Energy-Efficient Light Bulbs?

The recommended bulbs for an energy-efficient home include LEDs, CFLs, or halogen incandescents. They use less electricity and last longer.

Do Energy-Efficient Bulbs Save Money?

Absolutely! You may find they're more expensive initially, but long-term savings from lower energy consumption add up quickly.

How Do I Choose a Light Bulb?

Consider the lumens (brightness), color temperature, and wattage of the bulb. Always consider the light fixtures in your living room too.

Are All LED Lights Energy Efficient?

Typically yes! Most LED lights are quite energy efficient and can significantly reduce your power bills over time.

Can Electricians Help with Energy Efficiency?

Certainly! Local electricians can give advice tailored to your home's specific needs for optimal lighting efficiency—reach out to one today!

You might find this resource on lighting choices that save you money quite helpful as well.

No. 6

Choosing the Right Light Fixtures

You may find the choice of light fixtures overwhelming. The role of a local electrician becomes pivotal to guide you in this process.

Your local electrician understands the nuances of various light fixtures and their suitable placements to create a harmonious lighting scene in your living room.

  • Traditional Chandeliers: They are perfect for creating a central focal point. Their elegant details add to the aesthetic appeal.

  • Wall Sconces: If you desire subtle lighting for some casual reading, your electrician can install wall sconces at an appropriate height.

  • Recessed Lightning: They provide functional yet ambient illumination without any glare. Your local electrician would suggest these for a minimalist design appeal.

  • Pendant Lights: Easily adjustable in height, they provide both task and area lighting, especially near seating regions around couches or armchairs.

Your local electrician helps minimize potential mistakes, like a wrongly hung pendant or an overly bright chandelier, that could impair the overall ambiance.

Their expertise helps you navigate through the broad spectrum of choices and ensures each fixture complements the others, providing a balanced luminosity effect.

No. 7

Balancing Style and Aesthetics

An aesthetically pleasing living room enhances tranquility and comfort. Ideally, your lighting should strike a balance between style and utility.

Lighting fixtures can exude character as they strategically illuminate your space. Your choice of lights can accentuate the room's overall design.

Moreover, the correct lighting placement will emphasize the best features of your living room. So, it's crucial to orchestrate illumination accurately.

In this context, an electrician is indispensable. They are proficient in understanding the balance between light intensity and shadow dynamics.

  1. The Right Kind of Light: Proper layers of ambient, task, and accent lighting create a well-lit space.

  2. Flexible Controls: Using dimmers or dual circuits helps you adjust the brightness to suit different moods or activities.

  3. Energy Efficiency: Besides being cost-effective, energy-efficient lights contribute to environmental sustainability.

You don't need a solution right off the bat when making lighting decisions but consulting with a local electrician can be an enlightening experience.

Their knowledge about different types of light fixtures, suitability factors, and power requirements is invaluable for creating stunning lighting effects that harmoniously amplify aesthetics.

No. 8

Color Temperature and Ambiance

The right color temperature significantly impacts a living room's ambiance. Your local electrician can guide you toward the most suitable choices for your space.

Understanding Color Temperature

Lamps emit colors measured in Kelvin. Lower temperatures produce warm tones, resembling firelight. Higher ones emit cool tones, imitating daylight, enhancing readability.

Your local electrician can recommend specific temperature ranges for your desired atmosphere, enabling an optimal lighting experience.

Choose Right Luminaire

Furthermore, choosing the right luminaire aids in achieving the perfect color temperature. Your electrician can assist in finding fixtures complementing your decor.

Ensure they're installed with appropriate spacing, maximizing their potential. A uniform distribution contributes to balancing the desired nature of illumination.

Adjustable Lighting Options

Embracing dimmers or adjustable lights allows flexibility in managing color temperature. Your electrician can enlighten you on implementing such versatile solutions.

This approach facilitates effortless shifting amongst moods and activities, creating a holistic living environment that caters to every end of the color spectrum.

FAQ on Living Room Lighting

Inadequate lighting in your living room can shroud the space in unwelcome shadows. A local electrician can help alleviate this issue and brighten up the area.

Benefits of Well-Lit Rooms

A properly illuminated room enhances its aesthetic appeal. It becomes a more welcoming and vibrant space, promoting positivity and improving overall mood.

Types of Lighting

Understanding different types of lighting—ambient, accent, and task—is essential. They each play a unique role in elevating a living room's ambiance.

The Expertise of an Electrician

An experienced electrician assesses your room and suggests optimal lighting solutions. Their expertise can effectively transform the atmosphere of your living space.

Choosing the Right Bulb

LEDs, CFLs, or halogen bulbs? Your electrician can guide you to make this often-confusing choice, ensuring energy efficiency and longevity.

Maintenance and Safety

Your electrician ensures safe installation and effective maintenance, providing necessary tips for handling bulbs and light fixtures to prevent any potential hazards.

Takeaways

Now that you're equipped with essential information about living room lighting, it's time to make the best decisions. Even if tasks feel challenging, remember, a professional's assistance is just one click away at The Local Electrician.

Looking For Home Resources?

Looking to enhance your living space and create a sanctuary that supports your well-being? Explore our home partners who offer a wide range of resources to elevate your home environment.


homeHLL x Editor


How To Organize Your Entire Home Without Feeling Overwhelmed

Starting a whole-home organizing project can feel like climbing a mountain. Between overflowing closets, cluttered countertops, and packed storage bins, it’s hard to know where to begin.


But the truth is, a tidy, organized home isn’t as out of reach as it seems. With the right approach and a few smart strategies, you can tackle one area at a time without feeling buried in the process. In this article, we’ll share straightforward steps that will make organizing your home manageable, rewarding, and surprisingly enjoyable.

No. 1

Begin with a Vision and a Game Plan

Start by envisioning how you want each room in your home to feel and function. Picture an organized closet where everything is accessible or a kitchen with clear countertops and a logical flow. Having a vision helps you set practical goals and keeps you motivated.

Once you have a clear vision, create a game plan by dividing the project by rooms or zones. If you find the project overwhelming at any stage, consider reaching out to a professional service like Pretty Neat Professional Organizer.

Professional organizers can provide expert advice, help create a streamlined plan, and offer tools that make the process manageable and personalized. You can even book consultations from the comfort of your home to suit your schedule and needs.

No. 2

Start Small: Tackle One Space at a Time

It’s tempting to dive in and organize everything at once, but this can quickly lead to burnout. Instead, focus on one area at a time, such as a single drawer, closet, or shelf.

Starting small helps build momentum without causing overwhelm. Once you see progress in one area, you’ll feel motivated to move on to the next, tackling the project room by room.

No. 3

Declutter First to Simplify the Process

Before you start arranging items, take the time to declutter. Sorting through and removing items you no longer need or use will make organizing much easier. Decluttering frees up space, reduces visual clutter, and lets you focus on the essentials.

Use this rule of thumb: if something hasn’t been used in the past year, it’s likely not necessary.

Decluttering first also helps you assess what storage solutions you actually need, saving you from purchasing unnecessary organizers or containers.


hellolovelyliving-home-storage-organization

Lulu and Georgia

Elevate your space with Lulu and Georgia's stylish storage and organization solutions—where function meets design.


No. 4

Invest in Versatile Storage Solutions

Good storage solutions can make a significant difference in your organizing efforts. Look for versatile options like stackable bins, clear containers, and modular shelving units that can adapt to various spaces in your home. Clear containers are especially helpful because they allow you to see the contents at a glance, making it easier to keep track of items.

Consider furniture that serves multiple purposes, like ottomans featuring storage compartments or beds equipped with drawers. These options save space and keep items out of sight, promoting a clean and organized look.

No. 5

Implement the “One-In, One-Out” Rule for Maintenance

One effective way to maintain an organization long-term is by adopting the “One-In, One-Out” rule. For every new item you bring into your home, remove one that you no longer need or use.

This habit prevents clutter from building up and ensures you’re not overcrowding your space. It encourages mindful shopping and helps keep your home tidy without needing frequent, large-scale organizing sessions.

No. 6

Schedule Periodic Decluttering

Even after an initial organization project, maintaining a clutter-free home requires periodic upkeep. Set aside time each month or each season to declutter areas that tend to accumulate items, such as closets, pantries, and entryways.

By scheduling regular decluttering sessions, you can prevent clutter from piling up and keep your home organized with minimal effort.

No. 7

Organize High-Use Items by Accessibility

For spaces used frequently, like the kitchen, entryway, or bathroom, organize items based on accessibility. Keep frequently used items within easy reach while storing less-used items in higher or more out-of-the-way spots.

For example, place daily essentials like keys, wallets, and shoes in a designated area near the entryway for quick and easy access.

Creating accessible zones makes daily tasks easier and reduces clutter in high-traffic areas, helping keep your home organized and your routine smooth.

Takeaways

Organizing your entire home can be incredibly satisfying, bringing a sense of calm and order to your space. Taking it step by step makes the process manageable and even enjoyable.

But sometimes, life gets busy, and keeping up with organizing can feel like a challenge. In those moments, seeking professional help can be a great option, ensuring you get the results you want without the added stress.

Looking For Home Resources?

Looking to enhance your living space and create a sanctuary that supports your well-being? Explore our home partners who offer a wide range of resources to elevate your home environment.


homeHLL x Editor


Best Ways To Tackle Clutter Hotspots In Your Home

Does it feel like no matter how often you tidy up, clutter just keeps creeping back in? You stash everything away, and then boom—piles of mail magically reappear on the kitchen counter, and shoes are scattered around the entryway the next day. 


Well, it’s a story of most of us, making us feel like we’re in a never-ending battle with the mess, especially in those “hotspots” where stuff piles up faster than we can blink.

But here’s the deal—getting these trouble spots under control doesn’t have to mean spending hours cleaning every single day. With a few small tweaks, you can tackle the clutter once and for all. 

So, are you ready to reclaim your space? In this article, let’s dive into some easy, practical ways to conquer the mess in your home’s most chaotic corners.

Work with a Professional Organizer for Lasting Results

If you’re ready to tackle your home’s clutter hotspots once and for all, a professional organizer could be your best ally. First things first, they’ll listen to your pain points, understand your goals, and work with your budget to create a plan that fits your needs. 

Whether it’s the kitchen, storage rooms, closets, office spaces, or even garages, experts such as those working at https://organizing-etc.com/ have strategies for every area. During the initial consultation, they’ll assess your space and identify what’s needed to bring lasting order. 
They may even shop for containers and supplies tailored to your style and storage needs, ensuring every item has a designated place. With their guidance, you can establish systems that keep clutter from creeping back, leaving you with a more functional, organized home.

Apart from the professional help, here are some more ways to keep the clutter at bay:

No. 1

Create a Drop Zone by the Entrance

Entryways are notorious for clutter magnets, as everyone tends to drop their bags, shoes, and coats when they enter the door. 

Instead of trying to keep this area spotless, why not work with it? Designate a “drop zone” where these everyday items belong. For example, hooks on the wall are perfect for hanging coats and bags, while a small bench with storage underneath can hold shoes and umbrellas.

So, what should you do? Well, you should consider adding a small table or tray for mail, keys, and other small items that tend to scatter. By setting up a place where everything has a home right as you walk in, you’ll instantly reduce clutter without even trying. 

Plus, it’ll make getting out the door easier and faster since you’ll know exactly where everything is.

No. 2

Use Baskets and Bins to Tame Living Room Clutter

Living rooms are where we relax, but they’re also where clutter likes to gather. A common case scenario is remote controls, books, blankets, and toys all making a mess due to not having a designated place.

Now, what approach should you take? Well, baskets and bins are your best friends in this space, as they keep things organized and out of sight while adding a cozy, stylish touch.

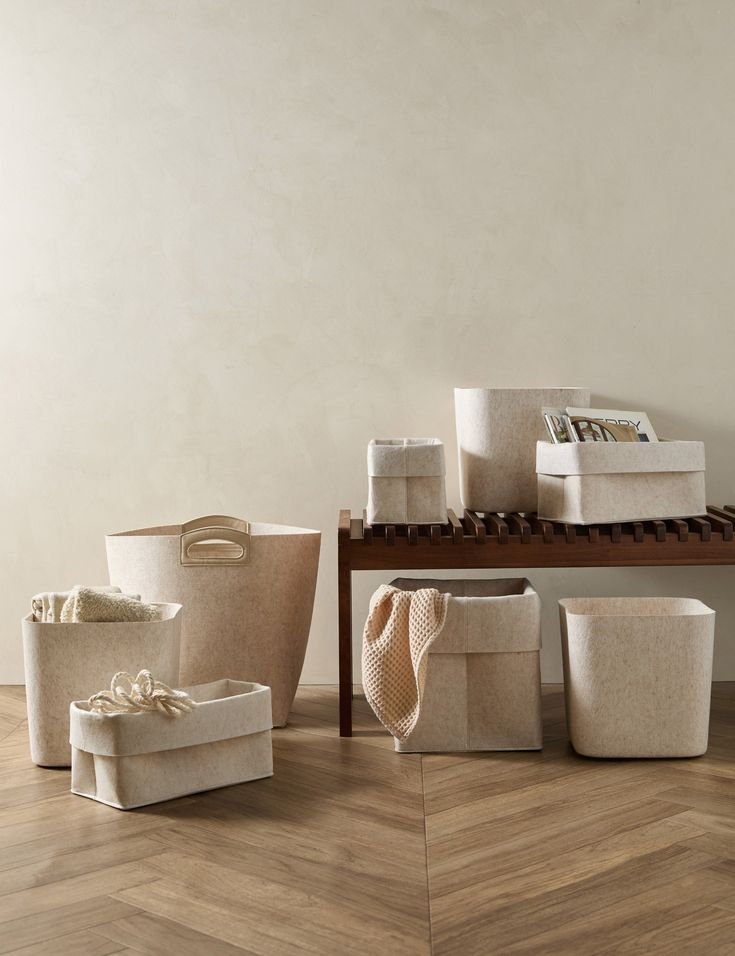
Try placing a large basket next to the couch for blankets and a smaller one for remote controls. For toys, designate one or two bins for easy cleanup. By keeping everything contained, you’ll be able to quickly reset the space after a long day, leaving you with a clutter-free environment that’s ready for relaxation.


hellolovelyliving-home-organization-storage

The Container Store

Your ultimate destination for innovative storage and organization solutions for home or office—offering everything from stylish bins and shelves to custom closet systems.


No. 3

Manage Bathroom Clutter with Smart Storage Solutions

Bathrooms may be small, but they can quickly create litter with toiletries, towels, and makeup scattered across the counter. Fortunately, the solution to this is quite easy.

You can maximize your bathroom space by using clever storage solutions like over-the-door organizers, drawer dividers, and wall-mounted shelves. Simply store daily-use items in easy-to-reach spots and tuck away less frequently used products in cabinets or higher shelves.

In addition to this, consider investing in clear bins or trays for the cabinet under the sink, making it easy to organize products and keep them accessible. Group items by category—like skincare, hair products, or cleaning supplies—to avoid rummaging through clutter.

Believe it or not, with these few storage tweaks, your bathroom will feel more spacious and streamlined, making your morning routine a breeze.

Takeaways

Keeping clutter at bay doesn’t require hours of daily cleaning or endless tidying up. By setting up simple systems and creating designated spaces, you can significantly improve those clutter hotspots that seem impossible to keep under control. Whether you start with professional organizer services, add storage solutions, or get creative with baskets, every step will bring you closer to a calm, orderly home no matter the season.

Looking For Home Resources?

Looking to enhance your living space and create a sanctuary that supports your well-being? Explore our home partners who offer a wide range of resources to elevate your home environment.


homeHLL x Editor


The Versatility Of Aluminum Fencing For Any Landscape

When it comes to choosing fencing for a property, people often seek something durable, stylish, and adaptable to various environments. Aluminum fencing ticks all these boxes, offering a versatile solution for residential and commercial properties alike. In this article, let’s explore why aluminum fencing is one of the best options for virtually any setting.


No. 1

A Durable Choice for All Climates

Although wood can be durable in certain conditions, it won’t last long when it’s constantly battered by the elements. Aluminum, on the other hand, resists corrosion and is more durable compared to wood. This makes it an ideal choice for properties in various climates, including those with high humidity, frequent rainfall, or even snowy winters.

Aluminum doesn’t warp or degrade when exposed to moisture, and it holds up well in both hot and cold conditions. Reliable suppliers such as GreatFence have aluminum fences that don't need frequent repairs or replacements.

No. 2

Wide Range of Style Options

Aluminum fencing offers a surprisingly broad array of design choices. Whether you’re looking for a classic wrought-iron look or something sleek and modern, aluminum can mimic various styles without the heavy price tag or the upkeep. 

Many manufacturers provide options that range from simple and understated designs to ornate styles with decorative elements like finials, scrolls, and arched tops. This range of customization options allows homeowners to choose a style that reflects their aesthetic preferences and complements their property. Aluminum fences also come in different colors, typically with neutral tones like black, bronze, or white, allowing them to blend seamlessly into different types of landscapes.

No. 3

A Perfect Fit for Sloped or Uneven Terrain

Traditional fencing materials can be difficult to install on uneven or sloped ground, often requiring extra work and materials. Aluminum fencing, however, is a popular choice for properties with varying topographies because of its ability to “rack” or adjust to the contours of the land. This means the fence can be installed to follow the slope without gaps at the bottom, maintaining both its appearance and function. 


hellolovelyliving-home-outdoor-exterior-decor-hardware

Rejuvenation

Rejuvenation believes in the power of thoughtful design - explore their extensive range of outdoor hardware, including stylish accessories that add character and charm to your home's exterior.


No. 4

Security Without Sacrificing Style

For those who prioritize security, aluminum fencing offers both peace of mind and aesthetic appeal. Aluminum fences come in different heights and styles, providing a barrier that deters trespassers while still looking visually appealing.

Aluminum is a strong material that withstands force, and many styles can be fitted with secure, self-locking gates. This makes it an ideal choice for homeowners with pets, children, or those who simply want an added layer of security around their property. 

No. 5

Environmentally Friendly and Sustainable

For those conscious of their environmental impact, aluminum fencing is a responsible choice. Unlike wood, which requires the harvesting of trees, aluminum is often made from recycled materials and is itself recyclable at the end of its life.

Its long-lasting durability means fewer resources are used over time for repairs or replacements. Choosing an aluminum fence contributes to sustainable practices while still offering the beauty and functionality people want for their outdoor spaces.

No. 6

Versatile for Both Residential and Commercial Use

Aluminum fencing is not just for homes—it’s also widely used for commercial properties. Its combination of security, style, and durability makes it suitable for a wide range of applications.

From securing office buildings to marking property boundaries in public parks, aluminum fencing is adaptable to various needs and environments. Many business owners choose aluminum because it provides a professional appearance and requires minimal maintenance, reducing upkeep costs over time. 

No. 7

Cost-Effective Over the Long Term

Although the initial cost of aluminum fencing can be slightly higher than some other materials, it quickly becomes a cost-effective option over the long term. The minimal maintenance requirements, combined with the fence’s durability, mean that you’re less likely to incur costs for repairs, repainting, or replacements. Aluminum fencing’s ability to withstand various weather conditions and its resistance to rust or decay add to its longevity. 


Takeaways

Aluminum fencing stands out as a versatile, attractive, and practical choice for any landscape. With options that suit diverse aesthetic preferences, the ability to withstand harsh climates, and minimal maintenance requirements, aluminum fencing appeals to a wide range of property owners. 

Looking For Home Resources?

Looking to enhance your living space and create a sanctuary that supports your well-being? Explore our home partners who offer a wide range of resources to elevate your home environment.


homeHLL x Editor


How To Regrout Tile Floor And Refresh Your Space

Over time, grout lines between tiles can become stained, cracked, or simply dull, making the entire floor look worn. Regrouting your tile floor is an effective way to refresh the space, restore its original appeal, and protect the tiles from damage. In this article, we share how to regrout your floor step-by-step, from gathering tools to sealing the final result.


No. 1

Gather Your Tools and Materials

To get started, make sure you have everything you need:

  • Grout removal tool or utility knife

  • Vacuum or brush for cleaning grout lines

  • New grout (sanded or unsanded, based on your tile)

  • Grout float or rubber squeegee

  • Sponge and bucket of water

  • Grout sealer (optional but recommended)

Selecting the right type of grout is essential for durability. For floor tiles with wider gaps (over 1/8 inch), go with sanded grout, which is stronger and resistant to cracking. For narrower gaps, unsanded grout will work fine. For inspiration on designs and applications, explore more tile flooring ideas.

No. 2

Remove the Old Grout

Start by removing the existing grout to create a clean foundation for the new application. Use a grout removal tool or utility knife to scrape away the old grout carefully.

  • Hold the tool at an angle and work slowly to avoid damaging the edges of the tiles.

  • Remove grout from all the lines evenly, ensuring a uniform depth across the floor. Aim for about 1/8 inch deep to provide ample space for the new grout.

  • Use a vacuum or brush to clear out any dust and debris from the gaps.

Taking your time here prevents tile damage and makes the regrouting smoother.

No. 3

Mix the New Grout

Follow the package instructions to mix your grout. If you’re using powder grout, add water gradually, stirring constantly, until the consistency resembles smooth peanut butter.

When mixing, avoid overwatering as it weakens the grout. Let the mix rest for a few minutes before applying, as it helps remove air bubbles and makes the grout easier to spread.


hellolovelyliving-home-hard-floors-cleaner-mop

Aircraft

Hard floor cleaners that deliver powerful and safe cleaning and polishing all in one.


No. 4

Apply the New Grout

With the grout prepared, use a grout float to spread it evenly across the tile floor.

  • Hold the float at a 45-degree angle to push the grout into the lines.

  • Move diagonally across the tiles to fill gaps fully.

  • Go over each line a few times to ensure the grout reaches the bottom of each space.

After spreading, use the float to scrape off any excess grout from the tile surfaces. This makes cleaning easier and leaves the lines looking even.

No. 5

Clean the Tile Surface

Once you’ve applied grout to all the lines, wait about 15–20 minutes (or follow package instructions) to let it set slightly before cleaning. Don’t wait too long, or the grout will harden and become difficult to remove from the tile surfaces.

Use a damp sponge to wipe the tiles in a circular motion, clearing away grout haze while avoiding pressure on the grout lines. Rinse the sponge regularly and keep it slightly damp to avoid pulling grout out of the lines.

No. 6

Cure and Seal the Grout

Let the grout cure for the recommended time, usually around 24 hours. This drying period is critical for a strong, lasting finish.

Once cured, apply a grout sealer to protect the lines from stains, water damage, and mildew. Some sealers come with an applicator tip that allows you to run it along the lines without spilling onto the tiles.

Allow the sealer to dry fully according to its instructions before walking on the floor or washing it.

Tips for Maintaining Your New Grout

Regular cleaning and occasional resealing will extend the life of your grout.

Here are a few tips to keep it looking fresh:

  • Use a neutral cleaner: Avoid harsh chemicals that can wear down grout. Stick to pH-neutral cleaners for routine maintenance.

  • Wipe up spills quickly: Spills, especially liquids like coffee or juice, can stain grout lines. Clean spills as soon as they happen to prevent stains.

  • Consider resealing annually: If your floor sees heavy use, an annual resealing will keep your grout lines more resistant to stains and water damage.

A consistent maintenance routine can greatly extend the life and appearance of your grout, keeping it clean and fresh. Simple practices like gentle cleaning solutions and resealing, when needed, will protect your work and help avoid costly repairs in the future.

Takeaways

Regrouting can instantly refresh your tile floor, bringing back the clean look you remember. With a few tools, a careful approach, and some patience, this project can significantly boost the appearance of your space. Plus, regular maintenance afterward will keep your grout lines looking new for years. Give your tile floor a solid finish, and enjoy the result!

Looking For Home Resources?

Looking to enhance your living space and create a sanctuary that supports your well-being? Explore our home partners who offer a wide range of resources to elevate your home environment.


homeHLL x Editor


Creating A Sleep Sanctuary: Choosing The Right Mattress And Bedding

When you think about how important sleep is, it's amazing how often we overlook the tools that help us get a good night's rest. But quality sleep starts with the basics—choosing the right mattress and bedding. In this guide, we walk you through key factors to consider, offering tips on how to create the sleep environment you deserve. Ready to make your bed a true sanctuary?


No. 1

Start with the Mattress: Size is Everything

Before getting into materials or firmness, think about the most basic aspect: size. Your mattress size isn’t just a preference—it directly impacts your sleep quality, comfort, and space in the room.

Here's a breakdown of the different mattress sizes Australia and how to choose the right size for your needs:

  • Single or Twin – Ideal for one person, compact, and space-saving, this size works well for solo sleepers, especially in small rooms.

  • Double – Slightly wider, it’s suitable for a single adult who wants extra room or a couple in a pinch.

  • Queen – A comfortable size for couples, balancing roominess with space economy.

  • King – For those who want room to sprawl or share the bed with a partner and maybe a pet. Great for larger rooms.

  • Super King – The ultimate luxury choice, offering ample space for couples who like plenty of personal room.

Choosing the right size isn’t just about what fits in your room; it’s about how you sleep. Are you a sprawler? Do you share the bed? Consider these questions carefully, as mattress size sets the foundation for everything else.

No. 2

Finding the Perfect Firmness

Once you know the size, let’s talk about firmness. Your mattress’s firmness level can make or break your comfort, so getting this right is crucial.

Here’s a look at the general options:

  • Soft – Ideal for side sleepers, soft mattresses cushion the shoulders and hips, making it easier to keep your spine aligned.

  • Medium – A middle-ground firmness that suits a variety of sleep styles, especially combination sleepers who switch between positions.

  • Firm – Perfect for back and stomach sleepers who need extra support for spinal alignment.

Testing out different firmness levels can be incredibly insightful. When possible, visit a store and lie down in your usual sleep position for a few minutes to see how it feels. A mattress shouldn’t feel too hard or too soft, but rather a comfortable medium that supports your body.

No. 3

Material Matters: Choosing the Right Mattress Type

The material of a mattress contributes heavily to its feel, support, and durability.

Here’s a quick guide to common mattress types and what they offer:

  • Memory Foam – Known for its contouring and pressure relief, memory foam is a top choice for those with joint pain or specific pressure points. It also absorbs movement, so it’s great for light sleepers sharing a bed.

  • Innerspring – Traditional yet popular, these mattresses are bouncy and breathable, making them ideal for those who prefer a firm feel and want to avoid feeling too “sunk in.”

  • Hybrid – A mix of foam and innerspring, hybrid mattresses offer both support and contouring, a good all-around choice for various sleep styles.

  • Latex – Made from natural or synthetic rubber, latex mattresses are supportive, bouncy, and eco-friendly, plus they’re naturally hypoallergenic.

Each material has its pros and cons, so it’s about balancing what’s important to you. Are you a hot sleeper? Consider a breathable innerspring or latex. Need pressure relief? Memory foam might be your best bet.


hellolovelyliving-home-bed-thermoregulating-blanket

Hilu

Ensure you and your loved ones enjoy a deeper, more restful sleep with the only blanket that actively adapts to keep your temperature perfect


No. 4

Bedding Essentials: What You Need for Comfort and Style

Now that we’ve covered the mattress, let’s shift our focus to bedding. Good bedding does more than add aesthetic appeal; it impacts your sleep quality, temperature control, and even the durability of your mattress.

Here are the key elements to consider:

Pillows: Support for Every Sleeping Style

Pillows are essential for maintaining proper alignment from head to spine, so choosing the right type is more important than you might think.

  • Side Sleepers – Look for firm, high-loft pillows that fill the gap between your head and shoulder, keeping your spine in line.

  • Back Sleepers – A medium-loft pillow provides just the right amount of support, gently elevating your head without pushing it forward.

  • Stomach Sleepers – Opt for a low-loft or soft pillow, so your head remains close to the mattress and doesn’t strain your neck.

Switching up your pillow can make a big difference, especially if you’ve been using the same one for years. Remember, pillows wear out over time, so replacing them every 1-2 years is recommended.

No. 5

Sheets and Blankets: Balancing Comfort with Temperature Control

Choosing sheets may seem simple, but fabric and weave can change your sleeping experience significantly.

  • Cotton – Breathable, durable, and soft, cotton sheets are a year-round staple, providing a good balance of warmth and airflow.

  • Linen – Lightweight and moisture-wicking, linen sheets are ideal for warmer climates or those who sleep hot.

  • Microfiber – Often more affordable, microfiber sheets are soft and warm, though they’re less breathable than natural fibers.

  • Flannel – If you’re in a colder climate, flannel sheets offer cozy warmth, ideal for winter months.

  • Thermoregulating - These innovative blankets utilize advanced graphene fabric technology to regulate your temperature.

Remember, bedding isn’t just about comfort but also temperature control. Light layers allow you to add or remove as needed, helping you stay comfortable regardless of the season.

No. 6

Mattress Protectors: A Simple Step to Extend Your Mattress Life

Finally, let’s talk about mattress protectors—a commonly overlooked element. Mattress protectors shield your investment from spills, stains, and allergens, and they’re generally machine washable, making maintenance simple. Think of it as a barrier that not only keeps your mattress cleaner but also extends its life.

Takeaways

With the right mattress, pillows, and bedding essentials in place, what’s left? Your sleep environment should reflect you. Consider calming colors, blackout curtains, and a consistent temperature to truly make your bed a sanctuary. Small touches like a quality throw, soft lighting, and even the scent of lavender can help set the mood for rest. Creating a sleep sanctuary isn’t just about aesthetics; it’s about creating a space that welcomes relaxation and promotes quality sleep.


Looking For Home Resources?

Looking to enhance your living space and create a sanctuary that supports your well-being? Explore our home partners who offer a wide range of resources to elevate your home environment.


homeHLL x Editor


Dining Chair Styles: How To Pick The Right One For You

Upgrading your dining space can be as simple as selecting the right dining chairs—ones that not only look great but also offer comfort. While factors such as size, fabric, and material are important, style is often the most crucial element.


Thankfully, with the wide variety of dining chairs available, you’re sure to find a chair that complements your interior design. In this article, we explore some of the most popular dining chair styles and tips on how to choose the right one for your space.

No. 1

Modern Contemporary

Modern contemporary dining chairs are defined by their minimalist designs and clean lines, offering a sleek yet elegant look. These chairs are often crafted from materials such as metal, plastic, or wood, and many are upholstered for added comfort.

However, you can also find options with plain acrylic or metal seats. If you’re aiming for a chic, modern dining space, this style is ideal. The simplicity of modern contemporary chairs ensures they blend seamlessly into a variety of interiors, making them a versatile choice.

No. 2

Eclectic

For those who love to mix and match, eclectic dining chairs are a perfect fit. This style isn’t confined to a single design; instead, it embraces a fusion of different textures, materials, and aesthetics to create a personalized, one-of-a-kind look.

Eclectic dining spaces allow you to express your creativity, but they can be tricky to pull off. The key is to maintain a balance between contrasting elements, ensuring the overall look feels cohesive rather than chaotic.

No. 3

Scandinavian

Scandinavian dining chairs are the epitome of form meeting function. Known for their simplicity and clean lines, these chairs are typically made from light-colored woods like beech or oak. Their sleek, uncluttered appearance makes them a popular choice for a wide range of interiors, from modern contemporary homes to more traditional or even eclectic settings. Scandinavian chairs are especially well-suited for informal dining areas, where their understated elegance can shine.


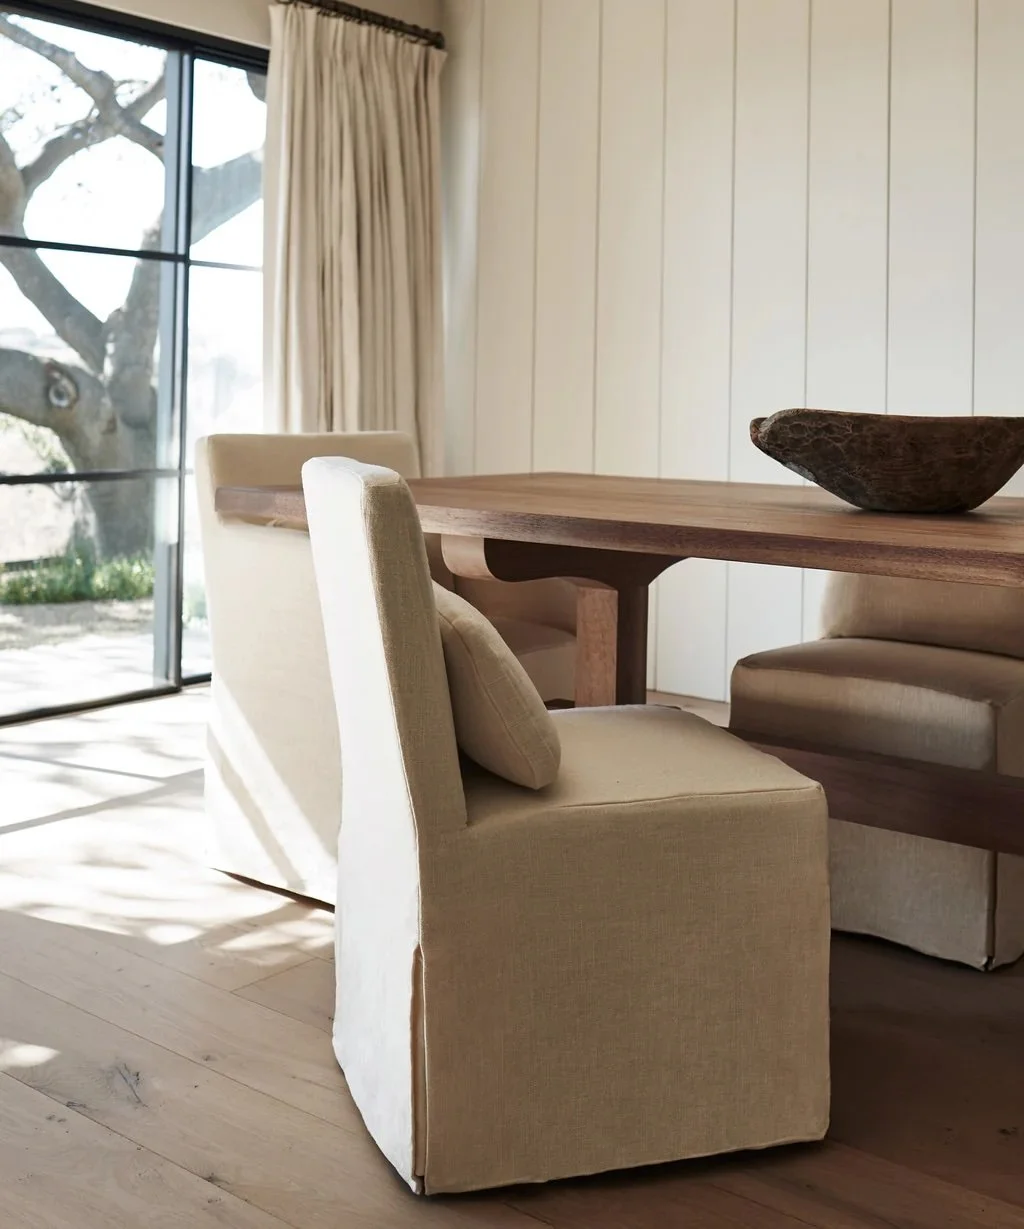
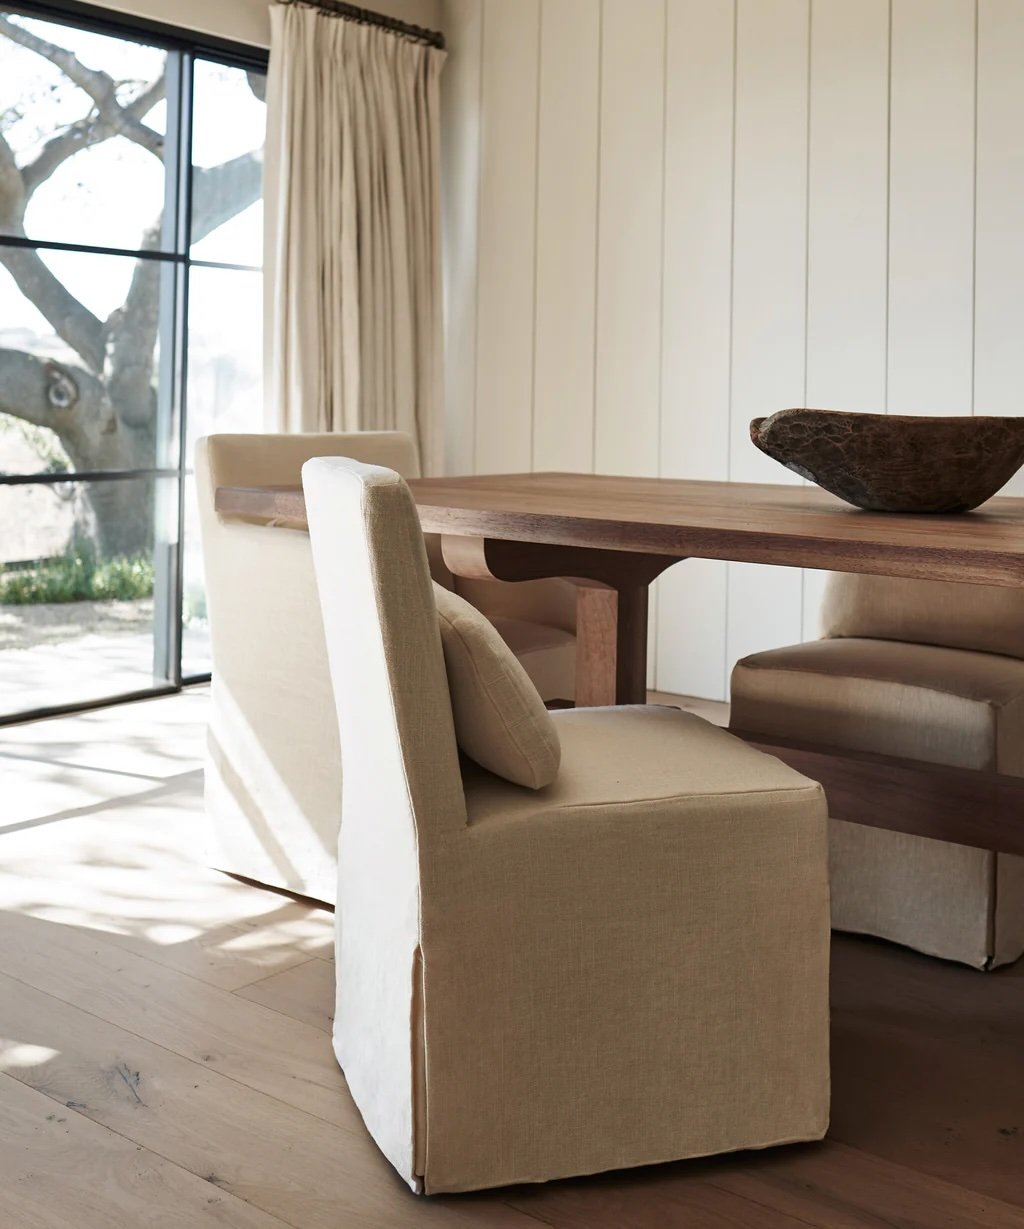
Jenni Kayne

Elevate your living space with Jenny Kayne Home—where timeless design meets effortless California-inspired comfort. Create a home that feels as good as it looks.


No. 4

Industrial

If you’re looking to add an edgy, urban vibe to your dining space, industrial dining chairs are the way to go. These chairs are characterized by their raw, utilitarian design, often featuring materials like metal and distressed wood.

Inspired by warehouse and factory aesthetics, industrial chairs bring a rugged charm to modern or loft-style interiors. Their tough, no-nonsense appearance can also serve as a striking contrast in more refined spaces, adding an unexpected twist.

No. 5

Traditional

For a more formal or sophisticated dining room, traditional dining chairs are an excellent choice. These chairs are often plush and feature elaborate woodwork, intricate details, and rich upholstery.

Their ornate design makes them perfect for classic, elegant dining spaces. However, traditional chairs can also be integrated into modern interiors when paired thoughtfully, creating a unique blend of old and new that adds depth and character to your dining area.

No. 6

Rustic

Rustic dining chairs bring a sense of warmth and coziness to any dining space. Typically made from natural materials like wood, rattan, or wicker, rustic chairs often feature weathered finishes and earthy tones.

These chairs are perfect for creating a welcoming, laid-back atmosphere, making them a great option for farmhouse-style or nature-inspired interiors. Their vintage charm can also be a beautiful complement to more contemporary settings, adding texture and warmth.

No. 7

Mid-Century Modern

For those who appreciate retro-inspired design, mid-century modern dining chairs are a timeless choice. These chairs are characterized by their slim profiles, organic forms, long tapering legs, and bold colors.

Their sleek, minimalist design pays homage to mid-20th-century trends, making them perfect for both classic and modern dining rooms. Mid-century modern chairs work especially well in spaces with minimalist decor, where their clean lines and vibrant hues can take center stage.

How to Choose the Right Dining Chair

When selecting the perfect dining chair for your space, consider the following factors:

  • Style Compatibility: Ensure the chair style complements your overall interior design. For example, if your dining room has a modern vibe, opt for contemporary or Scandinavian chairs. For a more eclectic or rustic space, mix and match styles and materials.

  • Comfort: While style is important, comfort should never be overlooked. Choose chairs with ergonomic designs and, if possible, cushioned seats for added comfort during long meals.

  • Material: The material of the chair should align with both your aesthetic preferences and practical needs. For example, upholstered chairs add a touch of luxury but may require more maintenance than wooden or metal options.

  • Size and Proportion: Make sure the chairs are proportionate to your dining table and room size. Oversized chairs can overwhelm a small space, while too-small chairs may look out of place in a larger room.

  • Durability: Consider the durability of the materials, especially if the chairs will be used frequently. Solid wood and metal chairs tend to be more durable than some upholstered or plastic options.

Takeaways

By carefully considering these factors and exploring different styles, you can find the perfect dining chairs to elevate your space. Whether you prefer the sleek lines of modern contemporary designs or the cozy charm of rustic styles, the right chair can transform your dining room into a stylish and comfortable gathering place.

Looking For Home Resources?

Looking to enhance your living space and create a sanctuary that supports your well-being? Explore our home partners who offer a wide range of resources to elevate your home environment.


homeHLL x Editor


When To Call For Blocked Drain Cleaning And Repair Service?

You finish rinsing the shampoo from your hair and notice the tub water is draining slower than usual. Uh oh, could this be the first sign of a clogged drain? Blocked drains are a common household issue that can escalate into a serious problem if left unattended.


Knowing when to handle the situation yourself versus calling professional drain cleaning and repair technicians, like The Relining Company, can save you time, money, and a lot of frustration. In this article, we explore the key signs that indicate it’s time to call in the pros for drain cleaning and repair services.

No. 1

Water Backing Up

If water begins to accumulate and overflow instead of draining, that’s a major red flag. Standing water is a clear sign of an advanced clog. Continuing to use the drain in this condition can lead to more severe blockages and potential water damage.

Professionals have high-powered augers and other specialized tools to clear trapped debris, restoring proper water flow. Don’t wait until the water has nowhere to go—address the issue before it gets worse.

No. 2

Slow Draining

A sluggish drain is often the first sign of a developing clog. If water is draining noticeably slower than usual, it’s likely that a partial blockage is forming inside your pipes. This is the perfect time for preventative cleaning to remove the obstruction before it worsens. Taking early action can prevent a minor inconvenience from turning into a major plumbing headache.

No. 3

Gurgling Noises

Strange gurgling sounds coming from your drains are another warning sign of a blockage or air pocket within your pipes. The turbulence caused by these blockages disrupts the smooth flow of water.

Professionals use pressurized water jets to thoroughly clean the interior of pipes, eliminating blockages and restoring proper drainage. Don’t ignore these noises—they’re often the first audible sign of a developing problem.


hellolovelyliving-home-improvement-supplies-tools

LOwe’s

Transform your home with confidence! From tools to materials, Lowe’s has everything you need to tackle your next project.


No. 4

Unusual Odors

If you notice foul sewage odors coming from your drains, it’s a sign that something is wrong. Blockages can trap decaying debris and bacteria, resulting in unpleasant smells.

A thorough professional drain cleaning can eliminate the source of the odor and freshen up your plumbing system. Simply masking the smell with air fresheners or cleaners won’t solve the underlying issue.

No. 5

Visible Mold Growth

Spotting mold around drain openings is a clear indication that water is backing up, creating a damp environment where mold thrives. Mold not only damages your home but can also pose serious health risks.

Once the drain is cleared, a professional will need to apply disinfecting treatments to remove hazardous mold and prevent it from returning. Simply scrubbing the surface mold won’t address the root cause—fixing the drain is essential.

No. 6

Multiple Clogged Drains

If more than one drain in your home is sluggish or clogged, the issue likely lies in the main sewer line. Tree roots, debris, or other obstructions in the main line can affect all the drains in your house. Instead of trying to fix each drain individually, it’s best to call a professional for sewer cleaning to tackle the problem at its source.

No. 7

Inaccessible Location

Some drains are located in hard-to-reach places, such as underground, inside walls or ceilings, or beneath tubs and sinks. Attempting to fix these drains on your own can be risky and may cause more harm than good.

Professionals have specialized equipment, such as snakes and cameras, that can navigate these tricky areas without damaging your home. Avoid the risk of injury or further damage by leaving these repairs to the experts.

No. 8

Recurring Clogs

If a drain keeps clogging repeatedly, it’s a sign that there’s a deeper issue at play. Damaged or misaligned pipes may be causing frequent blockages.

In this case, snaking the drain over and over again will only provide temporary relief. A professional can diagnose the root cause of the problem and recommend a long-term solution, whether it’s repairing or replacing the damaged pipes.

No. 9

Complete Drain Failure

A completely non-functional drain, accompanied by standing water, foul odors, and even leaks, requires immediate professional attention. This is a sign of a total blockage, and the longer you wait, the higher the risk of water damage to your home.

In these cases, the drain will need urgent cleaning, restoration, or even replacement. Don’t hesitate—complete drain failure won’t resolve itself and can lead to costly repairs if ignored.

Takewaways

As you can see, certain signs clearly indicate when it’s time to call in the professionals. Trust the experts for efficient, long-lasting solutions to stubborn clogs and blockages.

By taking action early, you can prevent minor issues from escalating into emergency plumbing disasters. Don’t wait until it’s too late—protect your home and your peace of mind by calling in the pros when you notice these warning signs.

Looking For Home Resources?

Looking to enhance your living space and create a sanctuary that supports your well-being? Explore our home partners who offer a wide range of resources to elevate your home environment.


homeHLL x Editor


When Is It Time For A Switchboard Upgrade?

The switchboard (or breaker panel) is the central hub connecting your home to the main electricity supply. Experts like Easther Electrical agree that this essential equipment directs power to all the circuits and appliances in the house. Upgrading an outdated electrical switchboard can provide much-needed improvements in safety, capacity, and reliability. In this article, we share signs it may be time for a switchboard upgrade.


What is a Switchboard?

First, let’s review what a switchboard is and does. The switchboard, commonly called a breaker box or service panel, is normally located in the basement, garage, or utility area.

This metal cabinet houses two key components:

  • Circuit breakers: Switches that regulate power to individual circuits and cut flow during overloads.

  • Busbar: Thick wires that deliver mains electricity into the breaker panel.

The switchboard is the central distribution point linking your home’s needs to the main power supply. An upgrade provides an opportunity to assess and enhance this connection.

Sign no. 1: Frequent Circuit Breaker Tripping

Circuit breakers trip as a safety mechanism when outlets or appliances in that circuit try to draw more power than the system can handle. This causes the breaker to “trip” or switch off.

If you find yourself constantly resetting tripped breakers for certain circuits, it likely indicates that the circuit is overloaded by additional electrical demands. Upgrading the switchboard provides extra capacity.

Sign no. 2: Not Enough Circuits for Devices

With most homes now containing far more wired devices than decades ago, inadequate circuit capacity is a common issue. If you’re constantly needing extension cords or power strips because available outlets are already overloaded, upgrading the switchboard can help by adding more dedicated circuits.

Sign no. 3: Buzzing Noises or Flickering Lights

An outdated switchboard may struggle to provide steady, reliable power to all your home’s lighting, electronics, and motors. Excessive voltage drops can cause buzzing from devices or flickering lights when multiple items run simultaneously. This points to an underpowered switchboard.


hellolovelyliving-home-lifestyle-tech-gadgets

Breo Box

Discover new tech gadgets to recharge your lifestyle with Breo Box - a quarterly box full of vetted, useful tech & gadgets you’ll use ever day.


Sign no. 4: Old Fuse Box

If your home still has an antique fuse box made of porcelain or Bakelite materials instead of modern circuit breakers, safety issues make an upgrade urgent. Old fuse systems lack the capacity to meet today's power demands. Replacing it with a current breaker panel enhances protection.

Sign no. 5: Faulty or Corroded Components

Faulty internal contacts, corroded connectors, or damaged insulation expose users to dangerous arc flashes and electrocution risks. If your switchboard shows any cracked, corroded, pitted, or damaged components, discontinue use immediately and call an electrician to assess replacement options.

Sign no. 6: No Room for Expansion

Upgrades like air conditioning, added wiring circuits, or electric vehicle chargers require installing additional breakers. If your existing switchboard is full with no open slots, future expansions or improvements become impossible. A larger panel provides flexibility.

Sign no. 7: Age Over 40 Years

Even functioning vintage switchboards degrade over time. Industry experts recommend proactively replacing any electrical panel over 40 years old. Newer equipment incorporates safer designs and premium materials for enhanced longevity and performance.

Takeaways

While scary, upgrading an aging switchboard provides an opportunity to assess electrical needs, energy-efficiency, and customize a system offering ample, reliable power for modern lifestyles. Consult electricians to weigh replacement costs against improved safety, capacity, and peace of mind.

Looking For Home Resources?

Looking to enhance your living space and create a sanctuary that supports your well-being? Explore our home partners who offer a wide range of resources to elevate your home environment.


homeHLL x Editor


How To Find The Right Granny Flat Builder On A Budget

Installing a granny flat can be a smart investment, providing extra living space for family members or generating rental income. However, quality construction and materials come at a price, and budget limitations can make the process challenging.


So, how do you find an affordable builder who still delivers high-quality work? This guide will walk you through the top tips for choosing the ideal granny flat builder, like Granny Flat Solutions Hunter Valley, while keeping your project within budget.

A granny flat, also known as a secondary suite, is a self-contained dwelling located on the same property as your primary home. These versatile units offer homeowners flexibility, additional living space, and income potential. Let’s explore some strategies to help you keep your granny flat project economically feasible without compromising on quality.

No. 1

Get Multiple Quotes

One of the most important steps in finding an affordable builder is to get multiple quotes. Don’t settle for the first builder you come across.

Reach out to several companies and request quotes for the full project, including design, materials, and construction costs. By comparing prices, you can get a better understanding of what’s realistic in your area and choose a builder offering competitive rates.

To ensure accurate comparisons, provide each builder with the same design, materials, and timeline. Cast a wide net and aim to get at least three formal quotes. This way, you’ll have a clearer picture of the market and can make an informed decision.

Key Tip: Be consistent with the information you provide to each builder to ensure you're comparing apples to apples.

No. 2

Ask About Display Units

Some builders offer move-in-ready granny flats that were previously used as display models. These units, while basic, can offer significant savings compared to custom builds. Builders often deeply discount display units after they’ve served their purpose at expos or open houses.

Ask builders if they have any discounted display stock available that could suit your needs. While these units may not have all the bells and whistles of a custom build, they can be a cost-effective option if you’re flexible on design.

Key Tip: Display units can be a great way to save on construction costs while still getting a high-quality, pre-built structure.

No. 3

Look for Referral Discounts

Many builders offer referral discounts for clients who were referred by past customers. If you found your builder through a referral, don’t hesitate to ask about any potential savings. Builders often reward referrals with percentage discounts or fixed dollar amounts off the total cost.

A simple question about referral savings could lead to significant cost reductions, so don’t be shy about inquiring.

Key Tip: Ask for referral discounts if you were introduced to the builder through a previous client—this could save you a substantial amount.


Houzz

Make your home project a reality. Find inspiration, products and the pros to make it happen - all in one place.


No. 4

Evaluate Materials Packages

Most builders offer tiered materials packages, ranging from basic to luxury. To stay within budget, opt for mid-range finishes that offer a balance between quality and cost. You can always upgrade individual features later if needed, but avoid overspending on extras that don’t add significant value or improve livability.

Focus on materials that are durable and functional, rather than splurging on premium finishes that may not be necessary for your granny flat’s purpose.

Key Tip: Resist unnecessary upgrades that won’t significantly enhance the value or functionality of your granny flat.

No. 5

Consider Pre-Fabricated Kits

Pre-fabricated granny flat kits are another cost-effective option. These kits are assembled in a factory and then transported to your site for final construction. Because much of the work is done off-site, pre-fab kits can significantly lower construction costs compared to fully custom builds.

When considering pre-fab kits, make sure to choose an accredited firm with a solid reputation. Contact past customers to verify the quality of the product and ensure that the company delivers on its promises.

Key Tip: Pre-fab kits can save you money on labor and materials, but always verify the quality before committing.

No. 6

Inquire About Sale Specials

Timing can play a big role in saving money on your granny flat project. Builders often run seasonal promotions or offer discounts on overstocked items. Ask if the builder has any upcoming sales or promotions that could help you save on construction or materials.

By carefully planning your project timeline, you may be able to take advantage of off-peak discounts or end-of-season sales. A little flexibility in timing could lead to big savings.

Key Tip: Don’t be afraid to ask about current sales or seasonal deals—timing your project right could result in significant cost reductions.

No. 7

Get Creative with Design

Sometimes, the best way to save money is by simplifying your design. A more compact floor plan, a smaller overall size, or opting for an attached granny flat instead of a detached unit can all reduce costs significantly. Focus on your essential needs and prioritize functionality over luxury.

Consider a minimalist design with multi-use spaces to maximize every square inch. By being creative with your layout, you can achieve a stylish, functional granny flat without breaking the bank.

Key Tip: Simplify the design to reduce costs—focus on what you truly need rather than what you want.

Takeaways

Finding a reputable granny flat builder within your budget is achievable with thorough research, strategic planning, and a bit of creativity. By prioritizing your needs, exploring financing options, and negotiating with builders, you can maximize the value of your investment without overspending.

Remember, your perfect granny flat is within reach. With the right approach, you can create a functional, stylish space that meets your needs and fits your budget. So, take your time, do your homework, and choose a builder who can deliver quality without compromising your bottom line.

Looking For Home Resources?

Looking to enhance your living space and create a sanctuary that supports your well-being? Explore our home partners who offer a wide range of resources to elevate your home environment.


homeHLL x Editor


Knowing When It's Time For New Garage Doors

As the main access point for your home's garage, those weighty garage doors get a real workout daily. Experts like Steel-Line Gold Coast say that opening and closing them over and over inevitably leads to wear and tear.


But when exactly is the right time to invest in replacing tired, sagging doors with brand new ones? In this homeowner's guide, we cover the signs indicating your garage doors need an upgrade along with the benefits sparkling new garage doors can provide.

No. 1

How Long Do Garage Doors Last?

The average lifespan of garage doors is 15-30 years depending on the materials, installation quality, maintenance, and climate. Wood doors last 10-15 years before needing replacement. Steel or aluminum doors last 15-30 years.

Properly maintained garage doors can squeeze out the maximum lifespan. But if you notice any of the following, your doors may be signaling that it’s replacement time even if they're not quite worn yet.

No. 2

Clear Signs Your Garage Doors Need Replacing

  • Visible cracks, rotting wood, or rust: Anything that compromises the door's structural integrity means it's time. Deterioration can lead to everything from minor leaks to complete collapse. Don't risk it.

  • Failed insulation: If chilled air and drafts are seeping in from the garage, the insulation inside the door panels has likely broken down. New doors equal a cozier, more energy-efficient garage space.

  • Frequent repairs: Once you've had to repair a door more than once or twice, continuing to sink money into maintenance likely isn't worth it versus investing in new doors.

  • Noisy operation: Squeaking, creaking, and rattling sounds when opening or closing are red flags. It means worn-out springs and rollers that can fail without warning.

  • Sagging panels: If your door panels look droopy or misaligned, the cables keeping them taut are shot. Time to say bye-bye before they snap.

  • Rusted hardware: Check screws, bolts, hinges, handles, and tracks for rust. Rust leads to seizing, snapping, and breakdowns that can trap your car inside or compromise safety.

  • Dents or cracks: Large dents that warp door panels or cracks wider than a couple of inches point to material fatally weakened and prone to collapse.

If your doors are exhibiting any combination of these issues, it's likely time to call it and bring on the new doors.

No. 3

Benefits of New Garage Doors

"But my old garage doors are still functioning," you may say. Fair enough—if it ain't broke, why fix it? Here are worthwhile benefits to be gained from new garage doors that make it worth going for the upgrade:

  • Improved safety: New doors must comply with updated safety codes. They may have pinch-free designs, tamper-resistant bottom brackets, and other features to protect you and your family.

  • Increased energy efficiency: Modern door construction and insulation makes them up to 15 times more efficient at preventing heat or cooling loss than old doors. This impacts utility bills.

  • Reduced noise: Quiet new doors eliminate annoying squeaks and sounds thanks to tightly sealed weatherstripping and well-oiled, aligned moving parts.

  • Curb appeal: Dented or drab doors make a poor first impression. New doors in a stylish modern design can drastically improve your home's facade and value.

  • Smart features: Choose doors with convenient extras like built-in WiFi for controlling them via smartphone, motion-activated lighting, ceiling insulation, and more.

Take these benefits into account when weighing the costs. Over many years your new doors will be reliably serving you, they can provide a great return on investment in terms of savings, security, looks, and convenience.


hellolovelyliving-home-garage-door-hardware

Rejuvenation

Upgrade your space with Rejuvenation's premium garage hardware – where functionality meets timeless design.


No. 4

Finding the Best Garage Door Replacement Company

Once you decide it's time to swap your worn-out garage doors for new ones, finding the right company for the job is key. Start by asking neighbors for referrals—firsthand recommendations are invaluable. Additionally, check for reviews on Google to gauge companies' reputations.

Look for licensed, insured, and experienced installers that have been around for many years. They should thoroughly explain all your available options—covering a variety of material types such as aluminum, steel, wood composite, and glass; detailing the different opener models, custom designs that cater to your unique needs, insulation choices for energy efficiency, warranties for peace of mind, and various pricing structures that fit within your budget.

Avoid any company that uses high-pressure sales tactics or pushes overpriced add-ons. Quality installers will help you choose doors within your budget that truly suit your needs. They'll handle permitting, old door removal, and full installation professionally.

Takeaways

Are your garage doors looking a bit droopy and worn out? Once those telltale signs of aging appear, it may be time to consider replacing them. Investing in new up-to-code doors made of durable modern materials can reward you with safety, efficiency, beauty, and convenience.

With the right doors expertly installed by a reputable company, you'll open your garage to a brighter, quieter, more attractive exterior for years to come. Here's to easy openers and smooth operation ahead!

Looking For Home Resources?

Looking to enhance your living space and create a sanctuary that supports your well-being? Explore our home partners who offer a wide range of resources to elevate your home environment.


homeHLL x Editor


Beds With Storage Are Perfect For Modern, Minimalist Bedrooms

Have you ever looked around your bedroom and thought, “I need more space”? It’s a common issue, especially when you're aiming for a minimalist look. You might have already decluttered, thrown away things you don’t need, and embraced a sleek, clean style, but somehow, there’s still not enough room for everything. If this sounds familiar, then a bed with storage could be exactly what you need.


In today’s homes, especially where space is limited, storage beds are becoming a real game-changer. They help you maximize space without sacrificing style. Whether you're living in a modern city flat, a cozy townhouse, or a more traditional home, a bed with built-in storage offers a practical and stylish solution. In this article, we explore why they’re the perfect addition to your minimalist bedroom.

Why Choose a Bed with Storage?

If you’re looking to transform your bedroom into a minimalist haven, every piece of furniture has to serve a purpose — and if it can serve more than one, even better! Storage beds do just that.

No. 1

Save Space and Declutter

We all know the struggle of trying to find room for all our belongings. Under-bed storage is a brilliant way to keep things organized without cluttering your space. Whether it’s extra bedding, off-season clothes, or things you don’t use daily, the hidden compartments offer the perfect spot for storing everything neatly out of sight.

Minimalism is all about creating a calming, clutter-free environment, and with the extra storage provided by a bed, you can say goodbye to overstuffed wardrobes and messy corners.

No. 2

Perfect for Small Bedrooms

If your bedroom feels a little cramped, beds with storage can work wonders. Instead of trying to fit more shelves or drawers into an already limited space, a storage bed allows you to make the most of the room you already have. It’s especially helpful in flats, smaller homes, or if you're working with a tight floor plan.

No more squeezing around furniture! With a storage bed, the space under your bed becomes useful real estate. You can enjoy a more open, airy room, making it feel larger than it really is.

No. 3

Maintain Your Minimalist Aesthetic

Minimalism isn’t just about having fewer things—it’s also about creating a space that feels light, clean, and intentional. A bed with built-in storage helps maintain that aesthetic by giving you a place to tuck away everything that doesn’t contribute to the overall look you want to achieve.

Since the storage is built directly into the bed, there’s no need for additional bulky furniture like dressers or chests of drawers. The result? A sleek, streamlined bedroom that stays true to minimalist design principles.'


hellolovelyliving-home-storage-container-solutions

The Container Store

Your ultimate destination for innovative storage and organization solutions for home or office—offering everything from stylish bins and shelves to custom closet systems


No. 4

Maximize Functionality

Let’s face it—in a busy household, every piece of furniture needs to pull its weight. Why shouldn’t your bed do more than just provide a place to sleep? With a storage bed, you're maximizing the functionality of one of the largest pieces of furniture in your room. You get to enjoy a comfortable night's sleep while knowing your belongings are neatly stored away.

No. 5

Stay Organized

Imagine waking up to a perfectly tidy room every day. A bed with storage helps you stay organized with dedicated spaces for your items. It’s easy to put things away and keep your room looking immaculate, which is key for anyone pursuing a minimalist lifestyle.

Organization isn't just about tidiness; it's about creating an environment that makes you feel relaxed and in control. With everything in its place, your bedroom becomes a calm, inviting sanctuary where you can truly unwind.

Types of Storage Beds to Consider

Not all storage beds are created equal, so it’s worth considering the options to find the one that suits your needs best. Let’s break down a few popular types:

  • Divan Beds with Drawers – A classic choice, divan beds come with built-in drawers that slide out from the sides. These are perfect for storing clothes, bedding, or anything you want easy access to.

  • Ottoman Beds – With ottoman beds, the entire mattress lifts to reveal a large storage space beneath. This type offers more storage than a divan and is ideal for bulkier items.

  • Platform Beds with Built-in Storage – These beds feature built-in drawers or shelves, often incorporated into the base of the bed. If you prefer an ultra-sleek look with built-in storage that doubles as design, this might be your ideal choice.

  • Under-Bed Storage Boxes – If you’re not ready to invest in a full storage bed, consider using storage boxes that fit underneath your current bed. It’s an affordable option that still gives you that much-needed space-saving solution.

Choosing the Right Style for Your Room

When picking a bed with storage, it’s essential to consider the overall look and feel of your room. Are you going for a more traditional or modern vibe? Storage beds come in various designs, so finding one that fits your style shouldn’t be too difficult.

If you’re aiming for a minimalist design, consider a simple bed frame in neutral colors, such as white, grey, or natural wood tones. These shades create a clean, calming atmosphere that promotes relaxation.

Don’t forget about materials! A wooden bed frame adds a touch of warmth to a minimalist room, while a metal frame can lend an industrial-chic feel. Either way, the storage feature should blend seamlessly into the design so that it doesn’t interrupt the flow of your space.

Takeaways

A bed with storage is more than just a practical piece of furniture; it's a solution to help you achieve the minimalist, clutter-free bedroom you’ve been dreaming of. By combining style and functionality, you’ll have more space to relax, unwind, and enjoy your surroundings.

So, what’s stopping you? If you’re looking to make your bedroom more spacious, organized, and stylish, a storage bed could be the perfect answer.

Looking For Home Resources?

Looking to enhance your living space and create a sanctuary that supports your well-being? Explore our home partners who offer a wide range of resources to elevate your home environment.


homeHLL x Editor


Better Air Duct Cleaning: Enhance Your Indoor Air Quality And Efficiency

Air duct cleaning plays a crucial role in maintaining indoor air quality and enhancing HVAC system efficiency. A thorough and professional air duct cleaning not only removes dust and allergens but also can lead to significant energy savings and improved airflow. Many homeowners may overlook this essential task, thinking that air ducts don’t require frequent attention.


Regular cleaning of air ducts can prevent the buildup of contaminants that might aggravate allergies or respiratory issues. The benefits extend beyond health, as clean ducts allow HVAC systems to operate more effectively, reducing wear and tear on equipment. This maintenance step can ultimately lead to lower utility bills and longer system life.

Investing in cleaning services ensures that the entire HVAC system runs smoothly and safely. With the right approach and techniques, it is possible to achieve a cleaner indoor environment that supports overall well-being.

Engaging a qualified professional is essential for maximizing these benefits. In this article, we explore the numerous benefits of indoor air duct cleaning and share the best practices and maintenance tips for ensuring that your air ducts remain clean and functioning optimally over time.

No. 1

Benefits of Regular Air Duct Cleaning

Regular air duct cleaning offers significant advantages that enhance indoor comfort and health. It plays a crucial role in maintaining air quality and supporting HVAC efficiency, ensuring it is working properly, while also minimizing allergens and irritants in the home environment.

Improved Indoor Air Quality

Regular air duct cleaning contributes to improved indoor air quality by reducing dust, mold, and other pollutants circulating through the home. Over time, air ducts may accumulate a buildup of contaminants that can negatively affect respiratory health.

When air ducts are cleaned, these pollutants are removed, allowing for fresher and cleaner air. Enhanced indoor air quality can lead to better overall health, particularly for individuals with asthma or allergies.

Studies have shown that a well-maintained duct system can decrease the number of airborne particulates significantly. This leads to a healthier living environment, promoting well-being for all occupants.

Enhancement of HVAC System Efficiency

Clean air ducts are essential for enhancing the efficiency of HVAC systems. When dirt and debris accumulate in the ducts, they can obstruct airflow, causing the system to work harder to maintain desired temperatures.

With regular cleaning, HVAC systems can operate more efficiently, resulting in lower energy consumption and reduced utility costs. A more efficient system also has a longer lifespan, which benefits homeowners financially.

In some cases, regular air duct maintenance can improve airflow by up to 40%. This efficiency translates to more consistent heating and cooling, ensuring comfort in every room of the house.

Reduction in Allergens and Irritants

Air duct cleaning is vital for reducing allergens and irritants that can trigger allergies and health issues. Dust mites, pet dander, mold spores, and pollen can reside in air ducts, eventually being distributed throughout the home.

By regularly cleaning air ducts, it’s possible to minimize these allergens significantly. This practice is especially beneficial for sensitive individuals, such as children and elderly persons.

Effective cleaning methods can remove up to 98% of these particulates. A cleaner air environment reduces the likelihood of allergy symptoms, enhancing the overall quality of life for residents.


hellolovelyliving-home-hvac-aroma-fragrance-air-freshener-natural

Aroma Retail

Scent your entire home or business up to 10,000 sq. ft. on a timer and on-demand via an app in less than 5 minutes.

The Scent Machine Pro is an efficient whole-home and whole-business solution for safe aromatics—ready to diffuse free-standing or ported into HVAC.


No. 2

Best Practices for Air Duct Cleaning

Effective air duct cleaning involves thorough assessments, appropriate methods, and consistent maintenance to ensure longevity and efficiency. By following these practices, one can significantly enhance indoor air quality and system performance.

Assessment of Air Duct Condition

Before any cleaning process begins, it is essential to assess the condition of the air ducts. Professionals should inspect for visible dirt, dust buildup, or signs of mold. This assessment can include using a flashlight or camera to identify hard-to-reach areas.

A thorough evaluation also checks for any obstructions in the ducts, such as debris or nesting materials. Airflow tests can reveal if ducts are blocked or leaking, impacting system performance. Based on the findings, experts can determine the level of cleaning required and whether repairs are necessary.

Selection of Appropriate Cleaning Methods

Choosing the right cleaning method significantly affects the efficiency of the process. Common techniques include brush cleaning, vacuuming, and chemical treatments.

Brush cleaning involves physically scrubbing the ducts, ideal for removing stubborn dirt. Vacuuming uses high-powered vacuums to suck out loose debris, proving effective for general maintenance. Chemical treatments can help eliminate mold but require careful application to avoid health hazards.

Each method has its strengths, so it’s crucial to select one that matches the specific condition of the ducts and the type of contaminants present. Professionals should provide a detailed plan with costs associated with the chosen methods.

Post-Cleaning Maintenance Tips

Post-cleaning maintenance is vital to keep air ducts in optimal condition. Regularly changing air filters can reduce dust accumulation within the system. Filters should be replaced every 1-3 months, depending on usage.

Homeowners should also schedule routine inspections at least every 3-5 years to monitor duct health. Sealing any leaks or gaps in the ducts prevents dust infiltration and improves energy efficiency.

Additionally, keeping the surrounding area clean and free from dust buildup helps maintain clean air ducts. Implementing these maintenance practices ensures the effectiveness of the cleaning and extends the life of the HVAC system.


Takeaways

The benefits of regular HVAC maintenance extend far beyond mere comfort; they encompass energy efficiency, reduced operational costs, and enhanced indoor air quality. By ensuring your system runs optimally, you not only prolong its lifespan but also minimize the risk of unexpected breakdowns that can disrupt your daily routine.

Consistent maintenance can lead to significant energy savings, translating into lower utility bills while contributing to a more environmentally sustainable home. Investing time and resources in HVAC upkeep ultimately supports a healthier living environment, allowing you to fully embrace the tranquility and balance that comes with optimal climate control.

Looking For Home Resources?

Looking to enhance your living space and create a sanctuary that supports your well-being? Explore our home partners who offer a wide range of resources to elevate your home environment.


homeHLL x Editor


Maximizing Your Home's Aesthetic: Exterior Design Insights

Your home’s exterior is the first thing people notice, and creating a visually appealing design can make a lasting impression. Whether you're aiming to boost curb appeal or simply want your home to reflect your personal style, the exterior design plays a vital role.


In this article, we offer actionable insights into how you can transform your home’s look through thoughtful design choices. We’ll explore color palettes, landscaping, materials, and more—so you can achieve a cohesive, beautiful exterior. These insights will not only enhance your home’s aesthetic but also increase its overall value and charm.

No. 1

The Importance of Cohesive Exterior Design

A well-designed home exterior should feel like a natural extension of its architecture. When all the elements—like materials, colors, and textures—work together, the result is a visually pleasing and harmonious appearance. A cohesive design enhances your home’s appeal by tying together different aspects, from the front door to the roofline, creating a seamless look that draws attention for the right reasons.

When planning your exterior design, consider how the style of your home can guide your choices. For instance, a modern home might call for sleek lines and minimalist features, while a traditional house might benefit from classic details and warmer tones.

Consistency is key—using complementary materials and color schemes can help unify the look. Functional elements, such as windows, doors, and gutters, should also match the aesthetic, ensuring that nothing looks out of place.

Balancing aesthetics with functionality is crucial. For example, while certain materials may be visually stunning, they must also withstand local weather conditions. Similarly, the design should not only look good but also serve practical purposes, such as enhancing energy efficiency or ensuring durability. By blending beauty with utility, you create an exterior that’s both eye-catching and long-lasting.

No. 2

Choosing the Right Color Palette

The color of your home’s exterior plays a significant role in its overall aesthetic. It sets the tone for your home’s personality, whether it’s bold and modern or warm and inviting. Choosing the right color palette can transform the entire look of your home, making it either blend harmoniously with its surroundings or stand out as a stunning focal point.

When selecting colors, it’s important to take into account the architectural style of your home as well as the surrounding landscape. For example, coastal homes often feature light blues and whites to reflect their breezy, seaside location, while homes in more rural areas might lean toward earthy tones that blend with nature. Additionally, consider how the colors will look throughout the year, as lighting and seasonal changes can affect how colors appear.

Residential exterior painting is one of the easiest and most impactful ways to give your home a fresh look. Opt for a main color that complements the environment and highlights the architectural features of your home.

Accent colors, such as those used for trim, doors, or shutters, can add dimension and interest. Neutral tones are a safe bet for those looking for timeless appeal, but don’t be afraid to experiment with bolder shades to create a more dramatic effect.

No. 3

Landscaping and Outdoor Features to Complement Your Design

A beautifully designed home exterior isn’t complete without landscaping that enhances its overall aesthetic. Landscaping acts as the frame for your home, drawing attention to its best features and creating a welcoming environment. Whether you have a sprawling front yard or a compact space, the right plants, hardscaping, and outdoor features can transform your exterior and make it feel complete.

When planning your landscape design, consider the architectural style of your home. A modern house may benefit from clean, structured lines with minimalist plant choices, while a more traditional home could be complemented by lush greenery and charming flower beds.

Don’t forget about seasonal changes—select plants that thrive year-round to ensure your exterior looks attractive no matter the season. Incorporating a mix of perennials and evergreens can help maintain visual interest throughout the year.

Hardscaping elements such as pathways, patios, and retaining walls play an important role in shaping the space. Stone or brick walkways can guide visitors toward the front door, while well-placed lighting can highlight architectural features and create a warm glow during the evening.

Outdoor features like water fountains, sculptures, or even a cozy seating area can add character and functionality to your yard. By carefully blending greenery with hardscaping, you’ll create an exterior that feels cohesive and inviting.


hellolovelyliving-lifestyle-home-outdoor-furniture

LUlu and Georgia

At Lulu and Georgia, you'll find exclusive designer collaborations, uniquely curated collections, and one-of-a-kind vintage pieces to bring your home to life


No. 4

The Role of Texture and Materials in Exterior Design

Texture and materials are essential components that bring depth and character to a home’s exterior. By combining different materials, you can add visual interest and contrast, elevating the design from simple to striking. The key is to choose materials that not only complement each other but also fit the style of your home.

Natural stone, for example, adds a rugged, timeless feel that works well with rustic or traditional designs. On the other hand, sleek metal finishes, such as steel or aluminum, are ideal for modern, minimalist homes, adding a futuristic edge.

Wood can be used to soften the overall look, bringing warmth and a natural feel to the design. Mixing these materials thoughtfully allows you to create contrast without clashing. For example, pairing smooth stucco with rough stone can balance sleekness with a touch of natural texture.

Texture doesn’t just come from materials; it can also be created through architectural details like siding, rooflines, or even the use of shingles versus smooth surfaces. Combining textures can make even the simplest design more dynamic.

Just be careful not to overdo it—too many competing elements can overwhelm the eye and create a disjointed look. Aim for a balance that enhances the overall aesthetic without making the design feel busy.

No. 5

Modern Trends in Exterior Design

Incorporating modern trends into your home’s exterior design can give it a fresh and updated look, while still allowing for timeless appeal. While trends may evolve, certain elements in contemporary exterior design are built to last, adding both aesthetic value and functionality. Understanding which trends resonate with your style and home can help you make choices that feel both current and enduring.

One of the most popular trends is the shift toward minimalist design. Clean lines, neutral color schemes, and uncluttered spaces have become hallmarks of modern homes. This approach strips away unnecessary details, focusing on the simplicity of form and function. Paired with large windows and open spaces, this trend creates an inviting, light-filled appearance that makes a home feel airy and spacious.

Sustainability is another growing trend, with eco-friendly materials becoming a focal point in exterior design. Homeowners are increasingly choosing materials like reclaimed wood, recycled metal, and sustainable stone, not only for their environmental benefits but also for the unique textures they bring to a design. Additionally, green roofs and solar panels are making their way into residential homes, reflecting a move toward more energy-efficient living without sacrificing style.

Lastly, smart home technology is also influencing exterior design. From motion-sensor lighting to smart locks and doorbells, integrating technology into the home’s exterior is a trend that enhances both security and convenience. These elements are sleek, unobtrusive, and designed to blend seamlessly into modern home designs, ensuring they contribute to the overall aesthetic.

Takeaways

Creating a well-designed home exterior involves more than just picking the right colors or planting a few shrubs. It’s about thoughtfully combining various elements—like cohesive design, color choices, landscaping, textures, and modern trends—to create a space that feels both functional and visually appealing. By taking the time to plan your exterior design with these insights, you can significantly boost your home’s curb appeal and enjoy a beautiful, inviting space that reflects your personal style.

Looking For Home Resources?

Looking to enhance your living space and create a sanctuary that supports your well-being? Explore our home partners who offer a wide range of resources to elevate your home environment.


homeHLL x Editor


Creating Serenity Spaces: Interior Design For Mental Health

Ready to transform your living space to support mental well-being? Interior design for mental health promotes serenity and tranquility, focusing on creating areas that foster a sense of calm and relaxation.


Whether you're dealing with stress or simply want to enhance the overall ambiance of your home, the right decor can make a significant difference. Thoughtful interior design choices contribute to keeping anxiety and distress at bay.

Interested in learning more about this growing trend? In this article, Beyond Blue provides expert advice on how you can use interior design strategies to improve your mental health and create serene spaces in your home.

No. 1

Understand the Purpose

The primary step in creating a serenity space is understanding its purpose: to evoke feelings of tranquility, promote mental well-being, and create a soothing environment.

What Makes a Space Serene?

A serene space blends comfort, practicality, and aesthetics. It uses calming colors, soft textures, and clean lines to evoke peacefulness and reduce stress.

What Are Some Design Choices?

  • Muted, Earthy Color Palettes: These tones, like soft blues, greens, and beiges, create a calming effect.

  • Natural Materials: Wood, stone, and other organic materials add warmth and grounding to the space.

  • Minimalist Furniture: Simple, functional furniture reduces clutter and promotes mental clarity.

Why Is Natural Light Important?

Natural light facilitates positivity and boosts mood. Incorporate large windows or use reflective surfaces to maximize the inflow of sunlight into your space.

How Do Plants Affect Serenity?

Incorporating plants into your design can produce a calming effect. They improve air quality and bring a natural, soothing touch to your surroundings.

What Role Do Personal Items Play?

Personal items can infuse meaning into your serenity spaces. Photos of loved ones or favorite artwork can boost contentment and feelings of peace.

No. 2

Select a Calm Color Palette

Chosen colors massively influence your space's tranquility. Subtle hues like blues, greens, and soft whites are known remedies for anxiety.

Avoid overly bright or dark shades, as they can induce stress rather than calmness. Balance is vital in representing calm and serenity in your space.

Tips for a Calm Color Palette

  • Monochromatic Schemes: Create harmony in visual flow, offering less distraction and fostering mental peace.

  • Accents in Furnishings: Use accessories with contrasting calm colors to refine the serene atmosphere without seeming too monotonous.

  • Soft Furnishings: Incorporating placid-colored throw cushions or rugs adds texture and warmth to your setting.

  • Natural Elements: Items like wooden furniture or stone décor have organic colors that provide a tranquil environment.

Ultimately, choosing a serene color palette can be therapeutic in developing mental positivity. Explore these suggestions to create your calm oasis.

Acknowledge that every individual has his/her unique relaxed vibe—your calming color may differ from another. The key lies in creating what feels peaceful for you.

No. 3

Incorporate Natural Elements

Integrating natural elements into your space significantly supports mental health. It sparks feelings of calm, balance, and refreshment, promoting overall wellness.

Elements like plants work wonders. Plants produce oxygen and reduce stress levels. A vase of vibrant flowers or a low-maintenance succulent may transform your ambiance remarkably.

Wooden décor pieces add homeliness. Wood has a grounding effect that eases anxiety. Think wooden furniture or decorations—each contributes to a serene space.

Natural Elements to Consider

  • Plants: Flowers or succulents reduce stress and produce oxygen.

  • Wooden Décor: Furniture or decorations made from wood ease anxiety and add homeliness.

  • Natural Light: Sunlight boosts mood and aids in regulating sleep cycles.

  • Water Elements: Aquariums or fountains soothe nerves and inspire creativity.

By incorporating these elements, you can create a serene environment that nurtures your mental health.


hellolovelyliving-home-wellness-plants-mood-natural

Terrain

Indoor and outdoor living, garden, and entertaining essentials that are well-designed, lasting, and beautiful


No. 4

Utilize Textures and Layering

Textures and layering can profoundly transform spaces. Different textures stimulate perception, creating an inviting atmosphere that supports mental health.

Fabrics and Rugs

You complicate decor when you neglect the power of soft, comfortable fabrics. Simple additions like velvet pillows or plush throws can change how a room feels.

Fabrics tell a story about the space, setting the mood and giving character. A cozy, well-placed shag rug from can enhance your living area's appeal.

  • Luxurious rugs or soft throw blankets engage the senses, augmenting serenity corners and boosting mood.

  • Natural fabric rugs or cozy plush options provide warmth and comfort, elevating your room’s vibe.

Experimenting with Fabrics

Don't be scared to mix fabric types. Oftentimes, the different textures create an inviting ambiance you will appreciate. Experimenting leads to unexpected design excellence.

Consider lightweight curtains to filter natural light gently into your rooms. The soft lighting created can uplift your mood and make you feel at peace.

Creative Use for Fabric

You can also use fabric in unconventional but tasteful designs. Think of draping walls or creating canopy-style ceilings to introduce a comforting touch.

These subtle design changes influence not only your aesthetic appreciation but also your mood and productivity levels. They provide anchoring points for visual rest.

No. 5

Wall Decorations

Incorporating textured wall art brings depth to your rooms. Opt for calming scenes or abstract pieces that promote relaxation and peace.

You can find various interior design styles online for inspiration. Whether minimal or eclectic, prioritize elements that soothe you.

No. 6

Optimize Natural Light

Inviting natural light into your space can tremendously impact your mood. Sunshine gently wakes you up and stimulates serotonin, the "feel-good" hormone.

Tips for Maximizing Natural Light

  • Light Window Treatments: Use sheer curtains or blinds that control light without obstructing it completely.

  • Mirrors: Reflect light to make a room appear brighter and more expansive.

  • Skylights: If possible, install skylights to allow maximum sunlight entry, promoting positivity and productivity.

  • Light Paint Colors: Reflect sunlight better than darker ones. Colors like white or pastel tones are excellent for creating brightness and spaciousness.

  • Create Open Spaces: Furniture arrangement is key as well. An uncluttered layout with open spaces allows natural light to flow freely, enhancing the serenity of your environment.

No. 7

Create Personal Retreats

Personal retreats are small corners within your home that allow you to relax and gather your thoughts. They are crucial for maintaining mental wellness.

Turning a small section of your home into a personal retreat is easy. The essence lies in incorporating objects that hold meaning to you.

How to Create a Personal Retreat

  • Comfortable Furniture: Opt for homely and comfortable furniture to ensure relaxation.

  • Color Psychology: Utilize colors that evoke calm, such as blue, green, or warm earth tones.

  • Air-purifying Plants: These not only boost oxygen levels but also provide a calming green color.

  • Personal Mementos: Include photos or souvenirs that evoke pleasant memories and feelings of peace.

No one knows better than you what brings serenity to your heart. Listen to yourself and incorporate those elements into your haven.

Creating an environment that makes you feel peaceful matters enormously. It contributes to your overall mental well-being by reducing anxiety and stress.

No. 8

Balance Elements on Ceilings

The ceiling is often neglected in interior design, but it can be repurposed to enhance serenity.

Ceiling Paint Colors

The color splashed across your ceiling can modify your feelings. Light, neutral colors promote relaxation while vibrant shades energize you. Bare in mind light colors make a room feel spacious, and darker ones create a cozy vibe.

Add Intriguing Textures

Textures on ceilings can grab attention. They can provide a source of visual interest by drawing upward sightlines. From decorative molding to bamboo mats, adding texture offers possibilities.

Eco-Friendly Materials

Select green materials for your ceiling. Options include reclaimed wood or recycled metal tiles. Not only do they look beautiful, but they also positively impact the environment. This decor speaks to sustainability, linking you even closer to nature–a perfect mental health booster.

Consider Soundproofing

Ideal for those seeking peace and quietness. The addition of soundproof insulating materials helps control external noise pollution. Muffling external clatter will allow for an undisturbed, tranquil space–perfect for meditation and restful sleep.

Creating a serene environment significantly impacts your mental well-being. One effective way is by using comforting fabrics in your interior design plan.

No. 9

Use Art for Expression

Art has a profound power to convey emotions and foster mental well-being. It brings color and character to spaces while cultivating tranquility and creativity.

From wall paintings to sculptures, artsy touches can add unique aspects to your space. They become the reflection of your personality and your emotional state.

The beauty of art is in its flexibility—it can be anything that resonates with you personally. It's an opportunity to express yourself freely in your environment.

Designing with art is more than aesthetic appeal—it's also about the feeling it instills. It can elicit calmness, inspire positivity, and create a sense of balance.

Types of Art to Consider

  • Reflection Art: Mirrors or abstract pieces that provide self-reflection.

  • Calm Landscapes: Natural scenarios that induce peaceful vibes.

  • Inspiring Quotes: Motivational sayings that augment positive thinking.

  • Family Photos: Memories that bring warmth and love into your space.

The selected art pieces not only enhance the visual appeal but also contribute significantly to the emotional value of their surroundings. They should represent relaxation and peace.

An excellent guide would be an article on the psychology of design, shedding light on how art contributes positively to mental wellness.

To keep your mind at peace, consider integrating art that speaks to you into your interior design. Let your living spaces reflect, nurture, and enhance your mental health.

Takeaways

In making your own serene space, remember these tips. Your interior design choices can significantly affect your mental health, so choose wisely. By incorporating natural elements, optimizing natural light, and using calming colors, you can create a space that promotes mental well-being and serenity.

Looking For Home Resources?

Looking to enhance your living space and create a sanctuary that supports your well-being? Explore our home partners who offer a wide range of resources to elevate your home environment.


home, wellnessHLL x Editor


Water Tank Solutions For Sustainable Living

Seeking a sustainable way to meet your water needs? Your solution could be right beneath your nose—harnessing the power of rainwater. From reducing environmental impact to relying on a renewable resource, water tanks are becoming increasingly prevalent in modern homes. Choosing water tank solutions for sustainable living is choosing a more responsible and secure future for us all.


Catering to your home's water demands can seem daunting, but with more people recognizing the importance of sustainable living, there’s no need to panic! In this article, we share a variety of innovative water tank solutions designed specifically for promoting sustainable living practices.

The Water Tank Factory believes in offering concrete solutions that match your specific needs. Their range of tanks fits seamlessly into your domestic setup, allowing you to live sustainably without compromising efficiency. Let’s explore how these systems can enhance efficiency and conservation in your daily life.

No. 1

Challenges of Water Storage

Water storage is crucial for sustainable living, but it presents multiple challenges. You need to consider these when devising efficient and practical water tank solutions.

Common Challenges

  • Stale or Contaminated Water: Long-term storage can lead to water becoming stale or contaminated. Regular cleaning and inspection of the storage container are necessary to maintain water quality and safety.

  • Size and Type of Tank: The size and type of container you choose play a significant role in the durability, accessibility, and maintenance of your water supply.

  • Water Quality: Ensuring the water stored is safe for consumption is essential. Regular testing is vital to check for pathogens or pollutants.

  • Maintenance: Consistently monitor tanks for signs of damage or leakage. An improperly maintained tank can lead to water wastage.

  • Tank Size: When choosing a tank size, consider both your water needs and available space. A too-small tank may not meet your needs, while a too-large one may be unwieldy.

  • Tank Type: Pick a tank type that suits your context and climatic conditions. For instance, underground tanks may not be suitable for areas prone to flooding.

Considering these factors ensures that your water storage solutions are long-lasting, practical, and contribute positively toward sustainable living.

No. 2

Innovative Tank Designs

As interest in sustainable living grows, so does the demand for advanced and efficient water tank designs. These innovations transform how you manage precious water resources.

Types of Innovative Water Tanks

  • Rainwater Harvesting Tanks: These tanks allow you to accumulate and store rainwater runoff, which can be used for gardening, irrigation, or domestic use.

  • Collapsible Water Tanks: These flexible structures offer a great solution for temporary water storage. They're easy to install and move and perfect for on-demand water requirements.

  • Underground Water Tanks: Aiming for minimal visual impact? Underground water tanks blend seamlessly into your landscape without compromising utility or capacity.

  • Modular Tank Systems: Modular systems provide flexibility, allowing you to expand your water storage as needed. Their innovative design ensures efficient use of available space.

  • Solar-Powered Water Tanks: Solar-powered tanks optimize energy usage while providing hot water. This eco-friendly solution reduces your energy footprint and lowers utility costs.

No. 3

Rainwater Harvesting Solutions

Adopting rainwater harvesting solutions is an eco-friendly choice for sustainable living. It utilizes nature’s gift, reduces your water bill, and lowers your dependence on municipal supplies.

Installation Choices

  • Rooftop Systems: These systems collect rainwater from your roof and direct it into storage tanks.

  • Surface Runoff Systems: These systems capture rainwater from the ground and filter it before storing it in tanks.

  • Advanced Systems: More elaborate setups can integrate pumps, diverters, and pressure regulators, allowing you to link your harvested rainwater directly to your domestic piping system.'

Choosing the Right Tank Size

The appropriate tank size depends on your locale’s rainfall, roof area, and water consumption pattern. Consulting an expert can help you choose the right tank to meet your needs.

By adopting rainwater harvesting, you contribute to sustainable living while securing a reliable water source. It’s an excellent solution, especially in areas with less reliable public water supplies.


hellolovelyliving-home-sustainability-water

Kangen Water

From cooking and cleaning to laundry and self-care, as well as gardening and caring for your pets, utilize the remarkable power of antioxidant-rich alkaline water to promote optimal health and green your home.


No. 4

Efficient Irrigation Systems

An efficient irrigation system paired with a water tank can significantly reduce water consumption, making it ideal for sustainable living. These systems use water judiciously, minimizing wastage.

Smart Watering Solutions

  • Weather-Based Adjustments: Smart watering solutions automatically adjust water use based on weather forecasts and soil moisture levels, ensuring plants receive the right amount of water.

  • Even Water Distribution: These systems are designed to distribute water evenly, avoiding over-watering or under-watering.

  • High-Efficiency Nozzles: High-efficiency nozzles emit water in a uniform pattern, ensuring accurate hydration without over-saturating your garden.

For more details on efficient irrigation systems, visit the Irrigation Association website.

No. 5

Fire Protection Strategies

When building a sustainable home, integrating fire protection measures is crucial. Water tanks play an integral role in this process, storing invaluable reservoirs for emergency situations.

Key Considerations

  • Tank Materials: Steel tanks are durable but may rust over time, while poly water tanks resist rust but can degrade in sunlight.

  • Tank Location: Position your tank strategically for emergency accessibility, ensuring it’s far enough from your home to prevent heat damage.

  • Tank Capacity: Ensure your tank holds enough water for both domestic use and emergencies.

By applying these strategies, you’re not just preparing your household for potential fires but also fortifying its overall resilience.

No. 6

Harvesting Rainwater for Potable Use

Clean, drinkable water is a crucial resource for every inhabitant on Earth, yet it remains inaccessible to some people. That’s where water tank solutions come in.

Rainwater Harvesting for Potable Water

  • Simple Setup: A straightforward setup of gutters, pipes, and tanks can help you harvest rainwater for potable use.

  • Water Treatment: After appropriate storage and treatment, harvested rainwater can serve various use cases, including drinking.

Gray Water Recycling

  • Reuse Lightly Used Water: Gray water recycling involves collecting lightly used water (e.g., from washing machines) for reuse in gardening or flushing toilets, reducing the consumption of fresh water.

Purifiers and Filters

To ensure safe consumption, implementing purifiers and filters is essential for removing impurities and potential health hazards from the water.

No. 7

Stormwater Management Tactics

If you’re focused on sustainability, proper stormwater management is key. By tactically locating water tanks, you can capture, filter, and store runoff from your rooftop, turning potential waste into an invaluable asset.


hellolovelyliving-home-sustainable-living


These methods not only conserve water but also benefit your finances. An investment in sustainability is a wise move for the future.

No. 8

Sustainable Aquaculture Practices

Turning to sustainable aquaculture practices is essential for conserving resources and protecting the environment. Efficient use of water tanks helps reduce the immense amount of freshwater used for fish farming.

Key Practices

  • Recycling Water: Recycling water conserves valuable resources and reduces waste.

  • Maintaining Optimal Temperature: Keeping the tank at the right temperature reduces power usage and supports fish health.

  • Feeding Wisely: Overfeeding leads to waste and contamination. Feed only the necessary amount for cleaner water.

  • Adequate Oxygen Levels: Providing sustained oxygen levels boosts sustainability by improving fish health and reducing losses.

No. 9

Thermal Storage Techniques

Thermal storage techniques are integral to sustainable living. These systems store excess heat during peak hours, reducing the need for grid power.

How Does a Thermal Storage Tank Work?

A thermal storage tank accumulates excess heat produced during the day, storing it for use during colder periods, which reduces overall energy waste.

Benefits of Thermal Storage Tanks

  • Energy Efficiency: Thermal tanks optimize energy usage by storing surplus heat energy for later use.

  • Compatibility with Solar Panels: When combined with solar panels, thermal storage tanks can store excess solar energy, contributing to a more energy-efficient household setup.

Takeaways

Adapting to water tank solutions supports your sustainable living goals. Utilizing innovative designs, effective systems, and sustainable practices is a step toward self-sufficiency. Whether it’s rainwater harvesting, efficient irrigation, or fire protection, water tanks provide a reliable and eco-friendly solution for modern homes.

By choosing sustainable water management practices, you’re not just saving water—you’re reshaping your lifestyle toward a sustainable future. It’s a decision that protects the environment and enriches your daily living experience.

Explore these products to kick-start your journey toward a more sustainable home.

Looking For Home Resources?

Looking to enhance your living space and create a sanctuary that supports your well-being? Explore our home partners who offer a wide range of resources to elevate your home environment.


home, sustainabilityHLL x Editor


How To Make Downsizing Easier When Moving

Are you feeling overwhelmed by the idea of moving and downsizing at the same time? You’re not alone. As minimalism becomes more popular, many people are choosing to simplify their lives and let go of excess belongings.


Residents in Mt. Pleasant, MI, are no different, embracing the trend of moving into smaller, more manageable spaces. Downsizing offers a chance to declutter and focus on what truly matters, but sorting through years of accumulated belongings can feel like a huge task.

Fortunately, with a little planning and thoughtful decision-making, downsizing can be an opportunity to create a fresh, organized living environment. In this article, we share a variety of practical tips and insightful strategies to make the process of downsizing much easier when navigating your upcoming move.


No. 1

Prioritize Your Essentials

As you begin downsizing, it’s important to focus on the items that are truly essential. Start by thinking about the things you use every day—furniture, clothes, kitchen items, and basic household goods. These should be the first items you pack or set aside for your new home. By focusing on the essentials first, it becomes easier to figure out what you really need and what you can live without.

When deciding on items, think about how much space you’ll have in your new home. If you’re moving to a smaller apartment or condo, you might not have room for large pieces of furniture or extra appliances.


No. 2

Use Temporary Storage Solutions

During the downsizing process, you may find yourself in a situation where you’re unsure about what to do with certain items. You might have belongings that you’re not ready to part with, or you may need extra time to make decisions.

In these cases, temporary storage solutions can be very helpful. For example, look up the keyword storage units Mt. Pleasant online to find reliable local options. This can help you keep your items safe while you decide what to keep, donate, or discard.

Using a storage unit gives you extra time and space, especially when dealing with larger items or sentimental belongings. It also allows you to move into your new home without feeling pressured to make decisions about everything at once. You can take your time sorting through stored items after the move, making the downsizing process less stressful.


No. 3

Let Go of Duplicates

One of the easiest ways to downsize is by letting go of duplicate items. Many of us accumulate more than we need over time, whether it’s kitchen gadgets, tools, or furniture. When you’re preparing for a move, it’s a good idea to evaluate your belongings and let go of anything you have two of, especially if they serve the same purpose. For example, if you have multiple coffee makers, pans, or sets of dishes, consider donating or selling the extra items.

This simple step can free up a lot of space, making the packing and moving process easier. Letting go of duplicates also helps you reduce clutter in your new home, giving you more room to focus on the things that matter most.


hellolovelyliving-home-moving-storage-solutions-organizing

The Container Store

Your ultimate destination for innovative storage and organization solutions for home or office—offering everything from stylish bins and shelves to custom closet systems.


No. 4

Measure Your New Space

Before moving, it's important to know the dimensions of your new home. This helps you understand exactly how much space you’ll have for your furniture and belongings. Measure each room, including doorways and hallways, to make sure your larger items will fit comfortably.

Knowing the size of your new living area allows you to make informed decisions about what furniture and belongings to bring with you. This step can prevent frustration when you arrive at your new place and realize certain items won’t fit.

By knowing your new home’s layout and space limitations, you’ll be able to prioritize which pieces of furniture or large items are most important. It also allows you to avoid the disappointment of transporting items only to find they don’t work in your new home.

No. 5

Get Rid of Sentimental Clutter

One of the hardest parts of downsizing is dealing with sentimental items. While it can be difficult to part with items that hold memories, it’s important to separate sentiment from practicality.

Try to limit how much sentimental clutter you bring to your new home. Keep a few key pieces that hold significant value and consider taking photos of other items to preserve the memory without having to keep the physical object.

For example, family heirlooms, meaningful photos, or small keepsakes can be set aside as your personal “must-keep” items. But for those sentimental pieces that don’t serve a purpose, such as old greeting cards or souvenirs, it might be time to say goodbye. Downsizing means focusing on the essentials and learning to let go of items that no longer serve a practical purpose in your life.

No. 6

Pack Room by Room

Packing room by room helps you stay organized and reduces the feeling of overwhelm during the moving process. Start with rooms or areas that you use the least, such as spare bedrooms, storage closets, or basements. This allows you to work your way toward the main living areas over time.

As you pack, label each box with the room it belongs to and its contents. This makes unpacking much easier when you arrive at your new home, as you’ll know exactly where each box should go.

By breaking the packing process into manageable tasks, you’re less likely to feel stressed. Packing one room at a time helps you stay focused and keeps the process more efficient.

No. 7

Enlist Help

Downsizing and moving can be exhausting, so don’t hesitate to ask for help. Whether it’s friends, family members, or professional movers, having extra hands can make a big difference. If you’re unsure about what to keep or toss, having someone else offer their opinion can help you make decisions more easily. Friends and family can also help with sorting, packing, and even hauling items to donation centers.

In some cases, hiring professional movers or organizers may be worth the investment, especially if you're short on time or dealing with a large household. Their expertise can help streamline the process and make downsizing more manageable.

No. 8

Stay Positive

Downsizing is often associated with feelings of loss or stress, but it’s important to focus on the positive aspects of the process. Moving to a new, smaller space can be a fresh start. It’s a chance to create a simpler, more organized home where only the items that truly matter remain. By letting go of excess belongings, you can reduce clutter and make your new home feel open and inviting.

Remember that downsizing doesn’t have to mean giving up things that are important to you. It’s about being intentional with your belongings and creating a living space that works best for your current lifestyle.

All in all, downsizing when moving can seem like a big task, but with a thoughtful approach, it becomes much easier to manage. By starting early, prioritizing the items you truly need, and using storage solutions when necessary, you can make the process smoother. Letting go of duplicates and sentimental clutter, measuring your new space, and enlisting help will allow you to stay organized and stress-free.

As you settle into your new home, you’ll enjoy the benefits of a clutter-free and streamlined living environment, making downsizing a positive and rewarding experience.

Takeaways

Decluttering before a move is not merely a practical step, but a transformative process that can significantly enhance your transition to a new space. By assessing your belongings and letting go of items that no longer serve you, you create a more organized and intentional environment. This practice not only lightens your physical load but also fosters mental clarity and emotional well-being.

As you prepare for this fresh chapter, remember that each item you release paves the way for new opportunities and experiences in your next home. Embrace the freedom that comes from a simplified life, and allow this experience of decluttering to serve as a meaningful step towards aligning with your truest self and future aspirations.

Looking For Home Resources?

Looking to enhance your living space and create a sanctuary that supports your well-being? Explore our home partners who offer a wide range of resources to elevate your home environment.


homeHLL x Editor


How To Free Up Space In A Crowded Garage

Many homeowners, like in Greeley, CO, struggle with crowded garages. Garages often become a dumping ground for everything from tools and sports equipment to holiday decorations and boxes of old belongings. This leaves little room for vehicles or other important items.


If you find yourself battling to create space in your garage, it’s time to take some practical steps to get organized and make the most of the space you have. In this article, we share various ways you can free up valuable space in your garage. With a few simple changes, you can turn your garage into a more functional area that is easy to navigate and use.


No. 1

Declutter and Sort Your Belonging

The first step in freeing up space in your garage is decluttering. Over time, garages accumulate items that are no longer needed or are rarely used.

To start, take everything out of the garage and sort your belongings into four categories: keep, donate, sell, or throw away. This will give you a clear picture of what you truly need to store and what can be removed.

Go through old tools, sports gear, and boxes of forgotten items. Ask yourself if you’ve used each item in the past year. If the answer is no, consider donating or selling it.

If something is broken or no longer usable, it’s time to throw it away. Decluttering creates more space and also helps you organize what’s left, making it easier to find things when you need them.

In some cases, large items like RVs or trailers take up valuable space in the garage. These large vehicles often prevent you from fully utilizing the garage for other storage needs or parking your car.

In Greeley CO RV storage facilities offer a convenient solution. Storing your RV off-site in an RV storage unit can free up significant space in your garage, allowing you to better organize your tools, sports equipment, or even create a small workspace.

By using RV storage, you can clear the garage and protect your RV in a secure facility. This frees up room for other items without sacrificing the safety of your recreational vehicle.


No. 2

Maximize Vertical Space

Once you’ve decluttered, the next step is to make better use of vertical space in your garage. Garages often have unused walls and ceiling areas that can be transformed into valuable storage zones. Installing shelves along the walls is a great way to store larger items like bins, boxes, or tools without taking up floor space.

Another option is to use pegboards or wall hooks to hang items like bicycles, ladders, or garden tools. This keeps the floor clear and creates more walking space.

Overhead storage racks can also be installed to store seasonal items, such as holiday decorations or camping gear, that you don’t need to access regularly. By maximizing vertical space, you can create a cleaner, more organized garage that’s easy to navigate.


No. 3

Create Designated Zones for Different Items

Creating specific zones for different types of items helps keep your garage organized in the long term. Designate areas for tools, gardening supplies, sports equipment, and seasonal items.

This way, everything has a place, and you’ll know exactly where to find things when you need them. Clear storage bins with labels are a good option for smaller items, while larger tools and equipment can be neatly organized on shelves or in cabinets.


hellolovelyliving-home-garage-organization-storage-solutions

The Container Store

Your ultimate destination for innovative storage and organization solutions for your garage—offering everything from boxes and sports organization to custom shelving systems.


No. 4

Use Storage Cabinets and Workbenches

Once you’ve decluttered and started using vertical space, it’s time to think about additional storage solutions like cabinets and workbenches. Sturdy storage cabinets are essential for keeping smaller items organized and out of sight. They provide an enclosed space for things like paint, cleaning supplies, and tools, helping the garage look tidy and clutter-free.

When choosing cabinets, make sure to pick ones that fit the size of your garage. If space is limited, tall and narrow cabinets can maximize storage without taking up too much floor space. Cabinets with adjustable shelves are also helpful, as they allow you to customize the storage according to the size of the items you need to store.

In addition to cabinets, consider adding a workbench with built-in storage. A workbench provides a dedicated space for DIY projects, repairs, and hobbies. Many workbenches come with drawers or shelving underneath, giving you extra storage for tools and supplies.

This way, your work area remains clean, and everything is within easy reach. Even if you aren’t a frequent DIYer, having a workbench can add value to your garage by creating a versatile space for various activities.

No. 5

Regular Maintenance to Keep Your Garage Organized

After organizing your garage, it’s important to maintain it over time. Without regular upkeep, clutter can quickly start building up again, making your efforts less effective.

A good habit is to spend a few minutes each week tidying up. This could be as simple as putting things back in their designated places or sweeping the floor to keep the space clean.

In addition to weekly clean-ups, plan for seasonal maintenance. For example, before winter, you might organize your snow removal equipment, making sure that shovels and salt are easily accessible.

In the spring, clean out gardening tools, and store winter gear in labeled bins for easy retrieval next season. Keeping up with these simple routines will help prevent the garage from becoming cluttered and disorganized again.

It’s also helpful to reassess your storage needs periodically. As time goes on, you might acquire new items or stop using certain tools or equipment. Regularly evaluating what you have and deciding if you still need it can help keep the space open and functional. If you find that your storage system needs adjustments, don’t hesitate to tweak it to fit your current needs.

No. 6

Use Clear Bins and Labels

When it comes to smaller items like nails, screws, or crafting materials, clear bins can be a game-changer. Using clear bins allows you to see what’s inside without having to open every box. This saves time and makes it easier to keep track of your belongings. Bins with lids also help protect your items from dust, moisture, or insects, which is especially useful in a garage environment.

Labeling your bins and containers is another simple trick that keeps things organized. You won’t have to search through multiple boxes to find what you need if everything is clearly labeled. A label maker is handy for this, but even handwritten labels on masking tape can work just as well.

Takeaways

Transforming a crowded garage into a more organized and functional space doesn’t require a major overhaul. Simple steps like decluttering, maximizing vertical space, using storage cabinets, and maintaining the organization over time can free up room and make your garage more useful.

With the addition of clear bins, labels, and a designated workspace, you’ll create an environment that works for your daily needs and keeps everything in its place. Taking small, actionable steps will help you regain control of your garage and make the most of this valuable area in your home.

Looking For Home Resources?

Looking to enhance your living space and create a sanctuary that supports your well-being? Explore our home partners who offer a wide range of resources to elevate your home environment.


homeHLL x Editor