Rustic Aesthetic On A Budget: How To Use Scaffold Boards In Your Kitchen
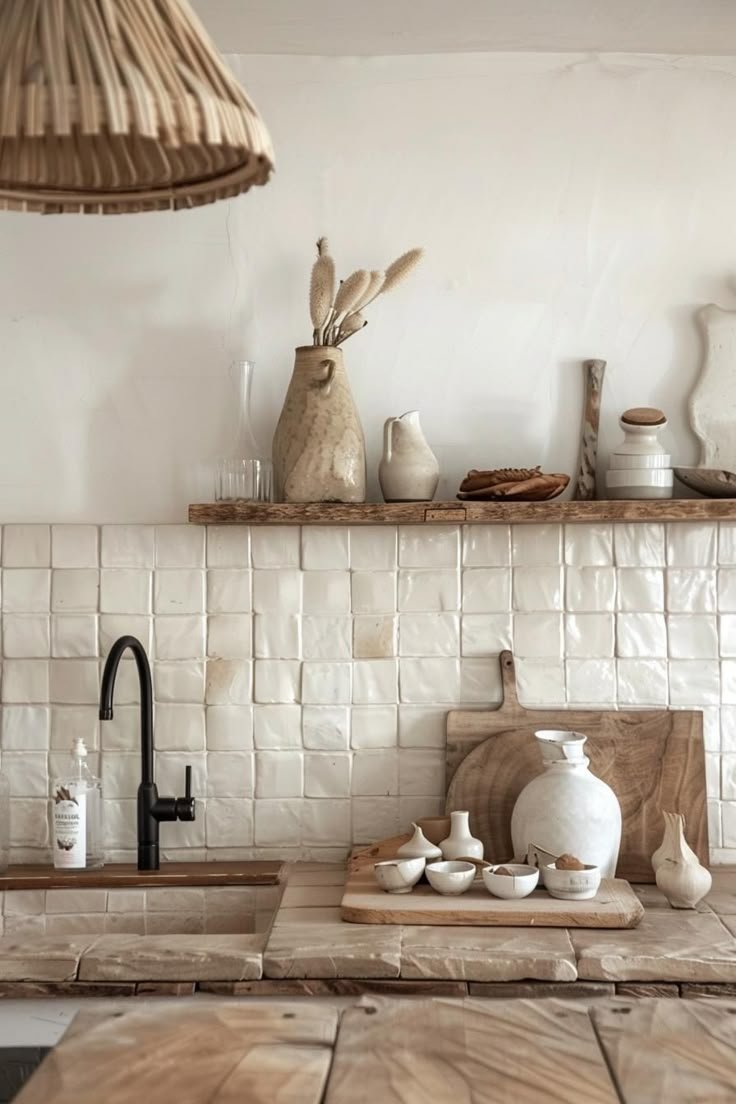
Creating a warm, rustic vibe in your kitchen doesn’t have to break the bank. Scaffold boards offer an affordable, durable, and versatile solution for homeowners looking to add character to their space. These reclaimed wooden planks can be transformed into shelves, countertops, islands, or decorative accents, bringing a cozy farmhouse feel to your kitchen.
Beyond their aesthetic appeal, scaffold boards are a practical choice for budget-conscious renovators. They provide ample workspace, sturdy construction, and a sustainable alternative to expensive hardwoods. With just a few tools and a bit of creativity, you can revamp your kitchen effortlessly while maintaining a timeless charm.
If you’re looking for affordable, high-quality materials, consider checking out scaffold boards for sale. In this guide, we will walk you through the benefits, preparation steps, treatments, and design ideas to help you make the most of these rustic planks.
No. 1
Why Choose Scaffold Boards for Your Kitchen?
Scaffold boards are an excellent choice for kitchen upgrades due to their strength, versatility, and affordability. Whether you're looking to create floating shelves, countertops, or a rustic dining nook, these boards offer a cost-effective alternative to traditional wood materials.
Key Benefits of Scaffold Boards
Exceptional Durability – Designed for heavy loads, scaffold boards can withstand daily kitchen use.
Timeless Aesthetic – Their natural grain and weathered look add rustic charm to any space.
Eco-Friendly Choice – Reclaimed boards reduce waste and promote sustainable home improvement.
Budget-Friendly – Compared to hardwood, scaffold boards offer a more affordable option.
Easy to Work With – Minimal construction experience is needed for DIY projects.
Versatile Applications – Suitable for countertops, shelving, islands, and decorative accents.
By incorporating scaffold boards, you can achieve a high-end rustic look without overspending. Their natural imperfections and rich textures make them a perfect fit for farmhouse-style kitchens.
No. 2
Essential Preparation Steps
Before installing scaffold boards in your kitchen, proper preparation is crucial to ensure safety, durability, and a polished finish.
Step 1: Inspect the Boards
Check each plank for splits, warping, or structural weaknesses. High-quality boards will provide a sturdy foundation for kitchen surfaces.
Step 2: Gather Necessary Tools
Having the right tools on hand will streamline the process.
Essential supplies include:
Measuring tape – Ensures precise cuts and proper fit.
Level – Helps maintain even surfaces.
Screws and brackets – Secure boards in place.
Sandpaper – Smooths rough surfaces for a refined finish.
Sealant or wood oil – Protects against moisture and stains.
Step 3: Cut Boards to Size
Measure and mark your boards before cutting to ensure a perfect fit for countertops, shelves, or islands. Accurate cuts prevent material wastage and enhance the final look.
Step 4: Sand the Surface
Start with coarse-grit sandpaper, then switch to finer grit for a smooth, splinter-free finish. Sanding enhances the wood’s natural grain and prepares it for sealing.
Taking the time to properly prepare your boards will ensure a long-lasting, professional-quality installation.
No. 3
Choosing the Right Finish: Indoor vs. Outdoor Treatments
Scaffold boards can endure different environments, but applying the right finish will maximize their lifespan.
Indoor Finishing Options
Wax or quick-drying oil – Ideal for controlled indoor environments.
Food-safe sealants – Protect kitchen surfaces from spills and stains.
Breathable finishes – Maintain air quality while preserving wood texture.
Outdoor Finishing Options
Water-resistant sealers – Protect against rain and humidity.
UV-protective coatings – Prevent fading from sun exposure.
Regular reapplication – Helps maintain integrity in fluctuating weather.
Selecting the appropriate treatment ensures your scaffold boards remain functional and visually appealing for years to come.

Caraway
Cook with confidence and care! Caraway's non-toxic kitchenware combines sleek design with health-conscious materials for a safer, smarter kitchen experience.
No. 4
Applying Oil-Based Sealers for a Rich Finish
Oil-based sealers penetrate deep into the wood, enhancing durability and moisture resistance. They also bring out the natural beauty of the grain, making them a great choice for rustic kitchens.
Steps to Apply Oil-Based Sealers
Choose a High-Quality Product – Opt for Danish oil, tung oil, or linseed oil for a rich, protective finish.
Apply Evenly – Use a brush or cloth to distribute the oil across the surface, ensuring full coverage.
Allow Proper Drying Time – Let each coat cure completely before applying the next layer.
Build Multiple Layers – Adding extra coats strengthens the wood’s resistance to moisture and wear.
Oil-based sealers enhance the wood’s natural character while providing long-lasting protection.
No. 5
Using Water-Based Sealers for a Quick, Eco-Friendly Finish
Water-based sealers dry faster, emit fewer fumes, and provide a clear protective layer. They are a great option for busy kitchens where quick application and drying times are essential.
Steps to Apply Water-Based Sealers
Check for Food-Safe Labels – Ensure the product is safe for kitchen surfaces.
Stir Thoroughly Before Use – Prevents inconsistencies in color and texture.
Apply Thin Coats – Use a brush or roller for an even finish.
Sand Lightly Between Coats – Improves adhesion and durability.
Reapply Periodically – Maintains protection in high-traffic areas.
Water-based sealers offer a simple, eco-friendly solution for preserving scaffold boards in a kitchen setting.
No. 6
Creative DIY Design Ideas for Your Kitchen
Scaffold boards provide endless design possibilities, allowing you to create custom, rustic-inspired kitchen elements on a budget.
1. Floating Shelves
Install L-brackets to mount scaffold boards as open shelving.
Display cookbooks, potted herbs, or vintage kitchenware for a farmhouse look.
2. Rustic Breakfast Bar
Use scaffold boards and metal supports to create a cozy breakfast nook.
Pair with industrial stools for a stylish, functional space.
3. Kitchen Island Countertop
Replace an existing island top with scaffold boards for a rustic upgrade.
Apply food-safe oil to protect the surface while maintaining its natural charm.
4. Sliding Barn Doors
Use scaffold boards to create barn-style pantry doors.
Install metal tracks for a modern farmhouse aesthetic.
Scaffold boards allow you to customize your kitchen affordably, blending functionality with rustic elegance.
Takeaways
Incorporating scaffold boards into your kitchen is a budget-friendly way to achieve a rustic, farmhouse-inspired aesthetic. Their durability, affordability, and versatility make them an excellent choice for homeowners looking to revamp their space without overspending.
Here are the key takeaways:
Scaffold boards offer a durable, cost-effective alternative to traditional wood.
Proper preparation and finishing ensure longevity and protection.
Oil-based and water-based sealers provide different benefits for indoor and outdoor use.
DIY projects like shelving, countertops, and barn doors enhance kitchen functionality.
A rustic kitchen upgrade doesn’t have to be expensive—scaffold boards make it achievable.
By following these steps, you can transform your kitchen into a cozy, rustic retreat while staying within budget. Whether you’re adding functional shelving or a statement countertop, scaffold boards provide an affordable, stylish solution that will stand the test of time.
Looking For Home Resources?
Looking to enhance your living space and create a sanctuary that supports your well-being? Explore our home partners who offer a wide range of resources to elevate your home environment.