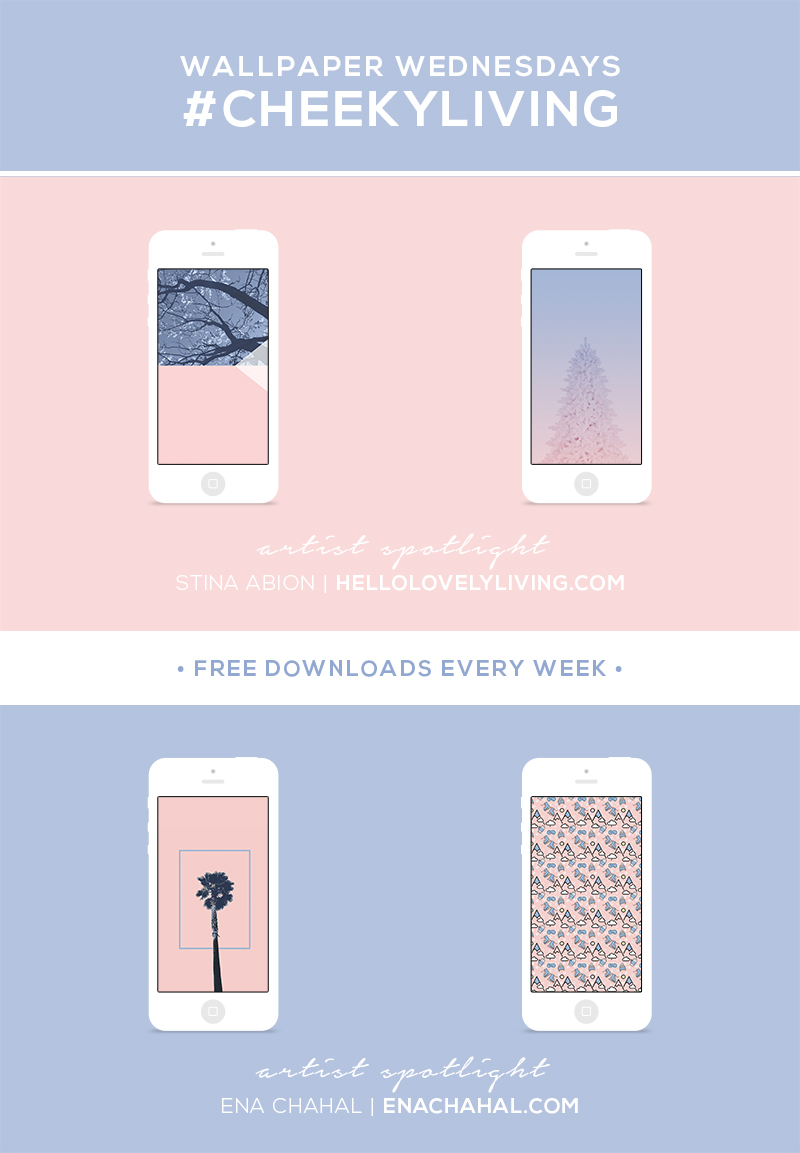
PANTONE recently released their Color of The Year 2016: Rose Quartz & Serenity, so being that I was in love with them from the get-go, I definitely couldn't pass on creating some themed wallpapers for them. I have always been a fan of these color families, so it was really natural for me to love them immediately.
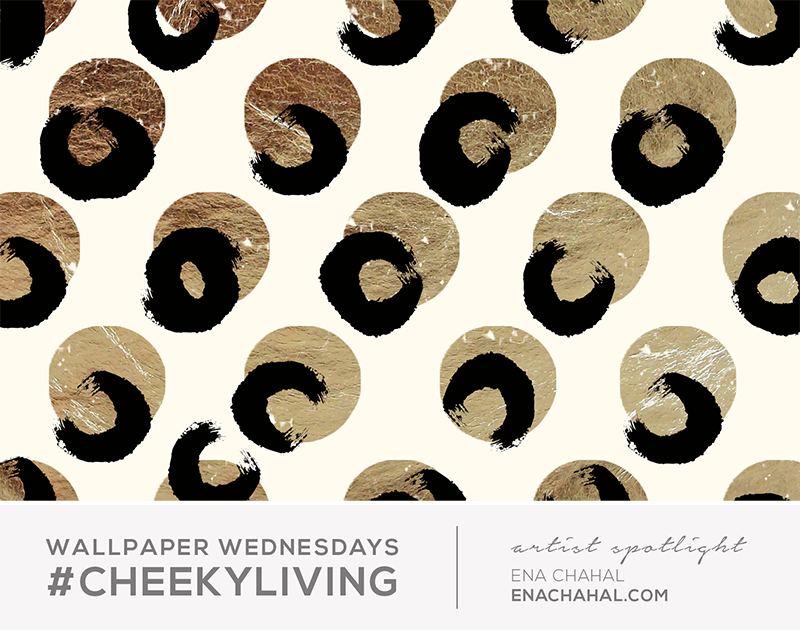
Since the holidays are upon us, Ena and I decided to create some seasonal designs as well. I hope you get to put them up in time to enjoy them for the holidays. I just noticed how the first two designs, one created by Ena and the other myself, also represent our different locations. I seriously wish I could trade places with her being that she is in sunny California and I'm in the midwest - Oklahoma. One day I definitely need to meet her in person!
So, anywho, enjoy these very colorful designs and do share your picks with us on Instagram via @hlovelyliving or @cheekybillo. We'd love to connect with you! Oh, and make sure to come back next week because we have another artist feature coming up that I know you'll love.
| download |
| download |
| download |
| download |
download 1 | download 2 | download 3 | download 4
I hope you enjoyed our designs this week! Come back every Wednesday for more.
For wallpaper updates, sign up for my newsletter in my sidebar or simply follow @hlovelyliving and @cheekybillo on Instagram. Search #cheekyliving where we will be posting when new designs are up and show us which wallpapers you picked.
My Wallpaper Wednesday partner in crime - the lovely, Ena Chahal - can be stalked over here: Blog | Etsy | Society 6
What designs would you like to see next? Share with me in the comments below!
Disclosure: All designs are original and for personal use. Artists retain rights to all designs and they may not be copied or reproduced in any form or likeness. We love when you share, but please link back to the original post. Enjoy!
thanks so much for visiting! make sure to check me out on my social accounts for more lovely content.
xo stina
If I could have pancakes every morning, I would. But really, who has the time to make them every single morning? Not this mama - and with a little one to prepare breakfast for as well - I need quick and easy options. This easy homemade pancake recipe is one that you can make ahead of time, freeze and just warm up in the oven.
This particular morning, I wanted to make pancakes for Uriah because I love how great of a finger food they are, and he definitely loves them. I had a sweet potato on hand, so I decided to use that and add some other yummy additions such as banana (his favorite) and honey.
I really loved how my recipe turned out. These are soft and creamy in the center because of all of that yummy sweet potato and crispy on the edges. They aren't too sweet, either.
I drizzled maple syrup over them for photography purposes, but just served them to him plain. Before you put these into the freezer, you could also drizzle them with a little maple syrup or honey so that once you warm them up, they're already set without any need to add syrup.
I also added a touch of poppy seeds because I think they're just fun and a nice subtle taste.
My oldest son also enjoyed eating these, so this recipe is not just for the little ones. Now let's get into this yummy recipe!
Mini Sweet Potato & Banana Pankcakes
Author: Stina Abion | Hello Lovely Living
Published December 2, 2015

Servings: 7-8 servings
Prep: 10 mins
Cook: 20 mins
Total time: 30 mins
Ingredients
- 1 small sweet potato (pale flesh)
- 1 banana
- 1 egg
- 1/2 cup cake flour
- 1 Tbsp raw honey
- 1/4 tsp poppy seeds
- 1/2 tsp baking powder
- butter
Instructions
- Steam sweet potato until soft. Mash until smooth.
- Combine sweet potato, banana (mashed), egg, and honey. Add in dry ingredients and mix well.
- In a skillet, on medium heat, melt a Tbsp of butter. Add batter using a 1 tsp measuring spoon. Flip when edges are cooked. Repeat until finished.
Notes
- Place in an airtight container or bag and freeze. To warm up, bake for 5-10 mins in 350° oven.
- Drizzle with honey or maple syrup for added sweetness.
- Makes 35-40 - 2" pancakes.
- I use organic ingredients whenever possible.
I hope you get to try this recipe for your toddler. It's super simple and perfect for getting that nutrition into their little tummies.
What is your favorite thing to serve your toddler for breakfast? I'd love to hear in the comments!
Thanks so much for visiting! make sure to check me out on my social accounts for more lovely content.
xo stina
So, the weather has been brutal lately here in Oklahoma City, and it's just starting to die down a bit and the sun is finally back out again. As much as I love snow and winter and all that jazz, I will never get used to the cold. You're talking about a girl from an island, here - someone used to 80-90° weather year-round (and two seasons: rainy and dry)! Oh how I miss it, but there's something so beautiful about the seasons. I love getting to experience it all. It really makes me appreciate everything about life a lot more and all of the things that need to take place. I've always been used to change, so I love it and know that it is a necessary part of life. I get excited about it, so I'm really looking forward to 2016.
This week, Ena and I created line-themed wallpapers and it was actually harder than I thought. I mean, when you think lines, you think that's pretty simple, right? Um, no. After six different designs, I was finally able to settle on the two that I liked the most. As with all of my designs, I try to stay true to my aesthetic, so usually many designs get tossed. *sad emoji*
Anywho, enough of my rambling (haha). I hope you enjoy these really simple wallpapers and hopefully they grace your screens! Take care and stay warm! Let me know in the comments below how the weather's like right now in your area.
| download |
| download |
| download |
| download |
download 1 | download 2 | download 3 | download 4
I hope you enjoyed our designs this week! Come back every Wednesday for more.
For wallpaper updates, sign up for my newsletter in my sidebar or simply follow @hlovelyliving and @cheekybillo on Instagram. Search #cheekyliving where we will be posting when new designs are up and show us which wallpapers you picked.
My Wallpaper Wednesday partner in crime - the lovely, Ena Chahal - can be stalked over here: Blog | Etsy | Society 6
What designs would you like to see next? Share with me in the comments below!
Disclosure: All designs are original and for personal use. Artists retain rights to all designs and they may not be copied or reproduced in any form or likeness. We love when you share, but please link back to the original post. Enjoy!
I hope everyone is enjoying their Thanksgiving weekend! It's the season of giving, and as promised, today we are excited to announce a special giveaway by artist, Holly Young who had designed a bunch of free wallpapers for us a couple of weeks ago. She created these beautiful hand painted ornaments and is giving away three of her designs, which the winner gets to choose.
How to enter
See official rules and entry on my Instagram or by clicking below.
Choose three
To see all of Holly's ornament designs, go HERE. Let us know which three designs you would choose if you win in the comments below!
Make sure to share this with your friends and family so that they get a chance to win too.
Hi lovelies! Are you all excited for tomorrow? One of my favorite things about Thanksgiving is smelling that turkey roasting slowly in the oven. This year, I'm keeping the menu simple: Turkey, gravy, mashed potatoes, stuffing, cranberry sauce, and candied yams - all of which are homemade. Of course, it wouldn't be the same without dessert, so I've gotta decide what to make. Any suggestions? My hubby wants a cheesecake, so we'll have to see because I didn't have much success with my last one. Desserts are not my strength in the kitchen, unfortunately.
Well, I hope you enjoy these dot-themed wallpapers Ena and I have for you this week! Which ones have been your favorite so far?
Have an amazing Thanksgiving filled with lots of laughter, smiles, hugs, and love.
| download |
| download |
| download |
| download |
download 1 | download 2 | download 3 | download 4
I hope you enjoyed our designs this week! Come back every Wednesday for more.
For wallpaper updates, sign up for my newsletter in my sidebar or simply follow @hlovelyliving and @cheekybillo on Instagram. Search #cheekyliving where we will be posting when new designs are up and show us which wallpapers you picked.
My Wallpaper Wednesday partner in crime - the lovely, Ena Chahal - can be stalked over here: Blog | Etsy | Society 6
What designs would you like to see next? Share with me in the comments below!
Disclosure: All designs are original and for personal use. Artists retain rights to all designs and they may not be copied or reproduced in any form or likeness. We love when you share, but please link back to the original post. Enjoy!
Hey guys! Today, Ena and I bring you more free goodies. It was so much fun to create these retro-themed wallpapers. I decided to go with a retro pastel vibe, and I love how they turned out. Ena's wallpapers are way cute, too. We definitely have a lot of fun creating these.
Have any themes you'd like us to consider? Let us know! Happy downloading, and I look forward to seeing those photos of your wallpapers on Instagram with #cheekyliving.
| download |
| download |
| download |
| download |
download 1 | download 2 | download 3 | download 4
I hope you enjoyed our designs this week! Come back every Wednesday for more.
For wallpaper updates, sign up for my newsletter in my sidebar or simply follow@hlovelyliving and @cheekybillo on Instagram. Search #cheekyliving where we will be posting when new designs are up and show us which wallpapers you picked.
My Wallpaper Wednesday partner in crime - the lovely, Ena Chahal - can be stalked over here: Blog | Etsy | Society 6
What designs would you like to see next? Share with me in the comments below!
Disclosure: All designs are original and for personal use. Artists retain rights to all designs and they may not be copied or reproduced in any form or likeness. We love when you share, but please link back to the original post. Enjoy!
My baby is officially a big boy now - THE BIG "1"! How did this happen so fast? It was just yesterday that I was looking into his eyes for the first time. Since that very moment, I have spent every single day enjoying everything about him and he has filled my heart with immense joy and love. I have learned to sing, dance, laugh, and enjoy life like never before all because of this precious heart that I have been blessed to nurture. I am so proud to be his mommy!
I wanted to make his 1st birthday completely special and handmade with love. So, with three days to put it all together, two hands, a baby in tow, and a budget - it was game! I was able to pull it off, and I am so happy with how it all came together. Here's the rundown, so you can get inspired to recreate this easy setup!
So, I decided that a woodland theme would be so cute. I'm so over the mass commercialized characters, so I was looking for something more whimsical and off the beaten path. After scouring Pinterest, I was able to get inspired and come up with a bunch of ideas. You can view my Pinterest board HERE. I then made a list and planned out all of the supplies I needed, which made it super easy and stress-free when it came time to shop.
It turns out, I actually didn't really need all that much on my list. I improvised with stuff I already had at home, which worked out amazingly well. I also cut back on a lot of other ideas I had because I may have gotten a tiny bit excessive.
These garlands were one of the first things on my list. I purchased the largest marshmallows I could find (campfire ones) and strung them threw some beige and white twine to create this really fun marshmallow garland. I also had to use 3M hooks to hang these because they were pretty heavy.
Inspired by: Homegrown & Healthy
For my burlap garland, I purchased pre-cut burlap pendants and drew out the letters of his name with chalk. Taking white cardstock paper, I cut out triangles to alternate between the burlap. I punched holes in each corner and strung them through with twine. A large needle comes in handy here. I then used tape to secure the ends of the string to the wall and also made tiny bows out of string to tape on top of each end as a finishing touch.
Originally, I wanted to fill these wafer sugar cones with fruit, but they ended up looking like little rustic trees on their own, so I kept it as is. I love how they look!
Inspired by: On To Baby
These smores were so easy and quick to make. All I did was gently temper some semisweet chocolate with a little vegetable oil, dip the large marshmallows to coat just halfway, then coat the top with graham cracker crumbs. So fun and pretty.
Inspired by: Spaceships and Laserbeams
I found wood rounds at Marshall's and Target. The one's from Marshall's were larger and more expensive, but better quality. The ones from Target were in the arts and crafts section and were really affordable. I'll have a list of all of the supplies at the end of this post.
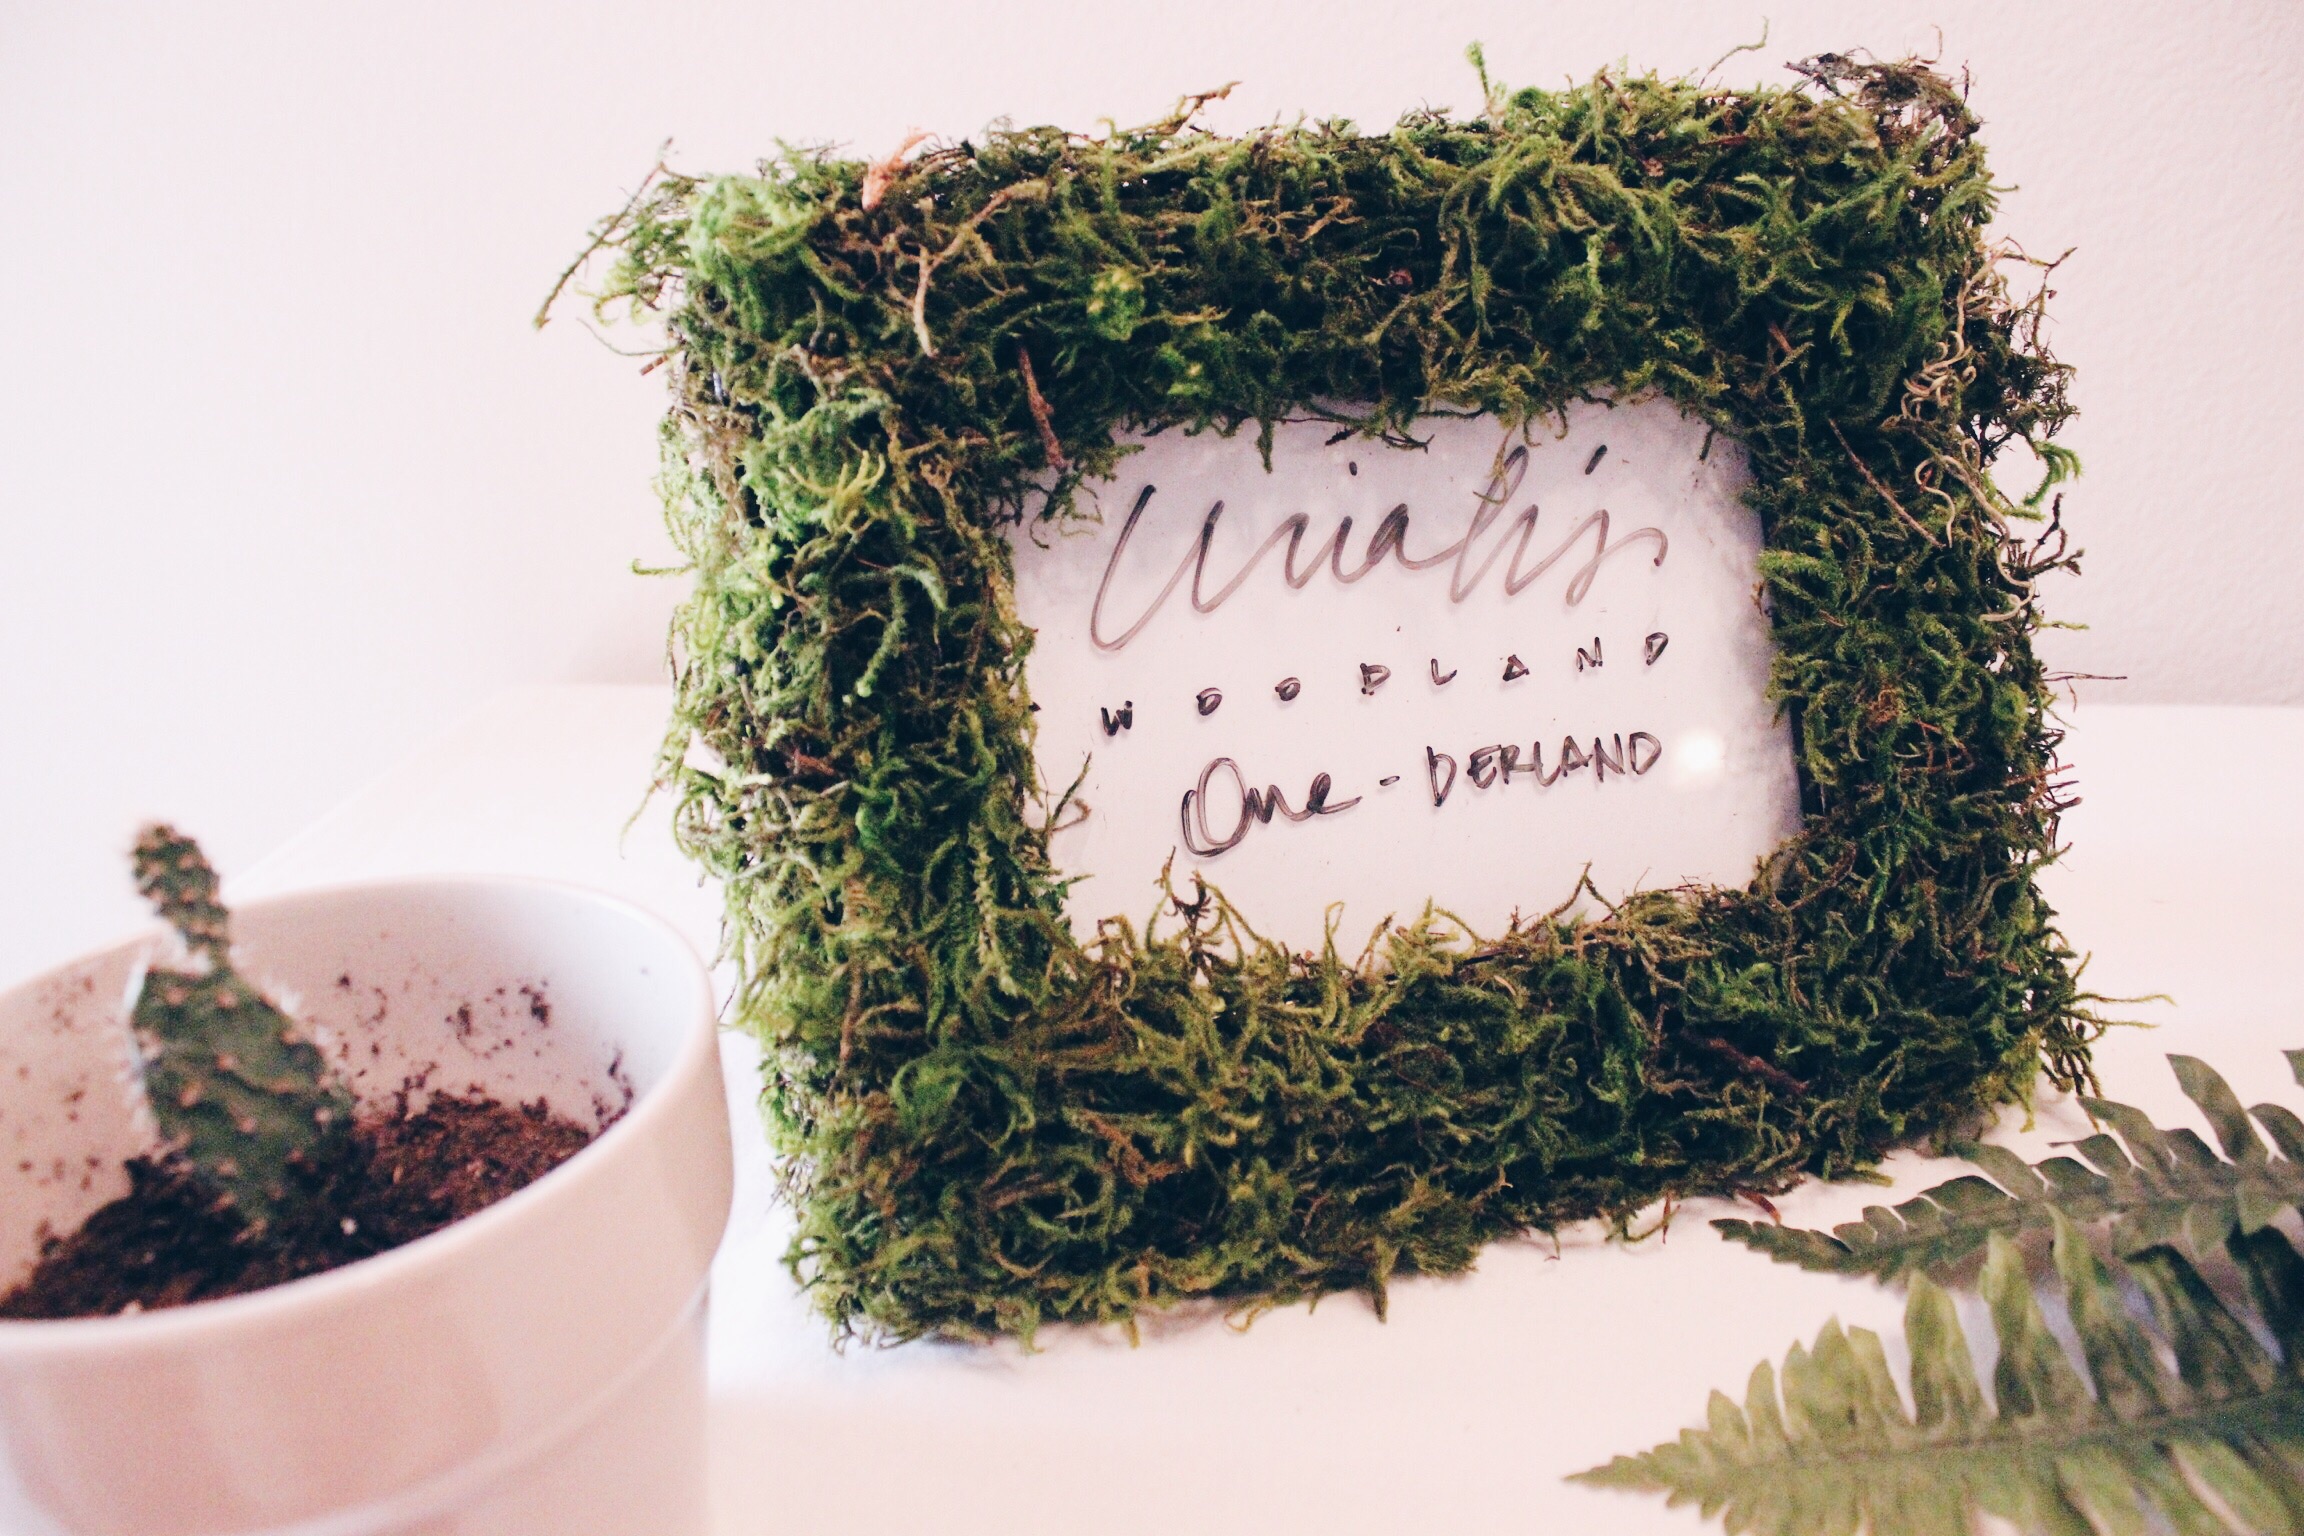
I found a frame that was lying around the house and decided to cover it with moss. I covered the frame in tape first, then glued the moss on top. This is more of a temporary hold, so I could remove it afterward and not damage the frame. I just placed a piece of white cardstock paper inside, then used a dry-erase marker to write "Uriah's Woodland One-derland".
Inspired by: Ruffled Blog
I wanted to incorporate a bunch of cute forest animal figurines. At Michael's, I was only able to find and purchase a wolf, so I was so glad that I came across a pack at Walmart that included a cub, wolf, fox, and fawn. They looked perfect alongside some piles of moss - like a miniature woodland.
Ar first, I tried looking for a number "1", but for some reason, it was so hard to find, so I came up with this easy DIY. I cut out the number from a styrofoam plate, then taped a wooden scewer to the back and spray painted it all metallic gold. The effect was amazing. It turned out looking like stone and had this really pretty texture to it.
For the base, I cut a foam ball in half and glued moss to it. This project was so simple and basically free for me since I had all of the supplies on hand. I placed "Bambi" on top, and it turned out perfect!
Inspired by: Ruffled Blog
I decided to go with a simple, white banana cake with honey buttercream frosting. It was supposed to be three layers, but I was so tired that I forgot to place the third layer on top! It was sooo good, guys. I wanted to do a healthy cake for Uriah, and this recipe was pretty clean. Instead of regular oil, I used coconut oil, and I cut down on the powdered sugar and used a little honey.
Cake recipe: Bake or Break | Frosting recipe: Wicked Good Kitchen | How to assemble a layer cake: Martha Stewart
This bunting was so cute and really easy to make. I just took two types of paper and cut out triangles, strung them on twine, and tied them to wooden skewers. I wrote the number "1" in the center with a black marker. It was perfect and super cute.
A single, white candle placed at the back was the finishing touch, along with the cub figurine. The cake was placed on the wood platter atop an inverted glass bowl.
I purchased one bunch of ferns and it turned out to be perfect for the cake centerpiece and little pieces to frame the table with. The moss also hid the bowl really nicely and created that natural look I was going for.
Not only did this cake look nice, but it tasted so good, almost like banana bread. This is definitely not one of those cakes that will go to waste if you have leftovers. It was 8" in diameter and the perfect size for us.
Since I couldn't find a white tablecloth in time, I just used a white sheet that I already had, and it worked out perfectly. The white backdrop made everything stand out so well.
I also made these chocolate covered pretzel sticks, which resembled birch branches. They were made from white chocolate and drizzled with milk chocolate. I had these vases on-hand, which displayed them so nicely.
Inspired by: Hostess With The Mostess
I had mason jars that I filled with the leftover marshmallows and a single fern. I love that rustic, yet clean look.
I also labeled each treat with wooden tags with fun names such as "Twigs" for the pretzel sticks, "Trees" for the sugar cones, and "Smores" for the marshmallows.
Here, Uriah is eyeing what he's going to grab first!
We had so much fun with this party, and it was so easy to put together. We even made sure to dress him up in his plaid shirt so he could look just like a lumberjack!
This cute garland just added that final touch. Since the big kids and adults got to eat pizza, I made Uriah miniature sized pineapple and ham pizzas, too. It was his first time eating pizza, and of course, he loved it! He was officially joining the big kids club.
Yummy... He had his hands full with all of those sweets.
I caught those little hands in action. Hmm... I wonder which one Uriah ate?
His daddy couldn't miss this day for the world.
His cousins and Auntie were there to celebrate too - and of course his curly-haired big bro was right there by his side!
It was such a joy to see my baby turn 1 and enjoy his birthday. I will never forget this day! It was too much fun for me, and Uriah skipped all of his naps, so that's a great indicator of how much fun he had, too. I love this cutie so much, and I am so happy with how this all turned out!
Supply List
Decor
- Wood Rounds: 2 - large, $9.99 each - Marshall's | 2 - small, $4.99 each - Target
- Forest Moss: $6.59 (40% off coupon) regular $10.99 - Michaels
- Boston Fern: 1 bush, $9.49 - Michaels
- Animal Figurines: Forest Grey Wolf, $4.99 - Michaels | Wildlife Figurine Set, $14.97 - Walmart
- DIY Cake Topper: Wooden skewers | 2 types of paper: 1 - rust, 1 - brown paper bag | Candles: $0.90 (clearance), Target | Twine | Animal figurine
- DIY Picture Frame: Old Frame | Moss | Tape | Glue
- DIY Number Stand: Styrofoam plate | Gold metallic spray paint | Moss | Foam ball (cut in half) | Animal figurine
- DIY Burlap Banner: Burlap Banner Kit, $7.99 - Michaels | White cardstock paper for pendants | Chalk | Twine: beige and white, $1.50 - Michaels
- DIY Marshmallow Garland: Large campfire marshmallows, $3.98 Walmart | Twine
- Repurposed glass vases
- Mason jars
- Wooden tags
Total Cost: $80.37
As you can see, most of the supplies, I already had on-hand. That's the fun in doing a DIY party. I'm pretty sure you can find a lot of these things lying around the house too! I didn't mind spending a little more on the wood platters because I definitely can use them in the future. I also could've saved a few dollars if I just cut out the burlap pieces for the banner myself. All in all, this was a super budget-friendly setup that is easily customizable and so much fun to put together.
If you plan on doing a woodland themed party for your little one, I hope this helps you get inspired with some ideas. It is super easy and so adorable. I tried to cover everything, so if I missed anything, let me know in the comments. Have fun!
Will you be putting a woodland themed party together? I'd love to hear about it in the comments!
Disclosure: Affiliate links are included.
We're featuring another artist this week - this time from Ontario, Canada! Holly's work is pulsing with energy and is very unique. The colors she uses are very vibrant and alive, but with a lot of pastel hues. I really enjoy how her brushstrokes contain different shapes and patterns that are really intriguing to look at. Each piece is so unique from the next, which makes me look forward to seeing what she comes up with next. Her work is far from predictable!
Ena really knows how to spot talent, and I am so glad that she introduced me to Holly's work. Every artist that I meet really inspires me to pick up my paint brush and experiment. Holly has dedicated herself to her passion after a career in interior decorating, and will soon have her works available for purchase on Burrow Home. I hope you get to check out her many other beautiful works. A few of her pieces are available at the end of this post as free wallpapers. We will also have a giveaway with Holly on Instagram in a few weeks. Holly will be giving away some hand painted ornaments, so make sure to follow us so you don't miss out on that. Now, let's get to know Holly!
Q & A
1. DID YOU ALWAYS HAVE A PASSION FOR ART AND WHEN DID YOU START PURSUING IT?
I loved drawing as a child & excelled in art classes throughout high school. At University I experimented in my art classes & discovered an interest in watercolour. My work was abstract & full of colour. After graduating with my BFA I attended college where I studied Interior Design. I have always loved interior spaces & thrifting vintage items. I have painted as a hobby for years, doing commissions for friends & family. It wasn’t until a few months ago that I decided I needed to make my passion my career, & just go for it.
2. WHERE DO YOU FIND INSPIRATION?
The combination of colour, texture, & pattern. My lines & brushstrokes are a dynamic expression of my daily life. Graffiti, interiors, & architectural elements are images I look at when seeking inspiration.
3. WHAT MEDIUMS DO YOU USE?
Primarily acrylic, I will often add in latex or spray paint to layer my paintings & create texture. I am planning on a new series this year, that is photo based with epoxy resin. I’m excited to branch out into a new direction & see what it leads to.
4. IN THREE WORDS, HOW WOULD YOU DESCRIBE YOUR STYLE OF ART?
Colourful, Abstract, Spontaneous
5. DO YOU LISTEN TO MUSIC WHILE CREATING ART? IF SO, WHAT’S ON YOUR PLAYLIST?
I always have music on, & I definitely have a playlist that gets me moving consisting of Florence & The Machine, Awolnation, & Cold War Kids. If I’m in a mellow mood you’ll probably hear Neil Young, Dawes, The Shins or Temper Trap. The titles of my works are often lyrics, or songs themselves that were playing in the background while I was creating.
To be continued...
Read the rest of the Q & A HERE.
| download |
| download |
| download |
| download |
download 1 | download 2 | download 3 | download 4
I hope you snagged all of Holly's beautiful wallpapers! Holly can be found over here: Website | Instagram
For wallpaper updates, sign up for my newsletter in my sidebar or simply follow @hlovelyliving and @cheekybillo on Instagram. Search #cheekyliving where we will be posting when new designs are up and show us which wallpapers you picked.
My Wallpaper Wednesday partner in crime - the lovely, Ena Chahal - can be stalked over here: Blog | Etsy | Society 6
A heartfelt thank you to Holly for collaborating with us!
What designs would you like to see next? Share with me in the comments below!
Disclosure: All designs are original and for personal use. Artists retain rights to all designs and they may not be copied or reproduced in any form or likeness. We love when you share, but please link back to the original post. Enjoy!
via Cake Time
The holidays are up and coming, and all I can think about are sweets! Since I'm not normally a sweets kind of person, I tend to get all excited once the holidays roll around because I love the desserts that are only around for a short period of time. When I stumbled across these miniature gingerbread houses, I just died! They are so adorable. I may just make them so I can stare at them all day. Not eat, just stare!
If you fell in love with these like I just did, you will definitely love this collection I put together of the tiniest and cutest holiday desserts out there. Being that they are so cute, you may just not want to eat them too, but seeing that they also look so delicious, that's probably not possible. Happy staring and happy eating! Hope you try these out.
Did you see something yummy? Let me know which one was your favorite in the comments!
Caramel corn is so addicting, but adding matcha and honey as well... It doesn't get any better than this. All caramel corn really is, is butter and sugar, so when you think about all of those yummy ingredients together, you're talking about the party of all parties in your mouth. Thanks to my husband for suggesting I put matcha into my caramel - I couldn't put down the container without finishing every last piece. Here's to changing caramel corn forever! Read on for the recipe.
Honey Caramel Matcha Popcorn
Author: Stina Abion | Hello Lovely Living
Published November 9, 2015

Servings: 8 - 2 cup servings
Prep: 0 mins
Cook: 25 mins
Total time: 20 mins
Ingredients
- 2/3 cup popcorn kernels
- 2 Tbsp olive oil
- 1/2 cup raw organic honey
- 1/2 cup brown sugar
- 1 tsp matcha powder
- 1/2 cup butter
- 1/4 tsp salt
- 1/4 tsp baking soda
Instructions
- For popcorn: Pop kernals in two batches. In a large 4-quart heavy-bottomed pot with lid on, heat 1 Tbsp of oil on medium heat and add 1/3 cup of kernals. Gently shake pot to distribute heat and oil on kernals and leave lid slightly adjar to allow steam to escape. Once it begins to pop, watch carefully and shake pot occasionally. Remove from heat as soon as you notice popping stops at 2 to 3 seconds apart. Repeat steps for second batch. Pour popcorn onto a 17.25" x 11.5" baking sheet lined with parchment paper.
- For caramel: On medium high heat, melt butter, brown sugar, honey, matcha powder, and salt in a large saucepan and heat until boiling.
- Once boiling, reduce heat to medium and allow to boil for 3 minutes without stirring. It will start to bubble, so watch it carefully.
- Remove from heat and add baking soda. Stir to combine. The mixture will get even more bubbly.
- Pour caramel over popcorn and gently mix to coat. Place in a 250° heated oven at 5 minute intervals and mix to evenly coat each time. When all kernels appear evenly coated, you may remove from the oven. Allow to cool before storing.
Notes
- For more matcha flavor, just add more matcha powder.
- Store in an air-tight container.
Homemade popcorn is just way more fun and even way more delicious. This is perfect for the holidays because of that rich, green color that the matcha powder creates. Just package in pretty little gift bags or containers and you have a simple DIY gift that anyone will love. I hope you try this out!
Look out for more matcha recipes coming soon.
What is your favorite popcorn flavor? Share with me in the comments!
It is officially Fall, and I have yet to make my way to the nearest park so I can see all of those beautiful leaves and bright colors. That is on the agenda ASAP, but in the meantime, I had so much fun mixing watercolors to create a few Fall inspired wallpapers. Ena also did a couple that are so playful and fun that you will love.
As always, happy downloading and do come back next week because we have another artist feature. Show us your wallpapers on Instagram with #cheekyliving.
| download |
| download |
| download |
| download |
download 1 | download 2 | download 3 | download 4
My Wallpaper Wednesday partner in crime - the lovely, Ena Chahal - can be stalked over here: Blog | Etsy | Society 6
What designs would you like to see next? Share with me in the comments!
For wallpaper updates, sign up for my newsletter in my sidebar or simply follow @hlovelyliving and @cheekybillo on Instagram. Search #cheekyliving where we will be posting when new designs are up and show us which wallpapers you picked.
Disclosure: All designs are original and for personal use. Artists retain rights to all designs and they may not be copied or reproduced in any form or likeness. We love when you share, but please link back to the original post. Enjoy!
Hi Lovelies! I'm writing this one a wee bit late this week - but hey - better late than never, right? Today, I want to talk about perseverance because I believe it is one of those qualities you absolutely need if you want to achieve anything worthwhile. So, let's get into it!
I love getting inspired by those who are already at the top and connecting the dots to common threads that successful people share. Recently, I've been visually connecting how those that are reaping the rewards of success, at one point, had to persevere through times of not really seeing any results. Well, maybe they did see results, but they were very small and not really encouraging. Perseverance is really those small steps that we take every day that add up to a larger picture (one day). These steps are the ones that are done in the darkness, with no one watching.
So, really, in order to ever reap a harvest, we must plant seeds NOW, and we must be consistent about it. We will not see them grow right away, but eventually, with consistent and persistent watering, they will. This reminds me of a quote that I came across that said, "The tiny seed knew that in order to grow, it needed to be dropped in dirt, covered in darkness, and struggle to reach the light."
Not only do we need to plant seeds, but we must also go through a lot of discomfort in order to grow. It won't be easy, because nothing worthwhile ever is, but that is really just the test of our perseverance. Are we willing to make the sacrifices now in order to have the life we truly want? Are we going to give up when times get tough? These questions will really determine the course of your future.
When you look at successful people, all you're really looking at is the result of them sowing seeds daily and being committed to the process. What's more is, they don't stop once they reach a certain level of success. They keep planting. They keep pursuing their dream. They keep growing. They don't get comfortable.
No matter where you are at right now in your life, as long as you are planting those seeds daily, you will one day see them grow. A seed is a seed, so no matter how big or how small it is, just keep doing it. Even if it takes 10 years for your dream to come to fruition, just know that you are one day ahead of the other person who has never planted anything towards their future.
Keep planting, and keep growing. Have an amazing week!
What is one way that you can plant a seed toward your dreams today? Share with me in the comments!
Visiting the park is one of the things I really enjoy these days, but since it's getting a lot cooler now, those days are long gone for a while until the warmer months are back. So, I was so happy to create this spontaneous DIY to admire and to reminisce upon during the colder seasons.
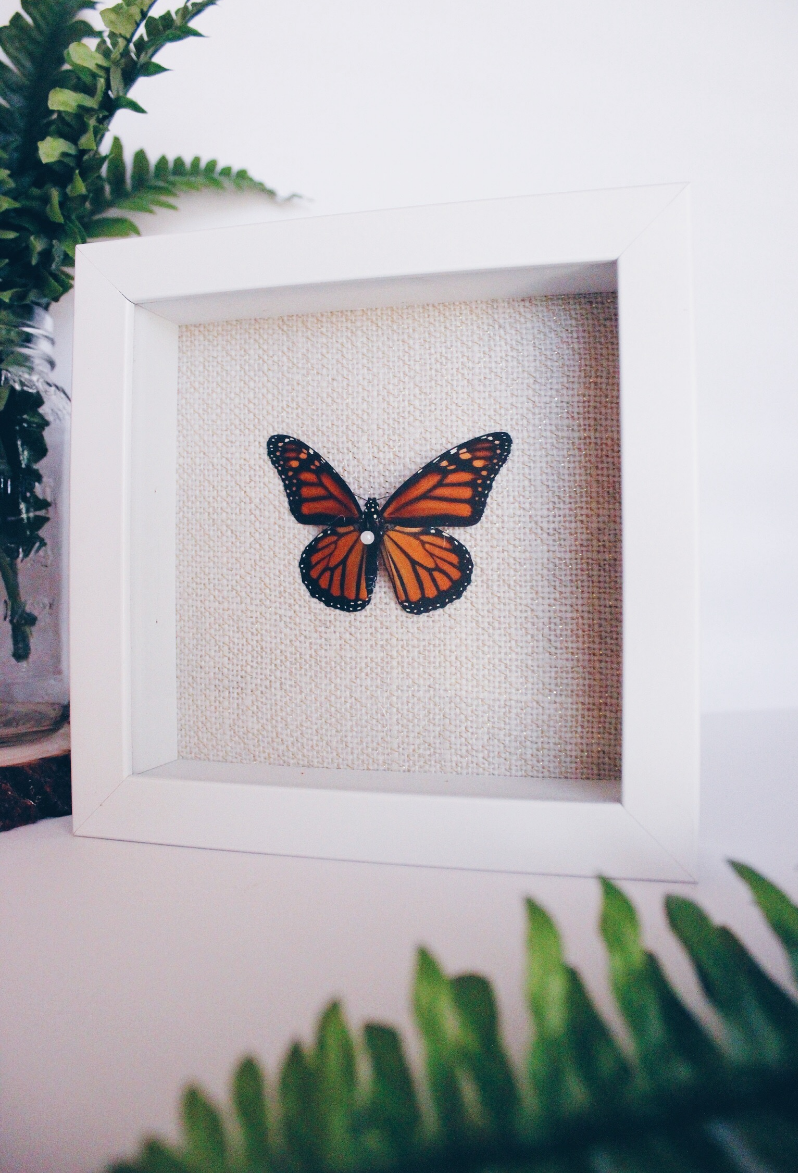
One of my favorite things to do at the park is to pick up little treasures, so when my oldest son found a butterfly that had gone to butterfly heaven, you know I wasn't going to pass it up. Having not preserved a butterfly before, I took to google and discovered that there's really not much to it than what I had thought.
I am definitely not the butterfly-killing type, so this was one of those DIYs that was very spontaneous and out of the blue for me. How often do you stumble upon a butterfly that is completely intact and not already stiff and dry (or missing a wing, a leg...) ? Rarely, right! This is a monarch butterfly, and they are so so beautiful and plentiful here. I was so excited to see one up close, but also sad that the butterfly had died somehow.
So, here's how I did this really quick project. I didn't take step-by-step photos because I was rushing to put it together at the time, but it's really easy and straightforward.
What you'll need
- Butterfly
- Shadow Box - Size: 7"w x 7" h (5 1/2" w x 5 1/2" h mounting area)
- Burlap with gold accents or any fabric - Size: 6 1/2 - 7" w x 6 1/2 - 7" h
- Tape
- Pin
Instructions
You'll need a butterfly that is still fresh and that has not gone stiff yet. If your butterfly has gone stiff already, put it in a container with a wet napkin and let it sit until the butterfly is hydrated. If you don't plan to mount the butterfly immediately, just put it in a container and freeze it. Once ready to use, remove from the freezer and place a wet napkin in the container to get it hydrated again. Note: Since I didn't need to freeze or rehydrate my butterfly, I am not 100% sure if these steps are effective. I found this advice online.
Remove the frame backing and take your fabric and wrap it around tightly. Secure the fabric with tape to the back of the frame. Measure the center of your frame and mark it so you know where to place your butterfly. Take your butterfly and spread out the wings gently. Holding the thorax, insert the pin as pictured. The butterfly should be pushed up against the pin head so it appears to be floating when mounted. Push the pin into the frame where you marked the center. Reposition the butterfly's antennae and wings for its final resting position. Reassemble your frame and hang.
I think that was one of the easiest DIYs in DIY history, and it literally only took a few minutes. Total cost: $5. I only had to purchase the shadow box, which was even on discount, so YAY for that. I love how it turned out, especially for a spontaneous project that will be enjoyed for years to come.
Even if you're designing on a budget, you can still achieve something beautiful and authentic. I hope this project inspires you! Happy Fall!
Let me know what you think about this DIY in the comments!
This week, Ena and I are featuring London based artist, Harriet Hoult! Harriet reached out to me - and I'm so glad she did - because I needed her artwork in my life. What I love about her art is that it has so much depth to it. I could literally stare at her pieces for days and would appreciate her work and never get tired of it if it were displayed in my home. Her work is so colorful as well and contains so many textures, patterns, and details yet to be discovered.
In Harriet's About section on her website, she says,
"I tend not to plan. I have an image in my head as a starting point and I make some makes in the direction of that original idea. Then I feel my way to what the next set of marks will be. It's a moment-by-moment evolving process."
To me, that is so inspiring and it is a common thread that many artists share. I find that intriguing and inspiring. To create something so beautiful from a space of letting go is really amazing, and that's why I admire her work so much.
Her work also has so much emotion and energy pulsing through it, while others are very soft and calming. I also love how every piece she has evokes a different feeling.
Explore her work - you'll be so glad you did! She is sharing three beautiful wallpapers at the end of this post, so make sure you grab them, but first, let's get to know her a bit more.
Q & A
1. DID YOU ALWAYS HAVE A PASSION FOR ART AND WHEN DID YOU START PURSUING IT?
I always loved Art at school and I used to get very excited about the Art class each week. Then I would spend the whole time from the point of the class ending looking forward to the next one. It was the only time of the week when I felt truly alive and sort of purposeful. Then at 16 I gave up it completely - I was advised by my teachers that Art was not an academic subject and that it would be sensible career wise to take a more robust subject like History or Politics. From that point on, I didn't pick up a pencil or paintbrush for many years - until I signed up for an art workshop in Scotland about 7 years ago, and that was probably the beginning of this particular phase and the seed of the work I am now doing.
2. WHERE DO YOU FIND INSPIRATION?
My inspiration comes from many places. I am and always have been very driven by aesthetic's - the things I perceive to be visually beautiful. So really, it is anything that I see that touches that 'beauty spot' within me - whether that's the way two colours interact on a street sign, an old tree stump in the park or a page in a magazine. I also love graphic design and I get very excited when I see what I consider to be a great design piece. The other thing I am very inspired by is people's stories - I often listen to podcasts like Radio 4's Desert Island Discs as I love hearing successful people talking about themselves, their motivations, and their lives.
3. WHAT MEDIUMS DO YOU USE?
I work mainly with acrylic (both tube and spray paint) and mixed media on paper. I love working on paper because to me it feels really sort of raw and real - I only use very thick textured archival paper. The mixed media could be anything from oil pastel to string or sand.
4. IN THREE WORDS, HOW WOULD YOU DESCRIBE YOUR STYLE OF ART?
Abstract, colourful, expressive
5. DO YOU LISTEN TO MUSIC WHILE CREATING ART? IF SO, WHAT’S ON YOUR PLAYLIST?
I sometimes listen to music but recently I've been listening more to podcasts - as I mentioned earlier Desert Island Discs on Radio 4 is one of my favourites, also Raise Your Hand And Say Yes by Tiffany Han is another one I've tuned into a lot in the last few weeks.
To be continued...
To see the rest of the Q & A, click HERE.
| download |
| download |
| download |
download 1 | download 2 | download 3
I hope you snagged one - if not all - of Harriet's beautiful wallpapers! Harriet can be found over at her Website, Facebook, Twitter, Instagram, Tumblr, and Flickr.
For wallpaper updates, sign up for my newsletter in my sidebar or simply follow @hlovelyliving and @cheekybillo on Instagram. Search #cheekyliving where we will be posting when new designs are up and tag your wallpapers in use to be featured.
My Wallpaper Wednesday partner in crime - the lovely, Ena Chahal - can be stalked over here: Blog | Etsy | Society 6
A heartfelt thank you to Harriet for collaborating with us!
What designs would you like to see next? Share with me in the comments below!
Disclosure: All designs are original and for personal use. Artists retain rights to all designs and they may not be copied or reproduced in any form or likeness. We love when you share, but please link back to the original post. Enjoy!
Happy Hump Day guys! Today, we have some minimal geometric designs up for grabs. I love how Ena and I can come up with something on the fly. Thanks to our night owlish tendencies, we have successfully not skipped a week! Just FYI, our feature artist is postponed until next week, so stick around for that!
On another note, I wanted to find out what other free resources you guys are interested in. I've been brainstorming projects, but your input would be great. That's one of the great things about the internet - and with so many resources available out there - it's hard not to want to jump on the bandwagon and give. That is actually a guiding force for this blog, so there is definitely more to come.
Hope you likey, and don't forget to tag us on Instagram with #cheekyliving and show us which wallpaper(s) you picked. Happy downloading!
There ya have it! I hope you snagged one - if not all - of these beautiful wallpapers!
For wallpaper updates, sign up for my newsletter in my sidebar or simply follow @hlovelyliving and @cheekybillo on Instagram. Search #cheekyliving where we will be posting when new designs are up and tag your wallpapers in use to be featured.
My Wallpaper Wednesday partner in crime - the lovely, Ena Chahal - can be stalked over here: Blog | Etsy | Society 6
What designs would you like to see next? Share with me in the comments!
Disclosure: All designs are original and for personal use. Artists retain rights to all designs and they may not be copied or reproduced in any form or likeness. We love when you share, but please link back to the original post. Enjoy!
So, I wanted to share with you guys this really quick and easy way to relieve migraines or headaches. As someone who on occasion suffers from migraines, I know all too well how debilitating it can be. Not only do I get the migraine itself, but I also experience nausea, dizziness, dehydration, and a general brain fog that makes it hard to function.
If you have ever suffered from a migraine, you know that you can sometimes experience an aura or the onset of the migraine before you get it. If I wake up feeling like I got hit by a train, the chances are high that I will end up getting a migraine that day. I have also experienced a heightened sensitivity to light, and just an overall feeling of tension. Not fun.
Due to the proliferation of MSG (monosodium glutamate) in our foods, it's hard to avoid getting a migraine - unless you avoid it completely or happen to be the lucky one who doesn't have a sensitivity to it. And it's not as simple as looking for MSG on the label - it's hidden under many names, so you'd basically have to avoid all processed foods to ensure that you don't come into contact with it. As much as I try to avoid MSG, I still occasionally come into contact with it due to my love of soy sauce - eating out doesn't help either.
Of course, migraines can also be triggered by more than just MSG. I found out once that I was low in potassium after having to go to the hospital because my migraine was so excruciating. Those were the days when I would literally suffer from a migraine on a regular basis (almost every day).
So, what is this remedy I speak of? To get straight to the point, it is cream of tartar. If there's anyone who has searched and tried natural remedies for migraines, it is me. This has to be one of the fastest working remedies I have tried and I think I have tried everything known to man (well almost). You may have heard about cream of tartar for baking. It's used to stabilize egg whites and whip cream along with other awesome baking tricks. Not only is it natural, but it is completely safe, of course when used in small amounts.
My comprehensive ebook
natural migraine remedies that work
In this ebook, I share my personal story of how I discovered relief with 10 natural migraine remedies, 3 recipes, and my top supplements that work. Enjoy a visual experience with 30 pages of helpful information to get the relief you need and prevent migraines from the start.
Cream of tartar is a byproduct of winemaking and is potassium bitartrate, or potassium hydrogen. When taken with water, it neutralizes the effects of MSG poisoning and raises the blood PH of the body, creating an alkaline-forming environment. (source) Potassium is an electrolyte, so paired with lots of water, your system will have all that it needs to get hydrated and rid itself of any toxins. It has other known natural uses, so I encourage you to research about it. As someone who tries to avoid medicine at all costs, finding natural remedies is my passion. I also did a post on how to naturally prevent the cold and flu, which is pretty interesting. I've found that it actually makes me identify the root causes instead of masking illness with more toxins in the form of medication.
So, what I did was I mixed 1/2 tsp in 8 oz of water and drank it slowly. The taste is tangy, but not anything disgusting. It reminds me of some type of sour candy, but without the sweetness. Upon drinking this, I immediately began to feel better and the dizziness and brain fog that I was experiencing began to dissipate soon after drinking it. When I was completely done, I felt really hydrated and energized. Not to mention, I had a hard time going to sleep because I had so much energy and all traces of my migraine were gone. Note though, that I did take this as soon as I began to experience migraine symptoms, so it wasn't as severe as it would be if I had let it get full-blown.
I am so thankful that this simple remedy made my migraine disappear. With a baby to tend to, ain't nobody got time for that! Keeping the family strong and healthy is of utmost importance. I hope you enjoyed this post, and please let me know if there are any other migraine remedies you may know about. Thanks so much for sticking through this lengthy post!
Disclosure: This post is purely from my personal experience and for informational purposes only, not to be construed as medical advice. Please seek medical advice from a licensed health practitioner.
Do you suffer from migraines? What has been your experience? I'd love to hear in the comments below!
It's totally natural to feel discouraged, especially when you are headed down a path that may only currently make sense to you. Doing what you feel in your heart to accomplish is often a lonely road filled with many moments where you question the very fabric of who you are. There will be times when you just need someone to reach out to you with some encouraging words. For some, that comes, and for others, it may not.
From a young age, I always felt that in order for me to succeed, I had to push myself and encourage myself. If I didn't do it, no one else would, so I made a promise to be that motivating voice for myself. That was one of the strategies that got me through being a young single mom, through high school while juggling a baby, through college while juggling work, and ultimately, to where I am today. Not only did I not rely on others for their validation or their approval, I took it upon myself to really dig deep within and find that inner strength.
I know what it feels like to not be encouraged by the people around you, so today, I wanted to focus on how to stay encouraged. It's an important part of the journey of life to stay lifted, so not only should we encourage others, we must focus on ourselves and keep the most important person in the room happy - us! If we're not encouraged, how can we make an impact on this world and the lives of others? It's a cycle that starts with you and I.
Tap into your inner strength.
Seeking outside validation is the fast track toward defeat. Not only will you get disappointed, but you will get drained looking for validation. Instead, be self-propelled and rely on your inner strength to fuel you. If we give people the power to feed us, we also give them the power to starve us. So, avoid being attached to external voices, which may limit you or give you a false identity. You have it in you to stay motivated, pushed, and propelled. Stay focused on that inner voice.
Surround yourself with the right people.
The people you do surround yourself with should be those that have the ability to uplift you, motivate you, and support your undertakings. Once you make that decision, your world will change because your environment will change. Not only does this include the people physically around you, but your online crowd as well. Flood your social media accounts with motivational content by following leaders and people that inspire.
It's also important to never adapt who you are for someone else or let anyone belittle you, your dreams, or your aspirations in exchange for making them feel comfortable. Instead, seek uplifting relationships and let go of tolerating people that either don't value you or can never step outside of themselves for a moment. You'll be surprised by how many people are out there that will actually support and encourage you because they are confident in their own journey.
Give of yourself.
Build your network around the idea of giving and it will be so rewarding. When you help others, not only does it feel amazing, but you will start to build authentic relationships. Taking our sights off of ourselves sometimes is so important because it allows us to set aside our personal issues for a moment leading us to feel fulfilled with a greater work.
When you discover other people's journeys, you'll start to be encouraged by their story, too. They will inspire you and it will be encouraging to know that you're not the only one going through certain challenges. You'll have the right people to relate to and be able to uplift each other.
Work your tush off.
There's nothing better than immersing yourself in your passion and blocking out all of the noise and distraction that can cloud our judgement at times. When you simply commit to what makes you happy, not only will you be filled with joy, but you'll be filled with contentment. Focusing on your work can bring so much reward and it will drown out any other voices. Working on your craft will also encourage you to keep at it and put in more work. Every day you will feel like you're walking in your purpose and fulfilling your dreams.
Stay inspired.
Staying inspired every day builds a momentum that only keeps growing. When you focus on creating, coming up with new ideas, projects, planning, and the like, you will be too occupied with the good stuff to be distracted by the bad. When you are inspired, you are happy - and that radiates to other areas of your life.
These are five ways that I have found to be absolutely encouraging in my journey. However, there are still so many other ways to stay encouraged - like having a tub of chocolate ice cream on standby. Who doesn't feel better after ice cream?
I think the main thing here is to just keep doing what you love to do, and by that, I mean everything. Once you get that ball rolling, it becomes easier to tap into that inner voice that says, "You know what? You're the bomb!" Ok, corny, I know. Haha! Stay encouraged, my friend. I'm here cheering you on!
Speaking of getting the ball rolling, here's an inspiring read that I think you'll like.
What ways do you stay encouraged? I would love to hear about it in the comments below!
Wow, we've hit our 10th Wallpaper Wednesday already! Time just really needs to slow down because, not only am I getting a day older, but my little one will be turning the big 1 this month. *cries* I can't even believe how fast this year has escaped me. I am just loving every minute of his precious life and never want him to grow up. Oh, and if you have any easy 1st birthday party ideas for boys, please share them with me!
This week, we put together some pastel inspired abstracts. I'm really loving how they turned out. Are there any designs that you would like to see in an upcoming WW? I would love to hear your ideas. After all, Ena and I do this for you guys, so we're open to any and all suggestions. We also would love to know who your favorite artists are and any recommendations for who you would like to see featured. We're so happy to have featured three budding artists so far, and we plan to grow an even bigger network in the months to come. Without further ado, happy downloading!
| download |
| download |
| download |
| download |
download 1 | download 2 | download 3 | download 4
There ya have it! I hope you snagged one - if not all - of these beautiful wallpapers!
For wallpaper updates, sign up for my newsletter in my sidebar or simply follow @hlovelyliving and @cheekybillo on Instagram. Search #cheekyliving where we will be posting when new designs are up and tag your wallpapers in use to be featured.
My Wallpaper Wednesday partner in crime - the lovely, Ena Chahal - can be stalked over here: Blog | Etsy | Society 6
What designs would you like to see next? Share with me in the comments!
Disclosure: All designs are original and for personal use. Artists retain rights to all designs and they may not be copied or reproduced in any form or likeness. We love when you share, but please link back to the original post. Enjoy!
via The Home
I love everything about boho design, and so I decided to put together a bunch of useful tips to getting that oh-so sought after look. No matter what season it is, you can always create the perfect little getaway in your home. At this moment, I'd have to go with a modern boho look because it is so me. I love the way you can mix and match colors, furniture, textures, and fabrics to create such an interesting and pretty space. I hope you love what I've put together, and hopefully it inspires you to go boho!
So, what did you think? Did you fall in love with any of these ideas? I think I fell in love with all of them. Yep, I basically did. I would love to incorporate all of these ideas into my home somehow. One day at a time, and I'm sure I will. Have an incredible and inspiring week ahead!
Which tip was your favorite? Share with me in the comments below!
PB&J. No childhood is complete without it, right? My little one was in for a yummy treat, because it was his first encounter with a jelly sandwhich and he devoured it! On occasion, I get bursts of excitement to try some new homemade treats for my little guy; this time, it was this delicous Strawberry Chia Seed Jam.
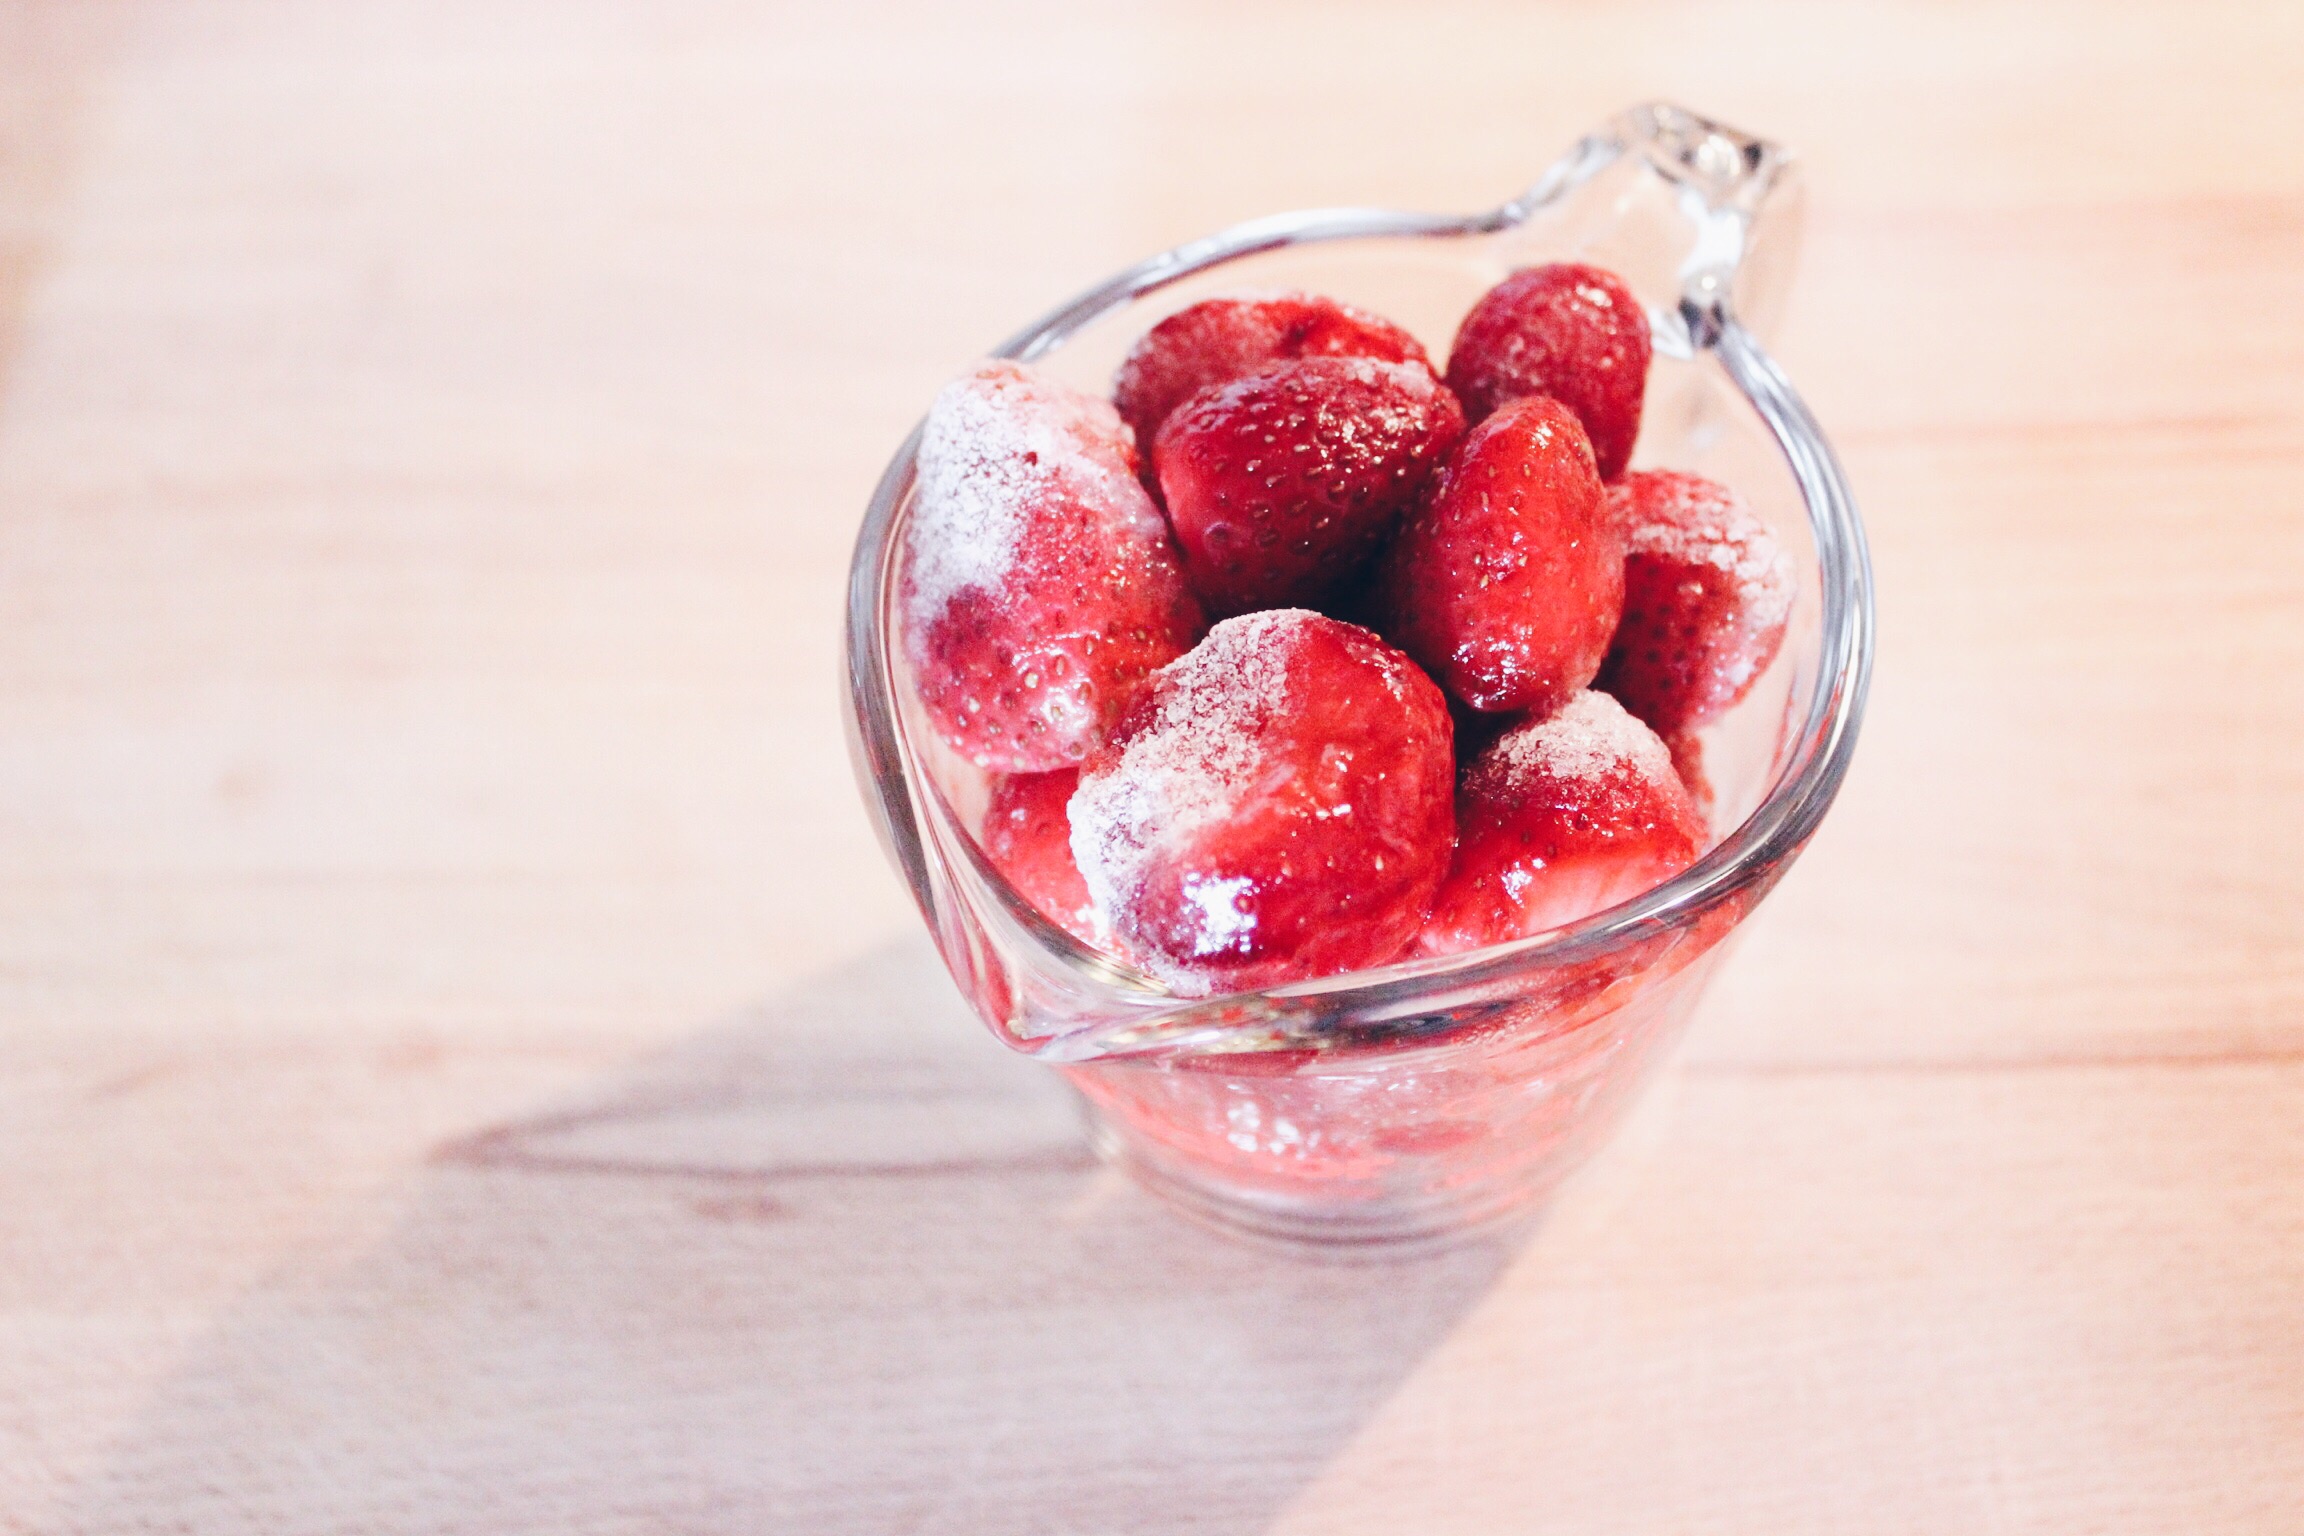
I've always wanted to make my own jam from scratch, but it seemed so intimidating. Surprisingly, it is so extremely simple when using chia seeds, that you could literally make this in your sleep! I'm so impressed with how easy it is, and I'm excited to try making it with other fruit.
See how yummy that looks! It's easily spreadable and packed with flavor. You won't be missing store bought jam, that's for sure! You may have heard about the health benefits of chia seeds - they're packed with fiber, protein, antioxidants, and Omega-3 fatty acids, and that's only naming a few. They're a superfood that can be used in so many different ways, so I encourage you to discover other yummy recipes. I'm sure Pinterest has a ton!
Can you believe that you'll only need three ingredients? Yep, so simple and so utterly delicious and healthy. I love using organic ingredients as much as I can. Let me know if you want to learn about what all this organic hoopla is all about!
My little one loves being in the kitchen with me, and when he's not tugging at my leg to pick him up, he's usually emptying all of my cabinets. Thank you, son for rearranging things for mommy! Haha. Hopefully that will translate into a love for cooking one day. This photo shows the strawberries once they're completely boiled down, and right before the chia seeds join the party.
I cut his jelly sandwiches into miniature, baby sandwiches. Aren't they just the cutest! Ugh. I wanted to eat them!
Of course, he disassembled every single one of them, and got strawberries all over the place, but that's okay! He loved them so much. I hope you get to try out this recipe, and do try this for your little ones. Jam can be ridiculously expensive (especially organic). Skip the artificial sweeteners and added junk, and try this recipe. Enjoy, lovelies!
Strawberry Chia Seed Jam
Author: Stina Abion | Hello Lovely Living
Published October 9, 2015

Servings: 6 oz
Prep: 0 mins
Cook: 15 mins
Total time: 15 mins
Ingredients
- 1 cup frozen strawberries
- 1.5 Tbsp chia seeds
- 2 Tbsp pure maple syrup
Instructions
- Place frozen strawberries in small saucepan and bring to a simmer on medium to medium high heat. Begin to mash strawberries and continue mixing until a nice, smooth consistency is reached.
- Reduce heat to medium low and add chia seeds. Let simmer for about 10 minutes.
- Add maple syrup and stir well. Cool and then place in a glass jar. Enjoy!
Notes
- Can be stored for up to 2 weeks in the refrigerator.
- Try using other fruits like blackberries, blueberries, cherries, etc.
Now wasn't that the easiest recipe, EVER? If you decide to try out this recipe, please share a photo with me on Instagram @hellolovelyliving. Happy Friday, and I'll be back for more kid-friendly recipes soon. Up soon: Homemade Chicken Nugget Shapes. Your littles will love this one. Talk to you soon!
Will you be making this recipe? What does your little one love to eat? I'd love to hear in the comments below!


