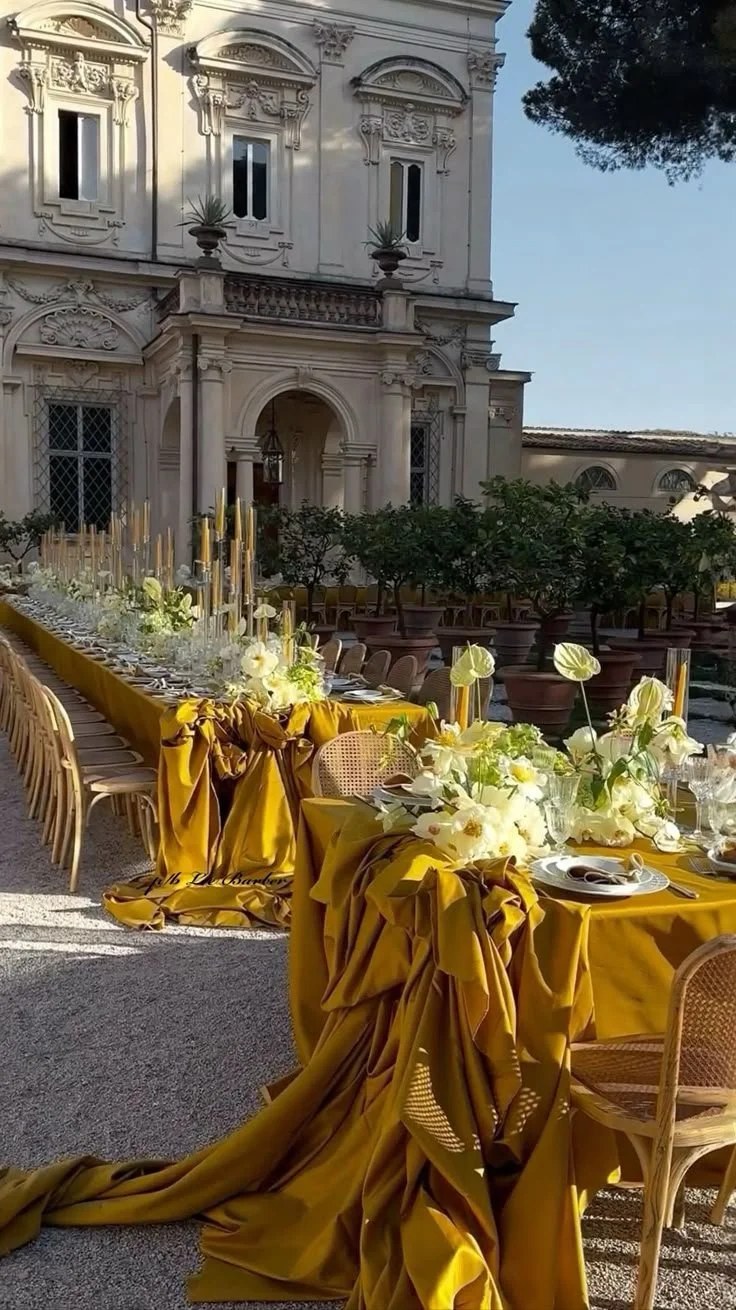
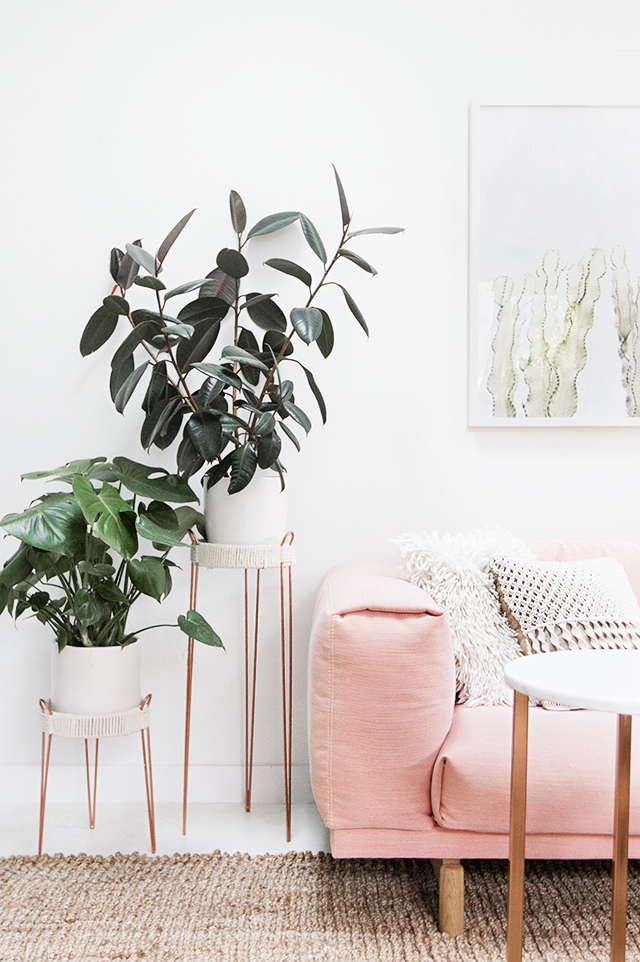
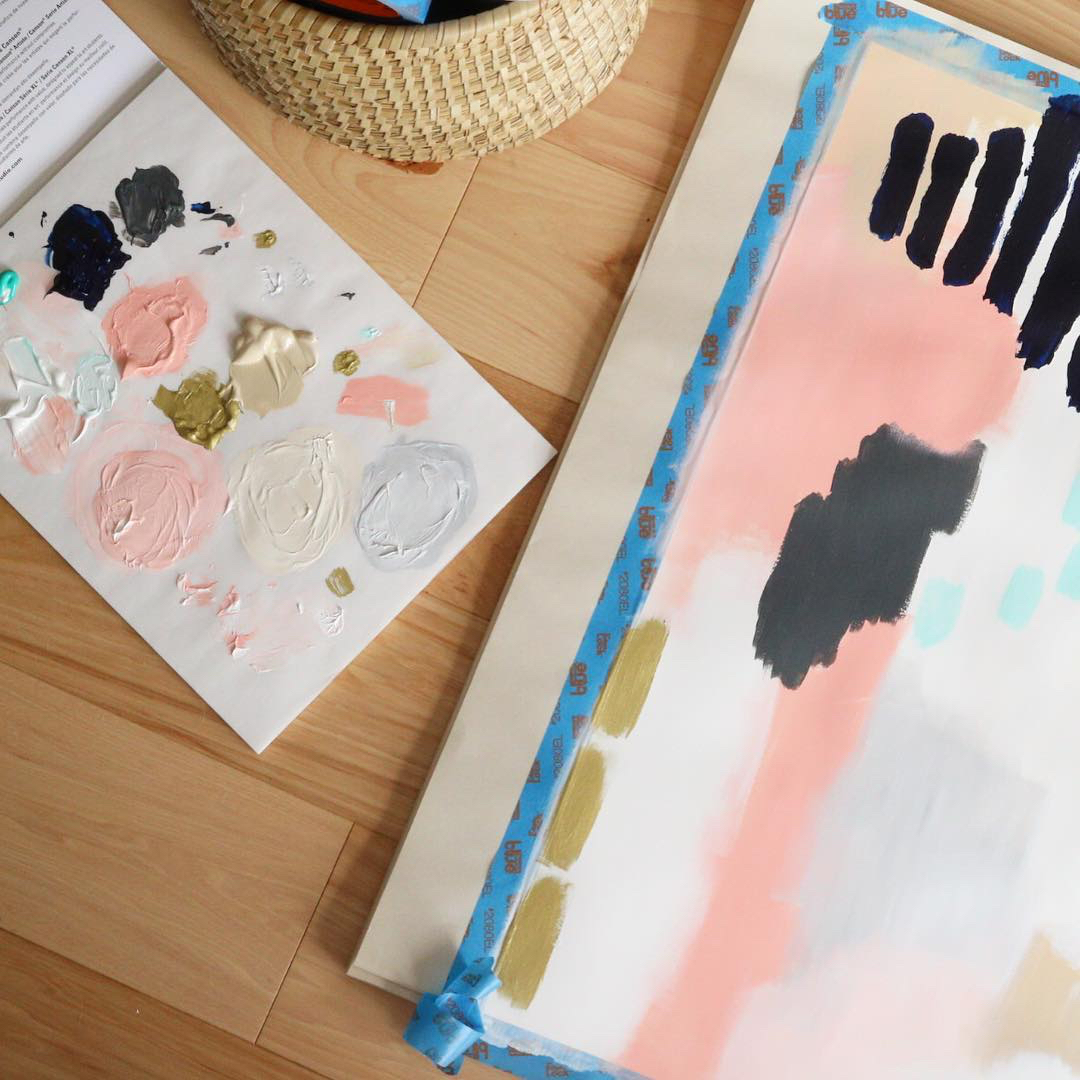
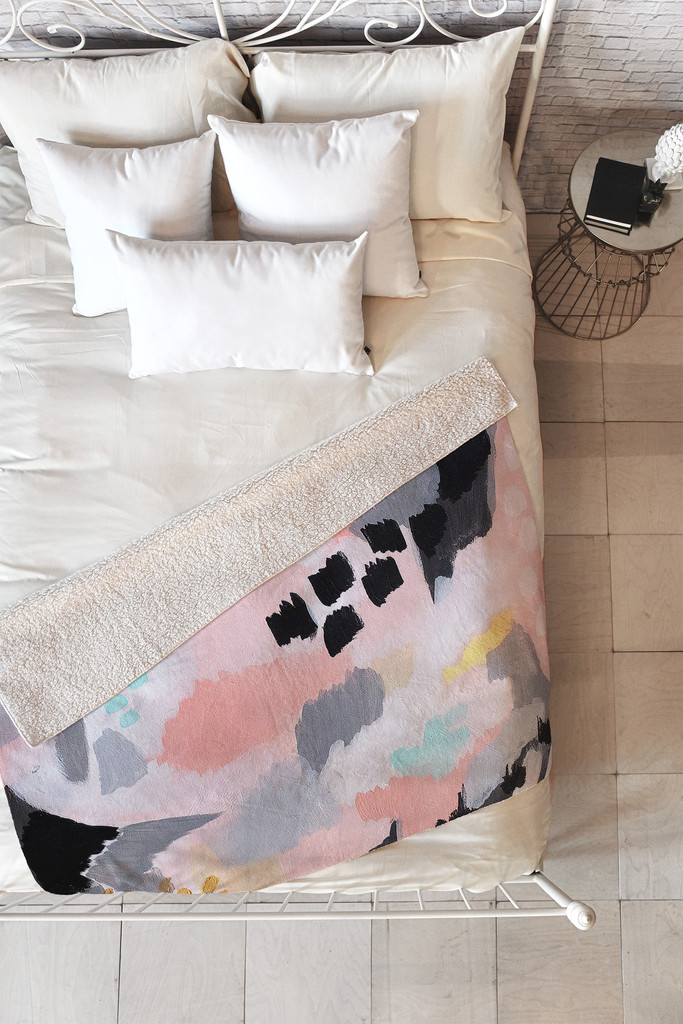
Week In Photos: Instagram Recap

Ok. I'm kindaaa obsessed with Instagram. AGAIN. Just when I was starting to move away from the platform, they pull me in with their new feature. Have you seen it yet? Instagram Stories. It's like Snapchat, but without the fun filters, but that's okay. In time, I'm sure they will come out with something that's as equally addicting as Snapchat. I just love how everything is on one platform now because I just can't keep up with it all. I sucked majorly at Snapchat, so I'm glad that this all happened. I also like how I am able to post things in my stories that don't need to stay on my wall because I can get pretty anal about the look and feel of my feed. In that sense, I am so loving it and plan to share a little more on there that is more candid and hopefully you can get to know me a lot better and get a better feel of the chick behind the screen. 

With all that said, I wanted to start doing a weekly roundup of my week in photos. Since I started Hello Lovely Living, I have developed a love for photography, particularly nature, styled photos, still life photography, and flat lays. I want to continue to explore where this will take me because I just love doing it, and it really gets me excited to create - be it  through taking photos, creating DIY projects, painting, writing, and the list goes on. I take photos of it all! All the photos you see here on Hello Lovely Living and on any of my social media channels were taken by me unless I specifically tag the source - then all credit goes to that person. I am all about sharing original content, so I do my best to create my own stuff. As an artist, I think creative control goes hand-in-hand, so I understand how it feels to feel proud of the things I create. It's liberating and exhilarating.

Anyway, before I go into a totally different tangent, I just thought I'd share that all with you guys. I hope you find inspiration in these images and that you get more of a glimpse into my world.  

Without further ado, last week's recap in photos. 

August 1-8 | 2016

So, did you enjoy perusing through my photos like a stalker? Kidding! I'm allowed to joke once in a while, right?! I may not be good at it, but I try! Hahaha.

I definitely enjoyed putting this together because it gives me a mental recap of my life in a way. Sometimes life can pass by so quickly, so it's nice to take a minute to reflect on the more valuable things in life like memories. It's so important to be grateful for every single thing, and I am certain this was just that exercise I needed. 

If you liked what you saw and want to stalk me some more *wink wink*, you can see the rest of my photos on Instagram and give me a follow. There, you can also take a look at my original captions, and hopefully they will inspire you in some way and give you the occasional giggle. Hope to see you there!

So, tell me, which social media platform do you prefer? I'd love to hear what you think in the comments below!

Hello Lovely Living | Sharing Is Caring
lifestyleStina Xplants, food


Perfectionism May Be Killing Your Dreams: 10 Ways To Overcome It
HelloLovelyLiving.com | The One Thing That May Be Holding You Back And How To Overcome It

Perfectionism. It's something that I've struggled with for all of my life, and I think it's something that a lot of us deal with in general. Is it a form of anxiety? I don't know, but it has caused a lot of anxiety in me over the years. I decided to talk about this topic for those of you who have the same struggle and who are trying to overcome it. I don't think I've necessarily overcome it, but I am miles ahead of where I was before, so that's a good sign! Maybe I can offer some insight that can help you to see perfectionism for what it is and then redefine the way you see it and break free from its grip on your life. 

I want to speak specifically to those of you who have serious dreams and aspirations and who have plans to do big things, yet have been held back in one way or the other by feelings of perfectionism. I know how it feels because that was (and at times, is) me. One thing that I can tell you from experience that will be the most important statement in this post is that perfectionism comes with a cost.

The cost?

Time. 

The reason why I say that the cost of perfection is time is because the more time you spend on visualizing the perfect plan or the perfect execution, the further and further away you get from actually achieving your goals. I'm not saying that planning things out is bad, I'm talking about reciting everything in your head a zillion times over until you finally feel that everything is perfect - which is rarely ever. Perfection is unattainable, so it is an unhealthy cycle to be in. 

So, what is the biggest threat to perfectionism and the solution to overcoming it?

Action.

When you decide to act upon your dreams rather than waiting for the perfect conditions, you not only punch perfectionism in the face (take that perfectionism!), but you build your confidence. I really believe that perfectionism is a form of insecurity because we feel as if we have to live up to certain standards - unattainable ones - and since it is created by us for us, we keep creating conditions of perfection and that cycle never really ends because it is in the mind. It is also a form of fear because what we fear is not having control over things, so we do everything in our power to control the conditions until we feel that they are ideal enough. 

One thing that I had to really learn is to distinguish perfectionism from being detail-oriented - which I now see are two very separate things. I've always been both, so knowing that being detail-oriented is a very positive trait and holding onto that while learning to let go of perfectionism has really changed the way I go about my life and the way I view things.

If this is something that you would like to work to overcome, in no particular order, here are strategies that I have used in my thinking process that have helped me so much in dealing with perfectionism.

I made this free printable for you (yes you)! Click the button below to download it instantly!

 
HelloLovelyLiving.com | Free Printable
 

1| Don't overthink things


I tend to do this A-LOT, and I'm a prime example of someone who really can't make a decision to save her life because I tend to be an over-thinker. Overthinking is one of those time-wasters, because while thinking about all of the ins and outs of the good, the bad, and the ugly may cause you to feel a little more secure about your decision in the short-term, it will most likely lead you to many of your insecurities as well. This process will be even longer than you anticipate - we're talking years. You'll most likely come up with reasons why your idea sucks or reasons why you should just not ever do it. Ever. Perfectionism can cause you to convince yourself to believe things that aren't even true - like that you're not good enough, skilled enough, or talented enough. It's pretty overwhelming, so of course your brain will shut down out of pure exhaustion - and give up (which we want to avoid).


2| Make a decision


What is it that you want to do? What is your dream, and how will you get there? First off, making a decision to do it in the first place is your first step to overcoming feelings of perfectionism, which prevents you from ever starting. When you commit to an idea, you block out any other voice that will distract you. Decisions are hard as it is, so ticking this off from the get-go will get you moving forward rather than entertaining that dialogue of perfectionism which states that you must have this, that, and the other sorted out first before you even commit to the idea. Committing is so important because it literally switches your brain from deliberating to the process of action. 


3| Just start


Now that the tough part is over, here comes another step that will be equally hard for the perfectionist. Of course - you have to make sure everything is absolutely perfect before you start, right? Wrong. No matter where you begin, whether you are inexperienced or you are a professional, you will have to start from scratch. The preparation starts now, not at Step 1 - that was the part where you were stuck in your head. Step 3 is where you already have one foot out of the door, and you're saying, "Heeeeello World!" 


4| Follow through


No matter what feelings come up, commit to follow through with what you set out to do. It's easy for you to want to throw in the towel when things aren't turning out the way you had envisioned, but that is exactly what will happen. Things will not turn out perfect. You may even discover that the very thing that you wanted to do just doesn't give you the satisfaction you thought it would - and that is perfectly okay. The sooner you learn, the better, and the clearer things will get. 


5| Have the end goal in sight


As a perfectionist, it's easy to give up on the process if it doesn't appear the way you want it to in the beginning. If you don't see the perfect results, you may start to question yourself and then you may not give your all to see things come to pass. Things take time, and in that, it is very hard to see things perfectly aligned as we envision it. I, myself, always have this idealistic view that can get in the way of reality. There are high expectations that I set for myself, that if I don't live up to them, I feel like I'm doing something wrong, then fear creeps in. It's something that I've had to overcome with motivating myself daily and reframing my expectations.


6| Grace not perfection


It's so easy today to feel the weight of the entire world on your shoulders. There are pressures coming from everywhere to be perfect, so it can feel overwhelming when you feel like you won't ever live up to what is portrayed out there. What I have learned is that my idea of perfection will never be attainable, so I'm just going to go for it and give it my best shot. No matter what the outcome is, as long as I am staying true to myself, that is all that really matters. When you value yourself over ideals of perfection, amazing things start to happen, and you begin to see your dreams realized.


7| Let your hair down


Just be exactly who you are and you will feel no pressure to be perfect. When you realize that you are enough and that you have exactly what it takes to succeed, you will start to enjoy the process more than you ever imagined. You won't need validation from others. You won't let fear guide you - your dreams will. You will begin to see that one dream will lead you to the next.


8| Take it one day at a time 


When we visualize what we want to achieve, we usually have this fantasy in our heads about how we want it to look and how we want it to be done, which is overwhelming in itself. In creating the future you want, taking it one day at a time will get you further than trying to craft the perfect month or year or decade. For example, if you want to create a brand, you may look at other brands for inspiration and feel pressured to look so polished and put together like them. The reality is that it took that brand years to create the brand that you see today. Take it one day at a time and know that every single day you are getting closer to your vision coming full circle. It will take time, but this time it is an investment into your future.  


9| Don't compare yourself to others


It's so easy to think that in order to be successful, you have to learn every single trick of the trade, which means you'll have to read every book, go to every seminar, and watch every motivational speech every recorded just to feel secure. Don't get trapped in the idea that everyone has the answers because you will end up chasing them down instead of chasing your dreams. Getting caught up in what everyone else is doing will take a toll on your individual journey. Instead of doing what you were created to do, you will stunt your growth by getting caught up in other people's journeys. Your journey is going to look different from theirs, but it is not any less effective. Do you and the lessons and results will follow. 


10| Have faith


The process of pursuing your dreams comes with a lot of uncertainty, which can be very difficult to deal with at times. One day you may be having the best day of your life, then the next day you may feel defeated and torn. Realize that it will be a process that will be full of challenges and questions, but with faith, you will know how to get through the tough times and not lose your enthusiasm moving forward. Learn how to shake off your mistakes, learn from your failures, and keep going. You will reach a beautiful place even if the journey getting there wasn't perfect.

I really hope this was helpful and encouraging for all of you seeking to step out into the unknown. The next time you feel like everything has to be perfect before you start something, come back to this list and let it encourage you. You don't need to be perfect, just real. Chase them dreams, girlfriend! And leave perfectionism in the dust.

Psst. Just in case you missed it. Click the button below to instantly download this free printable!


What are your thoughts about perfectionism, and how has it affected your life? I'd love to chat in the comments below! 

HelloLovelyLiving.com | Sharing Is Caring


Why I Only Wash My Face With Raw Honey and Sugar
Why I Only Wash My Face With Raw Honey and Sugar | HelloLovelyLiving.com

via Style Caster

The thought of applying honey and sugar to your face may probably result in you picturing a sticky mess. Since they are both water soluble, you don't have to worry one bit, as they both rinse away leaving a brighter, smoother, and moisturized complexion. Ever since I discovered how amazing using these ingredients for my skin are, I've been hooked and use them daily. My face has never been so moisturized and smooth. Read more about it below in one of my latest Mode stories. 

What are your thoughts about this skincare alternative? Would you try it? I'd love to hear your thoughts in the comments below!


DIY Furniture | Kids Scandinavian Tripod Table
HelloLovelyLiving.com | DIY Furniture - Kids Scandinavian Tripod Table

Please tell me why I would decide to make a table instead of going the simple route and just buy one like normal people do. I'm adding that question to the list of others that seem to escape me because this is one of those projects where I had to stop (on several occasions) to scratch my head and ask myself, what have I gotten myself into!? At the end of the day, it was totally worth it, but let's be honest, getting there was far from a walk in the park.

I now probably have a degree in painting from all of the articles that I devoured and the troubleshooting I went through to complete this project. Little did I know that painting a table is not as basic as it sounds. All I know is that I'm happy to share everything I learned and then some so that this project will be a breeze for you. In other words, I'm happy to have been your guinea pig! That's what DIYs are for, right.

In the mayhem that was this project, I decided that by taking photos, I would probably sabotage myself even more, so I opted not to do so. I do, however have the process down in my memory, so hopefully you don't mind that I don't have any photos of the process to share. 

For starters, it is very very very - and I mean VERY - important to sand down the wood before you proceed with anything. Call me dumb, but I decided that I could just skip that process. Soooo ... long story short, let's just say that I was kicking myself in the butt for it. Another important step is to use primer, then sand, then primer, then sand, and repeat that process until you have a smooth base for your paint. For me, it took several times to achieve a flat surface because I did run into problems with my wood having cracks in it, which I was supposed to fill in with wood putty, but thought I could skip that step as well. 

Since we're on the topic of wood having cracks in it, I also learned (after the fact) that all wood isn't created equal and that certain wood is better for painting and attaining a smooth finish. I did not know this, so I had to deal with the pine that I had already purchased. I don't have anything against pine, but if I had known that there were better options, I probably would have went with those instead so that I didn't have to deal with so many knots and cracks in my wood. Since pine wood has so many knots, you will have to use a primer that will be able to hide them and keep them from peeking through in the future. You may also have to apply wood putty to fill in holes or uneven spots. It was an easy option considering it was pre-cut, but if you want to explore other options, I encourage you to do so.

For the most crucial step - the paint - this is where things got really complicated at first. I decided to use an oil-based paint instead of a water-based paint, in other words, latex paint. An article I read suggested that it was the best choice for tables that receive a lot of use because it stands up to wear very well. What I did not know at the time was that oil-based paint takes longer to dry, can not be washed off of brushes (unless you use turpentine), smells really really bad, can be harmful, and is not eco-friendly! *yikes* So, I learned after the fact that maybe I should've just went with a latex paint, and my life would've probably been way easier and less stressful. 

Seeing that I was able to complete this project (finally) after several weeks due in major part to roadblocks and troubleshooting, I am still so pleased with the outcome, and I'm so proud of it. It was so worth every headache because I learned so much from this project. It's actually a really easy project once you know what you're doing. #notetoself

I just wanted to be completely transparent and honest with you guys beforehand about my experience. If you decide to do this project, here's the step by step of what you need to do to achieve the exact same thing. It'll be way easier for you now that I have all of the techniques figured out and outlined. I do recommend you decide on what type of paint will work best for you, though. If you decide to use latex paint, please do some research first as to how to use it since that's not the paint that I will be using for this project. You'll be surprised as to what a difference a little technique or Google search will do for you and the outcome of your project. 

HelloLovelyLiving.com | DIY Furniture - Kids Scandinavian Tripod Table

supplies


HelloLovelyLiving.com | DIY Furniture - Kids Scandinavian Tripod Table

Instructions


I recommend you do this project in an area without a lot of wind, but with good ventilation like a garage. 

Sand

The first thing you'll need to do is to sand the pine wood round to get a smooth base. I would recommend using the 120 grit for rougher areas (the edges of the table), then go over it with the 220 grit paper. For the top of the table, I used the 220 as it is a lot smoother. Remove excess dust with a tac cloth.

Prime & FILL

Spray a thin layer of primer in long strokes with the grain of the wood. Let dry for an hour, then sand with 220 or 120 grit sand paper. Remove excess dust with tac cloth, then repeat steps until you feel like you have a smooth finish. I primed and sanded my table 3 times, but it just depends on your individual results. After the first coat of primer, you will notice that the imperfections will start to show, like scratches, dings, and cracks. If they are not that bad, the primer will fill them in, but if they are deep, you will need to fill them in with wood putty or filler. If you do use wood putty or filler, all you would do is apply it according to the package directions, let it dry, sand smooth, wipe with tac cloth, then add another layer of primer and continue with the process that I've mentioned beforehand.

Paint

The key to getting a smooth finish is to have a smooth base to work with, so I can't stress enough about the importance of sanding as well as removing all dust particles and impurities before you paint. Once you have that covered, you are ready to roll - literally! Working with oil-based paint is a little tricky, but the key to applying it is to not apply it too thick because it will take longer to dry and it will run - oh it will RUN - and you don't want to be like me, stuck sanding it all down again. I learned the hard way.

To apply, use long strokes along the grain of the wood and try not to go over the same spot you painted too many times or it will drag. Since oil-based paint takes longer to dry, it will smooth out, so don't worry too much about getting it completely perfect. I recommend applying paint to the top of the table first, then to the sides of the table (remember, thin coats). Allow your paint to dry completely; dry time will vary by climate. This can take anywhere from 24-72 hrs to weeks, so patience is a virtue here. 

Before you apply your second coat, look for any areas where dust or particles may have entered and sand those areas down with 220 grit sand paper. Completely wipe your table down with a tac cloth to make sure you have a clean surface. To apply the second coat, apply as you did the first. Two coats should be all that you need, but it really depends on your preference. I had to do 3 coats, but that's because I messed up and had to sand down the drips from the second coat I did.

Allow your table to dry for several weeks because the fumes will be strong for a while. Oil-based paint also takes a while to cure, but you can still use it. In the meantime, just be careful not to bang it or it will dent. Once it is fully dry, the finish will cure and harden. 

Legs

For the legs, I do recommend installing them to your table before you apply the polycrylic gloss. To do this, you will need to first measure your table's circumference with string, which will roughly be 75", then cut the string into thirds (25" each). Using the string that you just cut, lay it out along the circumference of the table. At each end, this is where you will mark your spots for where your legs will be installed. Mark your spots at a 4" depth from the edge of the table. Now you can place your top plates on and get to drilling. Make sure that your top plates are angled outward first. It's a simple step that can be overlooked. Mark all four holes on each top plate as a guide, then drill in place. Once that's all done, you can now screw on your legs. 

Now it's time to paint your legs with the polycrylic gloss. I didn't sand mine, but I do recommend you do so to get a smoother finish before you paint. Mine turned out just fine, so it's up to you. Since the polycrylic base is water-based, the wood grain will raise a bit, which you'll either want to sand smooth or you can leave be (which I did). I just used one coat to maintain that natural finish. Let the legs dry for an hour and they're good to go!


HelloLovelyLiving.com | DIY Furniture - Kids Scandinavian Tripod Table

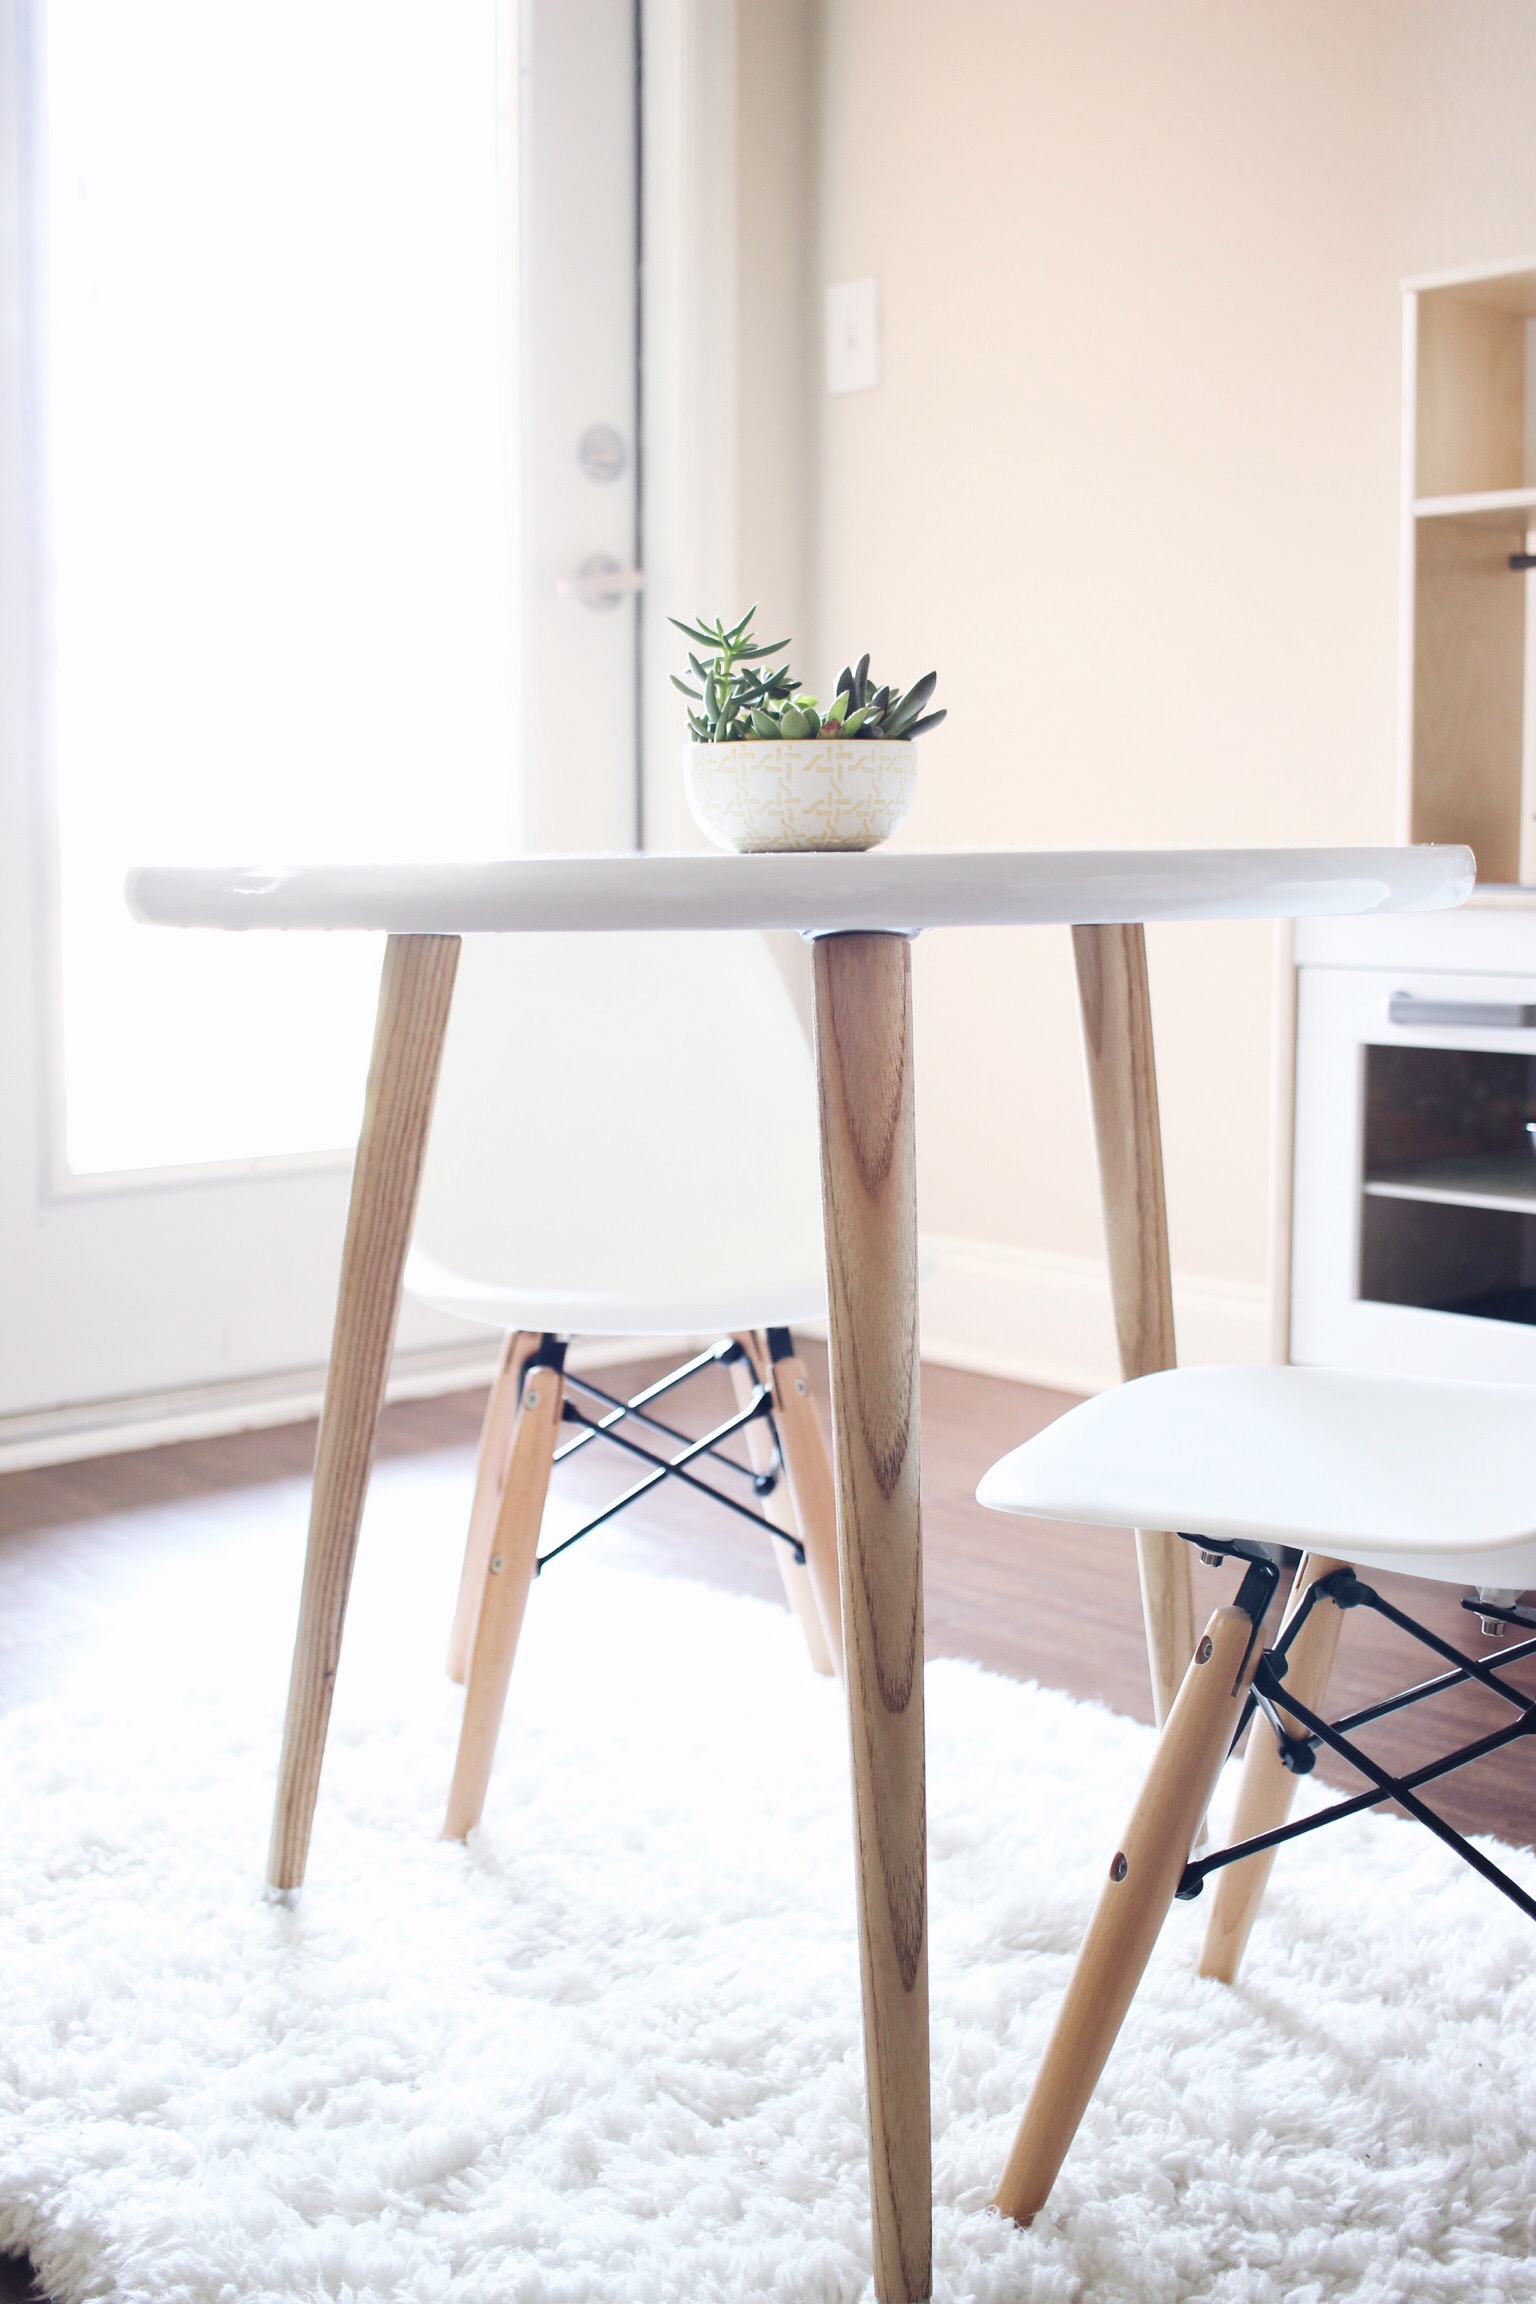
That's a wrap for this project! The play kitchen from Ikea was a nice surprise that I ran into while on my trip to the Dallas location, so I had to snatch it up. I think it looks amazing alongside the table! I am going for a Scandinavian look for his play area and for our home, so it's coming together very nicely. I did have a moment where I was considering going for a Scandinavian whitewashed finish, which also would've been pretty. I was able to find the plastic Eames chairs at Hobby Lobby - and they were on SALE! Big win for me. My small succulent arrangement is perfect for this small-sized table, and Uriah doesn't even mess with it. Don't be scared to use white. These are all materials that are easy to clean up and maintain. Uriah has already drawn on the chairs, and it was a cinch to remove.

HelloLovelyLiving.com | DIY Furniture - Kids Scandinavian Tripod Table

This project was so worth it. I mean, look at this space! I'm in LOVE. Uriah has been enjoying his little setup, and he can finally have his own kitchen to play in. He's all about being in the kitchen with me, so I just had to do this for him.

Do let me know if you try this project out and if you have any questions, I'd love to help. It will be 100% worth every ounce of love and sweat you put into it! 

Did you enjoy this DIY? I'd love to hear your thoughts in the comments below!

HelloLovelyLiving.com | Sharing Is Caring


Wallpaper Wednesdays 30 | Artist Feature - Ash Sta. Teresa

This week I'm featuring Seattle-based commercial artist, Ash Sta. Teresa whose patterns, illustrations. and color palettes will bring on the calm as soon as you set your eyes on them. 

Wallpaper Wednesdays 30 | Artist Feature - Ash Sta. Teresa

She finds inspiration through her 3 kids and interestingly, it wasn't until she had her second child that she began to develop her skill. I love how children have a way of inspiring us to be the best versions of ourselves. You can see the love through her work and many of her illustrations have that child-like charm and innocence, like this illustration.

Wallpaper Wednesdays 30 | Artist Feature - Ash Sta. Teresa

Her use of pastels and dreamy botanical illustrations are what first drew me to her art. Then, upon scrolling through her Instagram feed, I discovered a playful side that really stood out to me. It's been fun seeing what she comes up with in her 100 day project #dashofombre

Wallpaper Wednesdays 30 | Artist Feature - Ash Sta. Teresa

One of my favorites is where she shows how ripping paper can looks so beautiful. She really inspired me to take time to do something art-related no matter how small it is and to think outside of the box like what she did above and below.

Wallpaper Wednesdays 30 | Artist Feature - Ash Sta. Teresa

She has a lot going on and has a zillion patterns available for purchase on home decor, phone cases, and more.  If you want to check out all of her amazingness and get to know her more, you can also find her on Minted, Deny Designs, Casetify, and her Website, Dash And Ash

Wallpaper Wednesdays 30 | Artist Feature - Ash Sta. Teresa

Her latest endeavor has her launching an organic children's clothing line, which she hand carves herself. I could definitely see my little one, Uriah rocking these. Give her a follow and help support "Made In The USA"!

Ash shares a bit more in my short Q & A, and before you click out, download the 4 free wallpaper designs she made at the end. Happy downloading!


Q & A

DID YOU ALWAYS HAVE A PASSION FOR ART AND WHEN DID YOU START PURSUING IT?

I really never imagined doing anything else. I always loved creating and didn’t fully develop my skills until after having my 2nd child.

WHERE DO YOU FIND INSPIRATION?

http://www.denydesigns.com/collections/art-products/at-arrlo-the-buffalo and my kids. They actually tell me what to paint sometimes.

WHAT MEDIUMS DO YOU USE?

Right now mostly watercolor and linocuts. I sometimes play around with acrylic and love drawing on my Wacom.

IN THREE WORDS, HOW WOULD YOU DESCRIBE YOUR STYLE OF ART?

Pattern, Airy, Simple

DO YOU LISTEN TO MUSIC WHILE CREATING ART? IF SO, WHAT’S ON YOUR PLAYLIST?

I used to love music and I just haven’t made time for it since kids. I feel like noises just come at me all day. I do a ton of thinking while painting and I enjoy the silence of all 3 kids in bed.

DESCRIBE YOUR MOST TREASURED ART PIECE TO DATE - ONE THAT YOU ARE MOST PROUD OF.

I had a baby boy in February. I was in a horrible creative place during pregnancy and then suffered a postpartum hemorrhage afterwards, I actually thought I died on the bathroom floor. I was really lucky to be at a great hospital that acted fast. Recovering was a long time spent in bed, I would draw between feeding the baby and sleeping. I decided then to just spend time on art that only I would be proud of. You can see the piece here: Arrlo the Buffalo

NAME ONE ARTIST YOU ADMIRE.

I have to name Four: Ashley Goldberg, Frida, Georgia O'Keeffe, Lisa Congdon

WHAT ADVICE WOULD YOU GIVE TO EMERGING ARTISTS?

Just start and create art everyday, even if it’s for 5 minutes.

WHERE DO YOU SEE YOURSELF IN FIVE YEARS?

I’m in a transition to get more of my art on clothes. I hope that I will have a successful baby clothing line.

IF YOU COULD BE ANYWHERE IN THE WORLD RIGHT NOW, WHERE WOULD YOU WANT TO BE?

New York.

 
Free Wallpapers For Your Desktop & Phone | HelloLovelyLiving.com
 

Thanks for stopping by! For wallpaper updates, sign up for my newsletter in my sidebar or simply follow @hlovelyliving on Instagram. Search #cheekyliving to see when new designs are up and tag me with which wallpapers you picked so I can feature your photo!

What types of designs and artist features would you like to see next? Share with me in the comments below! 

Disclosure: All designs are original and for personal use. Artists retain rights to all designs and they may not be copied or reproduced in any form or likeness. We love when you share, but please link back to the original post. Enjoy!


Sharing Is Caring | HelloLovelyLiving.com


DIY Modern Plant Stand Projects Because #PlantLady
DIY Modern Plant Stand Projects Because #PlantLady | HelloLovelyLiving.com

via The House That Lars Built

Being a plant lady these days bring me great, great joy. Never in my wildest dreams would I have imagined how happy plants could make me, but they do.

Could I survive alone in a jungle? Probably.

Yes - that's how happy they make me, and maybe some of you can relate to my obsession.

Lately, I've been wanting to get my hands on every known modern plant stand out there at the moment.

Of course, not one of those has made its way into my home (YET), which makes me very sad.

So, in the meantime, I decided to compile a roundup of DIY Plant Stand Projects that makes waiting one more second that more bearable until my hubby lets me start on another DIY project.

Let's just say, I have a lot of projects that he'd like to see completed before I start on a new one!

Hopefully, I can start on another project soon enough once I share my latest project with you all, which I have nearly given up on but keep faith that it will soon come together. The struggle is real! #PrayForStina

I hope you find a project you like below in my latest Mode story and try your hand at it. Most of them are super easy to make. Have fun my fellow plant chicas!

Sharing Is Caring | HelloLovelyLiving.com


The Most Effective Natural Deodorant Alternative + How To Make Deodorant

This post may be a little TMI (too much information) for some, but I really wanted to share my wonderful, amazing, awesome, discovery. 

I am going to start out by saying that I am not one to talk about personal hygiene let alone my underarms, but I thought this post would be very helpful to many women and (hopefully) young girls, especially those who are looking for natural alternatives in the deodorant department.

When I was a teen, I remember how irritating it was dealing with certain issues like shaving, dark underarms, deodorants not working, etc. I mean, I still deal with the same issues, but I think I've figured things out over the years.

For one, antiperspirants are a crime against humanity.

Oops, did I just say that! Yes, you heard that right. They are loaded with toxins, the main offender being aluminum, which blocks your body's natural ability to rid itself of toxins through sweating. To top it off, you're adding more toxic load to your body by using products like these, and doing more harm than good.

Commercial deodorants and antiperspirants also contain other harmful carcinogens that may cause long-term health problems with continued use. As you know, deodorants are used on a daily basis, so it's scary to think that we're exposing our bodies to these harmful toxins day in and day out. 

Okay ladies, here's another one. Please hear me when I say that sweating is a GOOD thing.

What makes it bad is when it mixes with bacteria on the skin, which causes odor. Please, please, please, make moves toward eliminating antiperspirants from your household. You are supposed to sweat naturally. 

Yes, it may sound gross, but it really isn't.

I'm not saying to completely stop using any type of deodorant, just look for ones that are naturally derived and free from chemically-derived ingredients. Look for ones that contain essential oils, coconut oil, sodium bicarbonate (baking soda), and other safe ingredients. There are so many alternatives and options available these days, or you could even make one yourself (at the end of this post, I'm sharing my homemade deodorant recipe). 

I recommend the The Think Dirty app if you are interested in shopping for cleaner alternatives. It's a good resource to use when shopping around because it allows you to learn about the ingredients in beauty and personal care products and choose cleaner options.

To clarify, deodorants are used for preventing odor by killing the bacteria that causes odor, while antiperspirants block sweat by basically plugging up pores. Most products claim that they do both, so watch out for that.

The more the claim - you can bet - the more the toxins!

A bonus to switching to purely natural deodorants is that I have noticed a huge difference in the color of my underarms. I'm not saying that my underarms were black or anything, but they were enough for me to cry wolf. I'll be sharing my method for whitening underarms in a future post, but one of the main factors in the change of my underarm appearance was indeed switching to a natural deodorant. It made a huge difference. I am now confident enough to flaunt my underarms! Woot woot!

So, what is this super amazing discovery of mine that I wanted to share with you? 

Well, with my move toward a cleaner lifestyle several years ago, I started exploring different types of deodorants (natural ones) and found one that was made from a natural mineral salt. The product is called Crystal, and it's completely natural and EFFECTIVE. The way it works is that, once it's applied, it forms a barrier on the skin that prevents odor-causing bacteria from forming.  

Well, let me just say that this product is extremely effective at protecting the skin from developing any odor - not perfect, but close to it. The one that I use is the Crystal rock*. It literally is a clear crystal rock. All I do is wet it with a little bit of water, then rub it on and let it dry. 

Okay, so that's not the end of the story.

A year or so ago, I decided to try their other variety, Crystal Essence deodorant, which is basically the same thing in liquid form and with essential oils and extracts. I thought, hey, since it's the same thing, why not try it out. I tried it for a long time, and it did work "okay", but didn't work as well as the Crystal rock did. I would still develop BO, which is no bueno!

The Most Effective Natural Deodorant Alternative + How To Make Deodorant

So, since I was already caught up in the whole process of trying to find something that was close to a normal deodorant stick, what I decided to do was try another natural deodorant that I had been seeing all over social media - Schmidt's. I tried the Lavender + Sage scent. Although I really loved what this company stood for, I found the product to be quite thick, and it didn't work as well as I thought it would. 

Warning: TMI again.

I found that it did not hold up as well as the Crystal rock did. My body rejected it or something because I was getting BO within the 24 hrs that I had applied it. Not kidding! I was sad that Schmidt's didn't work for me, because like I said, I really love the scents that they have to choose from.

Moral of the story: It seems that different formulas react to my body differently. 

So, anyway, after being disappointed in that failed attempt to try something that closely resembled a normal stick of deodorant, I decided to go back to my tried and true Crystal rock, but change one thing.

I decided to also apply tea trea oil as well. 

Breakthrough! The combination of the crystal rock and the tea tree oil work so amazingly well together that I have not experienced BO like I did with the other two deodorants that I tried.

And ... why did I not think of this sooner ... ? Tea tree oil is a natural antibacterial, so it prevents bacteria from forming. I apply undiluted 100% tea tree oil after I rub the Crystal rock on my skin, and - TADAAA!

The perfect deodorant. It works so well for me that I think my deodorant-searching-days are over. 

I forgot to mention that in the past, I have also tried a homemade deodorant using baking soda and coconut oil, which worked well for several months. I'm not sure why I stopped. I think it was more of the matter of convenience that it was lacking, which is why I stuck with the Crystal rock. The Crystal rock dries completely clear and never leaves any residue.

I do recommend the Crystal rock deodorant + tea tree oil if you're interested in my method that has worked well for me.

The best part is that the rock literally lasts for years and years and stays completely new the entire time. It's amazing. For those of you who are interested in purchasing the Crystal rock and tree oil, I'll leave links at the end of this post so that they're easy for you to find!

While I'm at it, I decided to create a homemade deodorant recipe for those of you who are interested in something resembling a traditional deodorant stick.

I know how hard it can be to get used to something different, so this will help to ease the transition. It's also a great way to save money as natural deodorants are pricey! 

Here is some useful information about the ingredients that I've chosen for my natural deodorant recipe and why I chose to use them specifically. That's the good part about homemade recipes, you can always tailor it to you and get the exact benefits and results out of them, naturally. 

Coconut Oil

• Antibacterial, antifungal, antiviral, and anti-inflammatory properties

• Moisturizing to the skin and low molecular weight allowing it to penetrate the skin on a deeper level

Baking Soda

• Natural deodorizer 

• Natural exfoliant

• Neutralizes pH

• Absorbs moisture and oil

• Antibacterial, antifungal, antiseptic, and anti-inflammatory properties

Arrowroot Powder

• Absorbs moisture and oil

• Natural thickening agent

Tea Tree Oil

• Antibacterial, antifungal, and antiviral properties

• Natural antiseptic

Lavender Oil

•  Anti-inflammatory, antifungal, antidepressant, antiseptic, antibacterial, and antimicrobial properties

• Natural disinfectant and deodorant

• Detoxifying

• Calming  


Homemade Natural Lavender & Tea Tree Oil Deodorant Recipe 


The Most Effective Natural Deodorant Alternative + How To Make Deodorant

Supplies

• 1/4 c coconut oil*

• 1/3 c arrowroot powder

• 1/2 c baking soda

• 20 drops lavender oil*

• 20 drops tea tree oil

• 1 empty deodorant container and 1 glass jar

Yield: Makes 1 deodorant stick and 1, 4 oz. jar

The Most Effective Natural Deodorant Alternative + How To Make Deodorant

Add all ingredients except essential oils together in a bowl, and mix until well combined. 

The Most Effective Natural Deodorant Alternative + How To Make Deodorant

Once ingredients are all well mixed, add essential oils. Mix well by using a spoon to press the ingredients together to evenly distribute the oils throughout the mixture.

The Most Effective Natural Deodorant Alternative + How To Make Deodorant

The consistency will begin to resemble that of deodorant, and when pressed, will bind together to form a solid.  

The Most Effective Natural Deodorant Alternative + How To Make Deodorant

Fill the emty deodorant container with the mixture and press as you go until you reach the top. 

The Most Effective Natural Deodorant Alternative + How To Make Deodorant

And you're done! The consistency is just like a regular deodorant stick, but be aware that since it does contain coconut oil, it tends to get softer when exposed to warmer temperatures. You can pop it in the freezer for a few minutes to make it retain its shape.

The Most Effective Natural Deodorant Alternative + How To Make Deodorant

Add any remaining mixture to an empty jar, which you can use to refill your deodorant stick when it runs out, or use out of the jar.

I hope you get to try out this recipe. It's so easy to make and is completely natural, safe, and effective. If you get to try it out, I'd love to hear about your experience. 

What are your thoughts about these natural deodorant options? I'd love to hear what you think in the comments below!

Disclosure: Links that are marked with an * are affiliate links.

HelloLovelyLiving.com | Sharing Is Caring


How To Reach New Levels In Life

Has anyone ever said to you in a not-so well-meaning tone, "You've changed!" If so, I hope you took that as a HUGE compliment, because that is exactly what you want to be doing in life, girlfriend (or guy-friend).

Do you agree that there's nothing more annoying than people who sit back expecting everyone to stay the same exact person (like them). Well, duh, of course I changed. I'm not a rock. Wait a minute, even rocks change! Ha!

Sometimes with the pressure to conform to this idea that people have of us, we get caught up in trying to soften ourselves to appeal to those who "know" us.

Oh no ... we don't want to offend anyone by changing. But really, by doing so, we aren't being true to who we are, even when who we are has evolved into someone different - someone better.

What I've learned in my 31 (still newbie) years of life is that I must constantly evolve in order to become the best version of myself.

If I fail to evolve, I fail to grow, and that my friend would mean that I'm just living to die.

Extreme, yes (I can be), but it's so true. I know I don't have all of the answers, but I do know this much is true.

Along the way, you'll discover that by evolving, you will not only develop different needs in life, but you will shed old ones as well. You may outgrow the people that you once surrounded yourself with. Certain environments may not appeal to you anymore. It will trickle down to every area of your life. In some ways, it will take some getting used to, and you'll have to discover yourself again.

I've gone through this process many times and found that it was always a natural progression, never forced. Although it was sometimes uncomfortable, I always moved forward and found it to be an important process in where I am today and in getting me to a more fulfilling place.

On the topic of change, I always like to refer back to one of my favorite scriptures - Ecclesiastes 3: 

"There is a time for everything, and a season for every activity under the heavens ... "

When you understand this, change will never phase you because you'll know that there is a season for everything and that life is all about change.

Take any successful or accomplished person - who they are now is not the same person as who they were when they first started their journey. They were like any average person trying to navigate life and figure things out. 

Naturally, in order to meet the expectations of each new level of success, more was required of them, which they had to develop within themselves.

It took discipline. It took change.

There's no such thing as a successful person who never grew or never changed, and I'm pretty sure that if they stomped their feet and refused to change, they wouldn't be where they are today.

If you're feeling pulled in different directions and battling with the idea that maybe people won't like certain decisions you'll make out of fear that they will question your authenticity, have no fear.

You don't need anyone's approval.

The very journey you're on is yours and yours alone. You're on the right track when you're always pursuing the best version of yourself even if that means confusing a few people along the way. 

Recall all of those stories where someone does a complete 360 and turns their life around, then lives to tell the world their amazing story of how they overcame the odds and - you guessed it - changed. It takes a strong-willed person to change and not settle. 

There is absolutely no resistance for the person who refuses to ever change, but for the person who proactively decides to constantly change and grow - it takes strength, endurance, and resilience.

Every single day, by developing yourself and demanding more of yourself, you are flexing a different type of muscle and becoming stronger - able to reach new levels and opportunities in life.

The more you grow, the more you succeed.

Reaching new heights in life will be determined by your willingness to grow, so pursue those opportunities that will stretch you.


get this free wallpaper


Pursue what scares you, head-on.

Another thing is that growth hurts. People think, oh, that person changed. I don't like them anymore. They're a fraud. Um, why? Do they even know how many different experiences it took for that person to get to where they are today? 

It's so easy for people to judge what they see instead of empathizing with what a person went through to get to their current position. We usually see the end result of their growth, not the in-between, so it's easy to ignore that where a person is today is a result of something deeper and more difficult than what we are aware of. 

It's never too late to become the person you've always wanted to be, and it's certainly never too late to invent a new, better, and upgraded version of yourself, either.  

Who cares if people "accept" you, and for the record, you don't want those people in your life anyway. You want to be surrounded by people who support your growth and love you for whatever that may bring.

Some people may not understand you, and that's perfectly okay.

Do you know why? Because people that do understand you will come out of the woodwork, and those are the kind of people you want in your life. 

So, where do you stand? Have you changed? Do you want to change?

The best thing about life is new beginnings. Every. Single. Day.

That's actually what makes life so amazing. You can change your mind. Oh yes, and I love to do that. Very very often. 

What I'm trying to get at is that you should never feel scared to try something new, be someone new, and explore a different version of yourself. As long as you are being authentically you, that is all that matters at the end of the day. If you're moving in a positive direction, nothing can stop you. 

When you pursue new levels in life, it'll call for new versions of yourself - ones that you didn't even know you were capable of.

The only way to really know what you are capable of doing is to step out. And the prerequisite - there is none. 

I have learned that even when I didn't feel qualified enough, I made up for it by stepping out in faith.

By doing so, that stretched and grew me so much more than just waiting until I felt qualified, which truthfully, I have never felt 100% ready for anything that I have ever decided to pursue.

When faced with a decision, if it's not urgent, we'll naturally try anything to postpone it to a future date. So, the best thing to do is to act on whatever it is you want to do NOW, even if you don't feel ready.  

Once you force yourself to new levels in life, life will demand more out of you and elevate you as well. It's really up to you to take that initial step and show up.

Your willingness shows so much more than your ability, talent, or skill.

Anyone can have all of the above, but if they never show up, it's pointless, right? 

I encourage you to see change within yourself as a precursor to success. When you take on that mindset, you will surprise yourself with what you can accomplish when you reach difficult points in your life. Will you cave in or will you meet the challenges head-on and say, you know what, I got this! I will become a better version of myself in order to level up in life and become better than the person I was yesterday. 

I hope you enjoyed this post and found it to be encouraging. I look forward to doing more inspirational posts like these because I've always been into self-development, and I believe it's so important to stay motivated and inspired every day. I'm rooting for positive change in you and in your life!

What do you think, and what are your thoughts? I'd love to chat in the comments below!

Sharing Is Caring | HelloLovelyLiving.com


My 3-Ingredient Migraine and Headache Detox Remedy
My 3-ingredient Migraine And Headache Detox Remedy | HelloLovelyLiving.com

I wanted to finally share my go-to recipe that I reach for when I know that my body needs a quick detox. Although I try to eat as clean as possible on a daily basis, I still fall prey to eating out which exposes me to additives that may trigger a migraine. When dining out, the main culprit is usually Monosodium Glutamate (MSG) or high sodium content, which is usually hidden in pre-made sauces, marinades, and processed foods.

Of course, there can be many other triggers that may set off a migraine or a headache. There have been instances where I didn't drink enough water during the day or woke up on the wrong side of the bed. I also get migraines with PMS, which is like clockwork for me. There are so many factors that can cause an attack, but I can usually pinpoint what has been the cause.

In the past, I used to suffer from severe migraines and was officially diagnosed with it several years ago.

I would literally have a migraine on schedule every few days, which was not only debilitating, but frustrating because I felt like I had no control over my body.

On a mission to cure my migraines without meds, I discovered that there were many ways to overcome them naturally like using cream of tartar. In this post, I'll be talking about one of the ways that have been most effective for me.

Combined with a generally organic, whole foods and unprocessed lifestyle, I have been able to manage my migraines. In instances where I have been exposed to toxins, I quickly know that my body has been exposed to something or is reacting to a trigger and needs a detox.

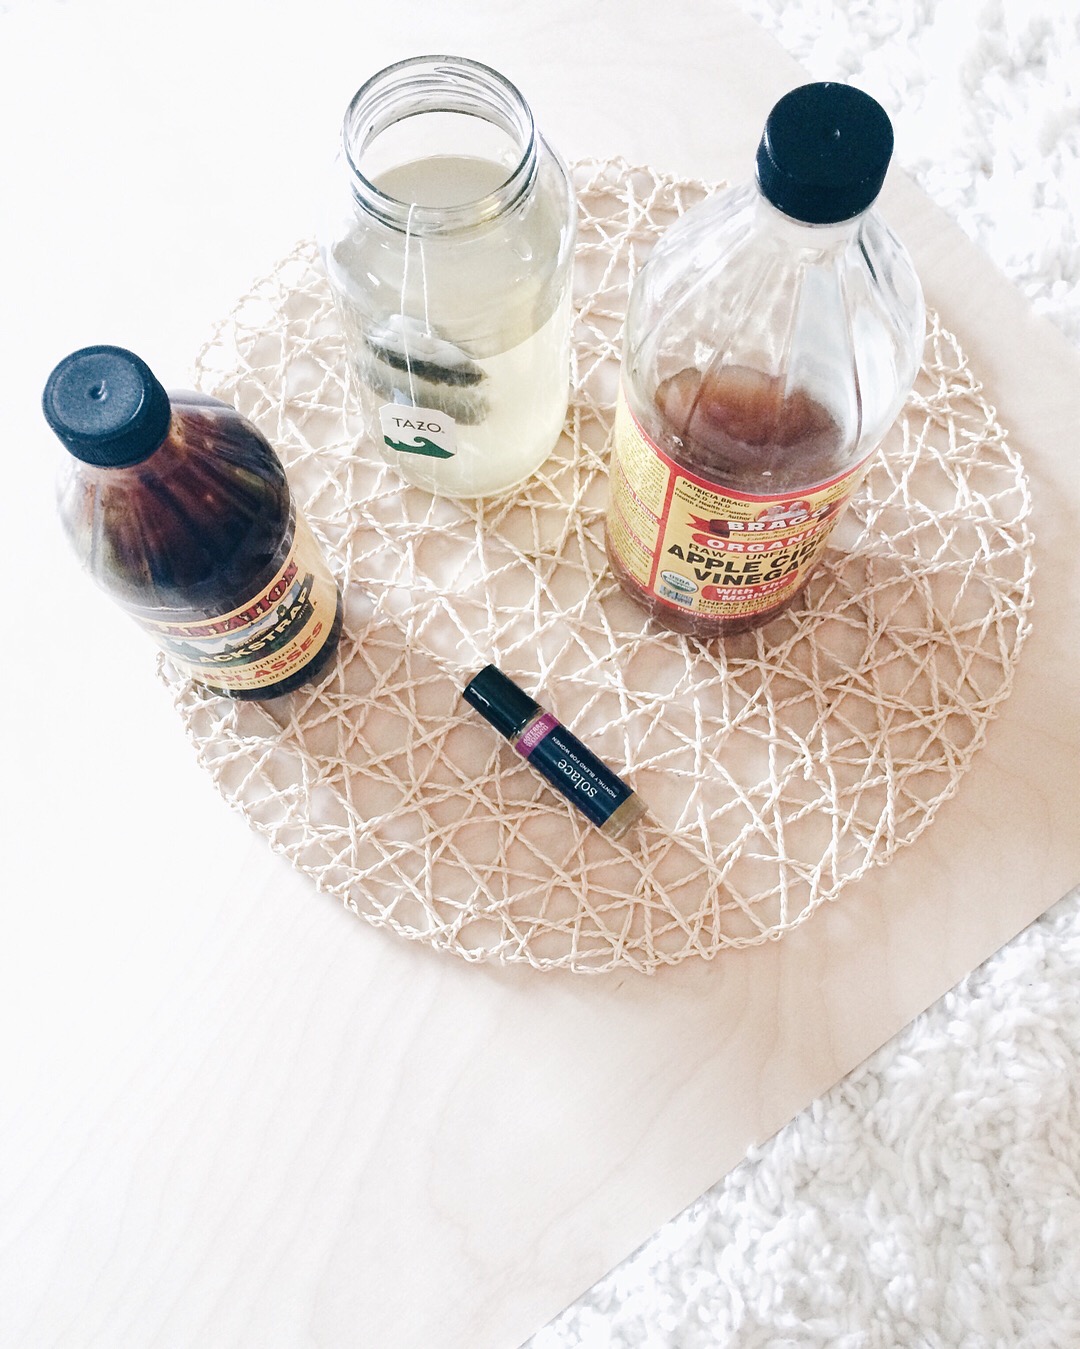
The 3 ingredients I reach for are apple cider vinegar, organic raw honey, and organic green tea.

Details of how I use these ingredients together to create a natural remedy will be towards the end of this post.

Organic Apple Cider Vinegar

If you haven't been exposed to the ridiculous amount of health benefits that apple cider vinegar has, I'd highly encourage you to check it out. Apple Cider Vinegar (ACV) is a miracle cure for the body, both topically and internally and as a cleansing agent around the home. It's made from apples that are allowed to ferment naturally in wooden barrels, which produce natural enzymes, minerals, and natural acids. Just make sure you get the one with the "mother", which is the raw and unfiltered variety that has all of the beneficial properties intact.

What I love about ACV is its ability to balance the body's alkalinity.

When your body's acid-alkaline state is imbalanced, the body reacts with illness. You may be familiar with pH levels, which is basically the same thing. It's important to understand the chemistry of your body because it is absolutely life-changing to know your body's natural reactions and how to keep it healthy. ACV helps to get your body back into a health-promoting state where your body is in an acid-alkaline balance.

Apple Cider Vinegar also contains high levels of potassium and Vitamin C which aids in reducing pain and inflammation - often associated with migraines and headaches.


MY COMPREHENSIVE EBOOK

natural migraine remedies that work

hello lovely living | natural migraine remedies that work

In this ebook, I share my personal story of how I discovered relief with 10 natural migraine remedies, 3 recipes, and my top supplements that work. Enjoy a visual experience with 30 pages of helpful information to get the relief you need and prevent migraines from the start.


Organic Raw Honey

Raw honey is not your average honey. Commercial honey is filtered and heated excessively at high temperatures which destroy the natural vitamins, minerals and enzymes that makes it beneficial for health. In contrast with processed honey, raw honey is a health food that contains enzyme-rich propolis (essentially bee glue) and beneficial phytonutrients along with a myriad of naturally-occurring vitamins and minerals. It also contributes to that alkaline-acid balance I was mentioning earlier due to its antioxidant-rich organic acids.

Organic Green Tea

I have found that the presence of caffeine in green tea works amazingly well in combination with the apple cider vinegar to relieve migraine symptoms. 

I do, however, use decaf green tea, which still provides trace amounts of caffeine that still does the trick.

Caffeine is usually used in analgesics, such as aspirin and acetaminophen due to its ability to increase their effectiveness. The amount of caffeine found in a 5-ounce cup of green tea is comparable to that found in over-the-counter pain reliever medications that contain caffeine.

Another reason why caffeine is so effective is how it causes vasoconstriction, whereas the blood vessels in the head constrict. This is beneficial during the onset of a headache or a migraine because blood vessels dilate. Therefore, the process of vasoconstriction can stop a migraine in its tracks.

Green tea has so many health benefits, and it contains more than just caffeine. It contains antioxidants, nutrients, and amino acids which improve brain function and protect the body from oxidative damage and free radicals. It's a powerful detoxifier as it flushes out toxins and enhances digestive functions in the body.

Be aware, however, that caffeine can also be a trigger when used in excessive amounts. Sticking to green tea instead of other forms of caffeine should prevent any reactions that other sources may cause.

A few minerals that I pay special attention to that are present in raw honey and apple cider vinegar are potassium and magnesium which I have found to be essential for me in combatting migraines.

Potassium maintains electrolyte balance keeping the body hydrated. A potassium deficiency can cause severe headaches, which I have experienced in the past. 

A magnesium deficiency can also cause migraines, so it is said that taking magnesium supplements are a good preventative measure. Magnesium also helps with digestion, which works amazingly well for detoxing the body and getting things going (if you know what I mean). 

I could go on and on about the health benefits of the vitamins, minerals, and nutrients present in these ingredients, so I highly encourage further reading for more in-depth information. It's really interesting stuff, and I definitely get into geek mode when it comes to researching about it.

All three ingredients, apple cider vinegar, organic raw honey, and organic green tea - when used together - provide for a powerful and fast-acting migraine and headache remedy.

Imagine your body is a sponge, and by drinking these ingredients, all of the minerals, nutrients, and antioxidants are quickly absorbed into your blood providing quick and natural relief.

Now, here's my natural migraine and headache detox remedy in 2 simple steps:


MY 3-INGREDIENT MIGRAINE AND HEADACHE DETOX REMEDY


Step 1

Mix 2 Tbsp of organic apple cider vinegar and 1-2 Tbsp of organic raw honey in 8 ounces of filtered water. Drink.

Step 2

Boil 8 ounces of filtered water. Remove from heat and add 1 organic green tea bag. I don't remove the tea bag and just allow it to continue to steep. After a few minutes, add 1-2 Tbsp organic raw honey and stir. Drink.


Apple cider vinegar has a strong smell, but don't be turned off by this! The honey makes it taste good and hides the strong taste. Add more honey to your liking. You can drink it with a straw, but I usually go all in and I've never had problems with my teeth being sensitive.

Upon drinking this amazing concoction, I always feel better and more alert. My brain fog clears up and my migraine dissipates. Depending on the type of migraine, it usually goes away very quickly - and I'm not hyping this up, it really works for me.

For this remedy to work, I drink lots and lots of water. I basically drown myself in water! This is the only way the body will get rid of toxins. Sometimes dehydration and mineral or vitamin deficiencies can trigger migraines, so this remedy is a great way to quickly flood the body with essentials.   

I hope you enjoyed this post and that it serves to help you if you suffer from migraines or headaches. I know how bad it can get -  thankfully natural remedies like these and being aware of triggers has helped me manage them. This is just scratching the surface, discover the other many amazing benefits of these ingredients for your health. 

In the comments below, I'd love to hear about what natural remedies have worked for you!

Resources:

  • Apple cider vinegar 1

  • pH levels 1

  • Raw honey 1

  • Green tea 1, 2

  • Magnesium deficiency 1

  • Potassium deficiency 1


Disclosure: This post is purely from my personal experience and for informational purposes only, not to be construed as medical advice. Please seek medical advice from a licensed health practitioner.

Sharing Is Caring | HelloLovelyLiving.com
wellnessStina X


Wallpaper Wednesdays 29 | Artist Feature - Laura Fedorowicz

Wallpaper Wednesdays had a short hiatus, but have no fear - it's back! This week, I'm featuring Laura Fedorowicz, a Canadian artist that I came across on Instagram. She makes the most vibrant pieces of art that have a soft and feminine feel while also giving off energy and movement.

Wallpaper Wednesdays 29 | Artist Feature - Laura Fedorowicz

Laura's strong use of contrasting colors in vibrant and pastel hues make her art feel very bold, yet soft. Her artwork is perfect for anyone who wants to incorporate color into their home without having to paint the walls. As you can see in the photo above, it accomplishes just that. Her pieces add that perfect modern touch and are filled with abstract patterns, which I can see make any space a happier place because of them.

Wallpaper Wednesdays 29 | Artist Feature - Laura Fedorowicz

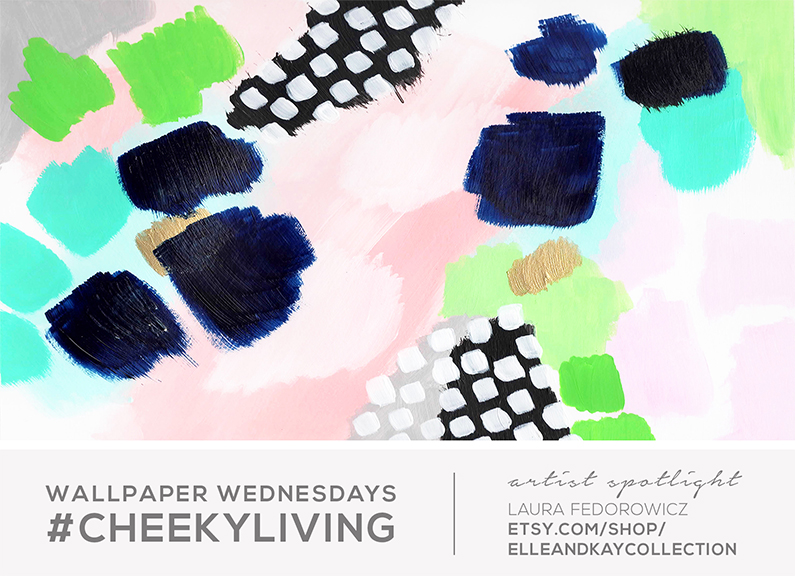
I really love Laura's use of color and the color palettes that result from her work. Sometimes it can be intimidating to use so many colors, but she uses them so perfectly well that everything comes together without looking overpowering. The patterns she comes up with - well, I can stare at them all day. And her paint swatches look just as beautiful as her finished pieces. 

Wallpaper Wednesdays 29 | Artist Feature - Laura Fedorowicz

You can catch Laura running her Etsy shop, Elle and Kay Collection where she sells a wide variety of original modern prints. She also posts regularly on Instagram. Just scrolling through her feed will make you have heart eyes; You'll find beautifully composed pictures of her art and behind the scenes beautiful messes (like above). Isn't it just pretty! She also shares candid moments as an artist and mom of a toddler who knows how to color coordinate with her artwork. Her pup is cute too and can be seen living the good life taking a nap with her art adorned pillow and throw blanket.

Wallpaper Wednesdays 29 | Artist Feature - Laura Fedorowicz

But that's just the beginning for Laura, who is quite the busy-bee. I was really excited to find out that her designs can be found on so many products from gift wrapping paper to home decor. I just about wanted everything I saw! Her recent collaboration with Hedoe Paper (above) will make it hard for anyone to want to rip their packages open. I know I just couldn't see myself destroying such beautiful wrapping paper. 

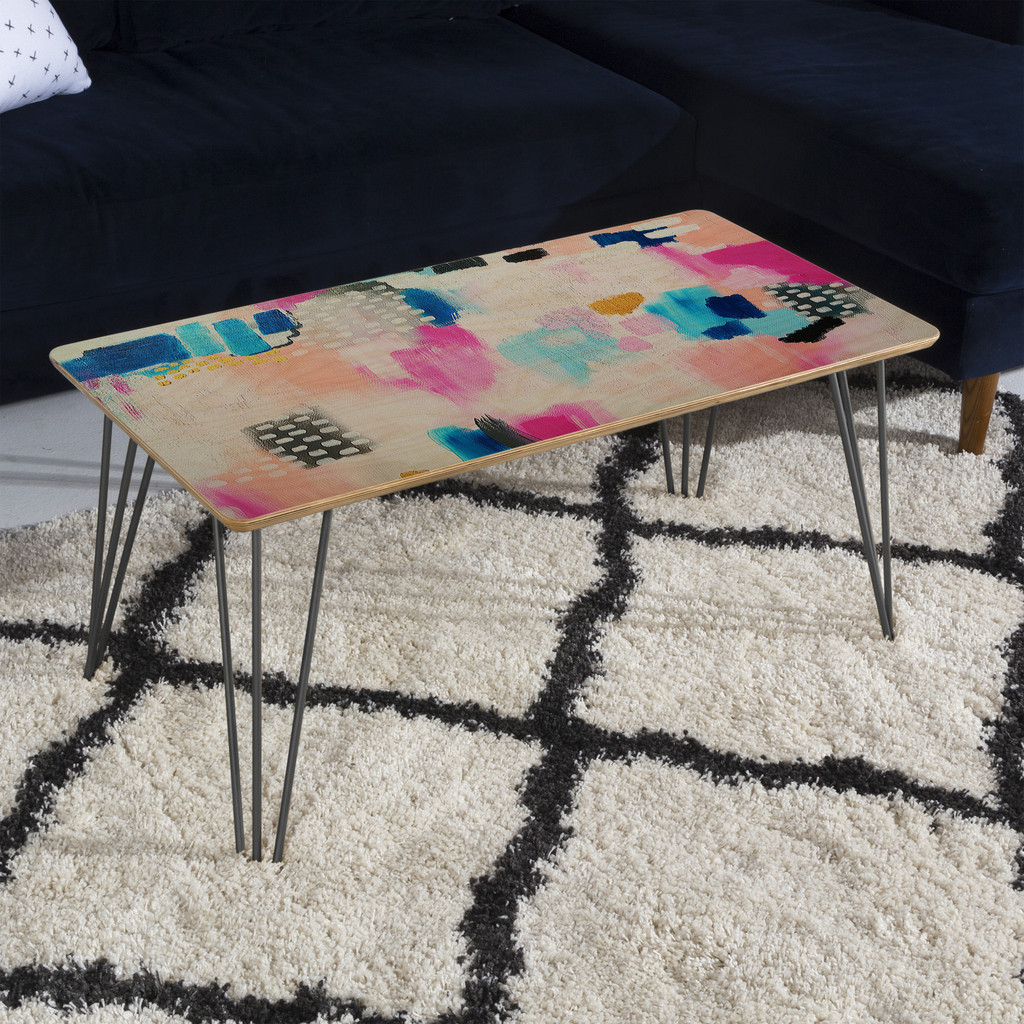
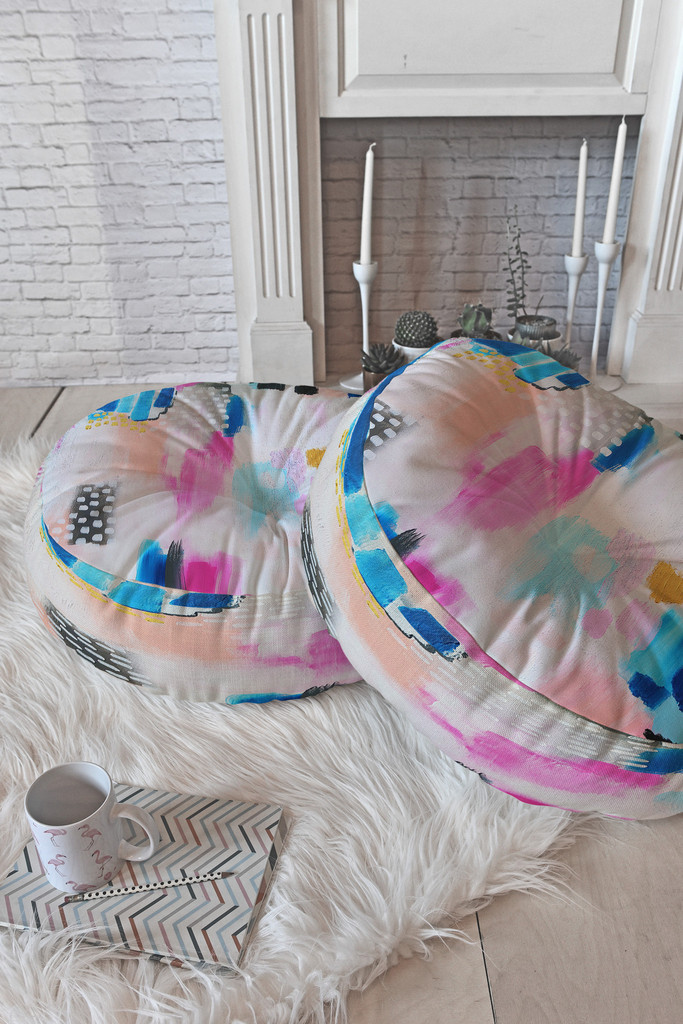
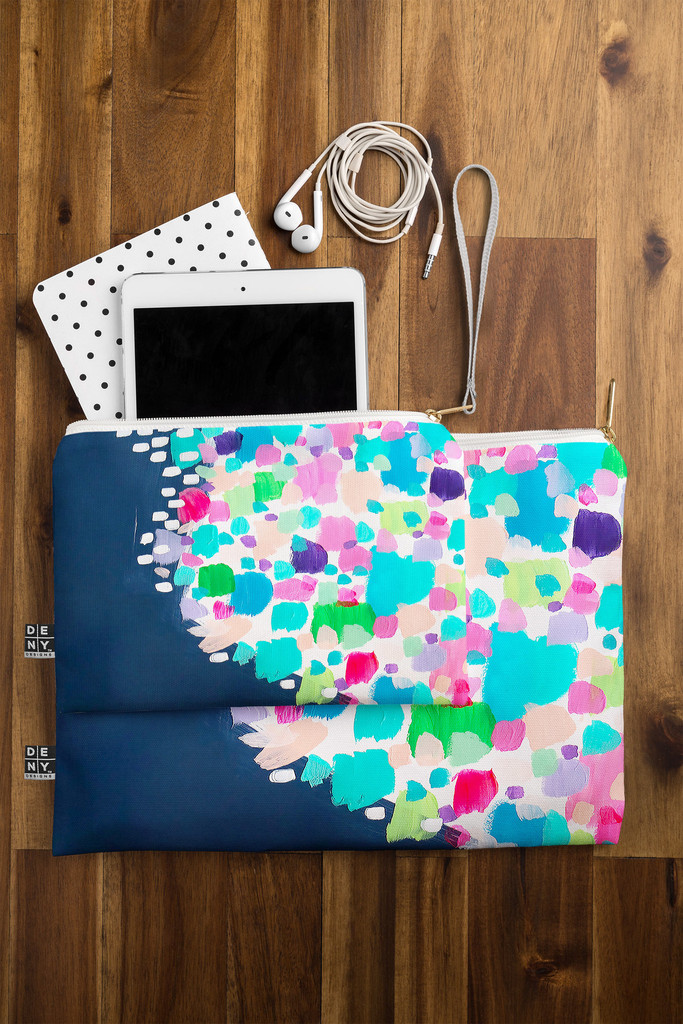
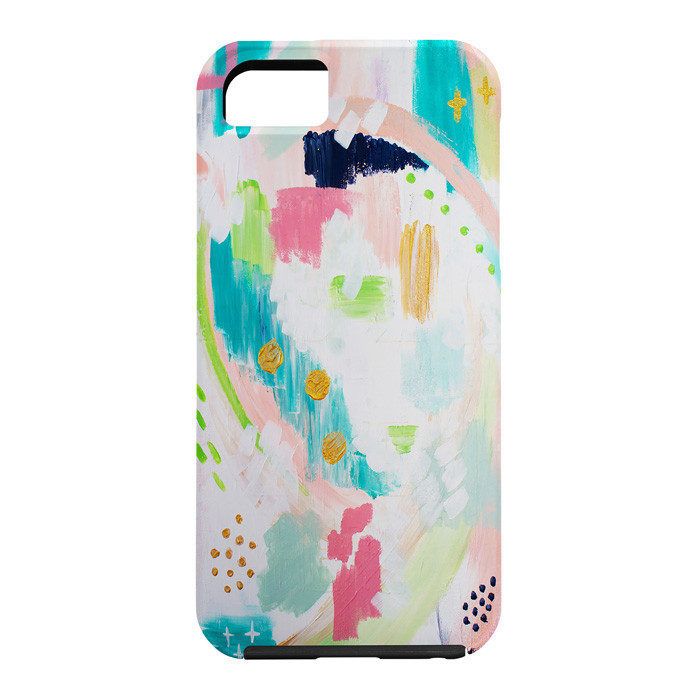
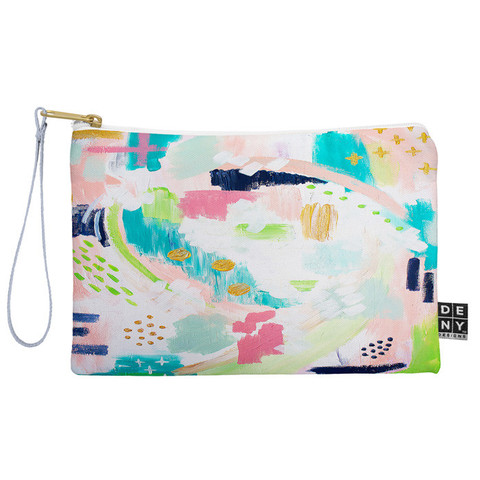
Laura is also active on Deny Designs, where her art has been placed on home decor, cellphone cases, makeup bags, and more. There's literally pages and pages of amazingness happening with her art. I hope you stop by and check her out and give her a follow, but before you do, below is a short Q & A to get to know her a bit more! She also created four amazing free wallpaper designs for your computer and phone toward the end. Happy downloading!


Q & A

DID YOU ALWAYS HAVE A PASSION FOR ART AND WHEN DID YOU START PURSUING IT? 

I have always been passionate about art and design. I can remember re-doing my room at about 10 and going to the paint store, and being so specific about how the room would and should look. The salesperson looked at my mom and said, “She’s going to be an artist”. I spent free time at home painting, and spare periods in high school in the art room creating. After attending OCAD University for Environmental Design, I took a break from creating. I started back up while on maternity leave with my first child and haven’t stopped since. 

WHERE DO YOU FIND INSPIRATION? 

I find my inspiration all over the place. In everyday life, from fashion trends, floral arrangements, pretty skies. I find since I have started creating again, everywhere I look there is inspiration. (and it is a lovely feeling!) 

WHAT MEDIUMS DO YOU USE? 

I stick to acrylics currently, adding detail in ink when needed. When I first started creating again I used water colors, and I am so itching to play with oil paint. I think my abstracts would be so delicious in the texture that oils bring! 

IN THREE WORDS, HOW WOULD YOU DESCRIBE YOUR STYLE OF ART? 

Enthusiastic, Bright, Feminine 

DO YOU LISTEN TO MUSIC WHILE CREATING ART? IF SO, WHAT’S ON YOUR PLAYLIST?

Yes, always. A wide mix, Justin Bieber, Beyonce, Macklemore and Ryan Lewis, Drake, and then on the opposite side….I’m a country girl too, Maren Morris, Clare Dunn, Miranda Lambert and obsessing over Thomas Rhett’s “Tangled Up” currently! Just depends on my mood.

DESCRIBE YOUR MOST TREASURED ART PIECE TO DATE - ONE THAT YOU ARE MOST PROUD OF. 

My Wild and Free Canvas represents a big breakthrough for me. I realized in that painting - that my very own style and developing voice was one to be proud of. Sharing your art with the world in the beginning is a scary thing - this represents moving on from the fear and stepping out - proudly. I have since turned that canvas into a set of art prints, so others can have Wild and Free in their home.

NAME ONE ARTIST YOU ADMIRE. 

Britt Bass - Her color and the feeling in her abstracts are so stunning. 

WHAT ADVICE WOULD YOU GIVE TO EMERGING ARTISTS?

Just Create. Focus on your creative drive, your need to create, and just keep moving. You will get distracted, you will sometimes feel defeated or stuck. But just keep going. Usually after those down periods, something wonderful comes. You were meant to create exactly what it is you are creating, and no one else can do it how you do. 

WHERE DO YOU SEE YOURSELF IN FIVE YEARS?

I want to be running a successful online boutique where I can sell not only my own art, but the art and accessories of other artists. I want to curate a shop full of beauty! 

IF YOU COULD BE ANYWHERE IN THE WORLD RIGHT NOW, WHERE WOULD YOU WANT TO BE?

Hawaii. My husband and I went to Hawaii for our honeymoon, and we secretly dream of moving our family there and living a simpler life. 


Free Wallpapers For Your Desktop & Phone | HelloLovelyLiving.com
 

Thanks for stopping by! For wallpaper updates, sign up for my newsletter in my sidebar or simply follow @hlovelyliving and @cheekybillo on Instagram. Search #cheekyliving to see when new designs are up and tag us with which wallpapers you picked so we can feature your photo!

My Wallpaper Wednesday partner in crime - the lovely, Ena Chahal - can be stalked over here: Instagram | Blog | Casetify | Society 6 

What designs and artist features would you like to see next? Share with me in the comments below! 

Disclosure: All designs are original and for personal use. Artists retain rights to all designs and they may not be copied or reproduced in any form or likeness. We love when you share, but please link back to the original post. Enjoy!

Sharing Is Caring | HelloLovelyLiving.com


You'll Never Look At A Paper Bag The Same Way Again
You'll Never Look At A Paper Bag The Same Way Again | HelloLovelyLiving.com

via My White Obsession

How many times have you collected a million and one paper bags and asked yourself, now what am I going to do with all of these things? Well, now, I've got the perfect solution for you that'll actually improve your quality of life. Read on in my latest Mode story below - and don't mind the silliness that is my writing. It's 2:25 in the morning and your girl is lacking sleep! :)

Sharing Is Caring | HelloLovelyLiving.com
lifestyleStina X


Moodboard | Modern Nordic and Boho Inspired Outdoor Space

Living in Oklahoma, being outside to enjoy the weather is a luxury. Not only is the weather bipolar, but it is either extremely cold or extremely hot for the most part of the year. In between, we're lucky to enjoy a good day or two during the week that is perfect - and for me, that means weather in the 70s - 80s! 

Now, being that I'm from an island, you can imagine how extreme this can be for me because what I'm used to back home on Guam is one of two things: rain or shine. Guam's two seasons - wet and dry -  means that if the sun isn't out, it's raining, but for the most part it's beautiful year-round. I miss being able to predict the weather almost every day and be able to enjoy outdoor activities. Since I feel serious deprivation, I jump on any opportunity to go to the park or just drive around to enjoy a good, sunny day and warm weather.

One of the things that I've been wanting to do is create a nice outdoor space on my patio so that I can enjoy any good weather on a moments notice. My sons and I enjoy going outside to get fresh air and enjoy the scenery, and we do get a nice view of the sunset, but one thing prevents us from staying outside for too long; The space is empty! I mean, let me elaborate on that. I have no furniture, no chairs, just a small wooden box with a marble slab on top to hold some plants, but that's it! I would show you a picture of it, but seriously, it's that embarrassing. 

It's been on my mind to do something with the space, but I just haven't had the budget to actually make it something worth doing. So, I've been searching for DIY projects on how I can make things myself for pennies of what it would cost to purchase something at the store. I've found a few DIYs, but not many that are simple and that don't require me to have some level of woodworking expertise or following-directions expertise (in my case). Measurements make me nervous.

So, when Douglas Elliman contacted me to be a part of their Florida Room Challenge, it came at the perfect timing. I had just come back from a family vacation from Florida - which I didn't want to come back from - and my patio had been on my mind for quite a while now. They asked me to share how I would style my dream Florida Room so that I could enjoy it year round. Challenge accepted!

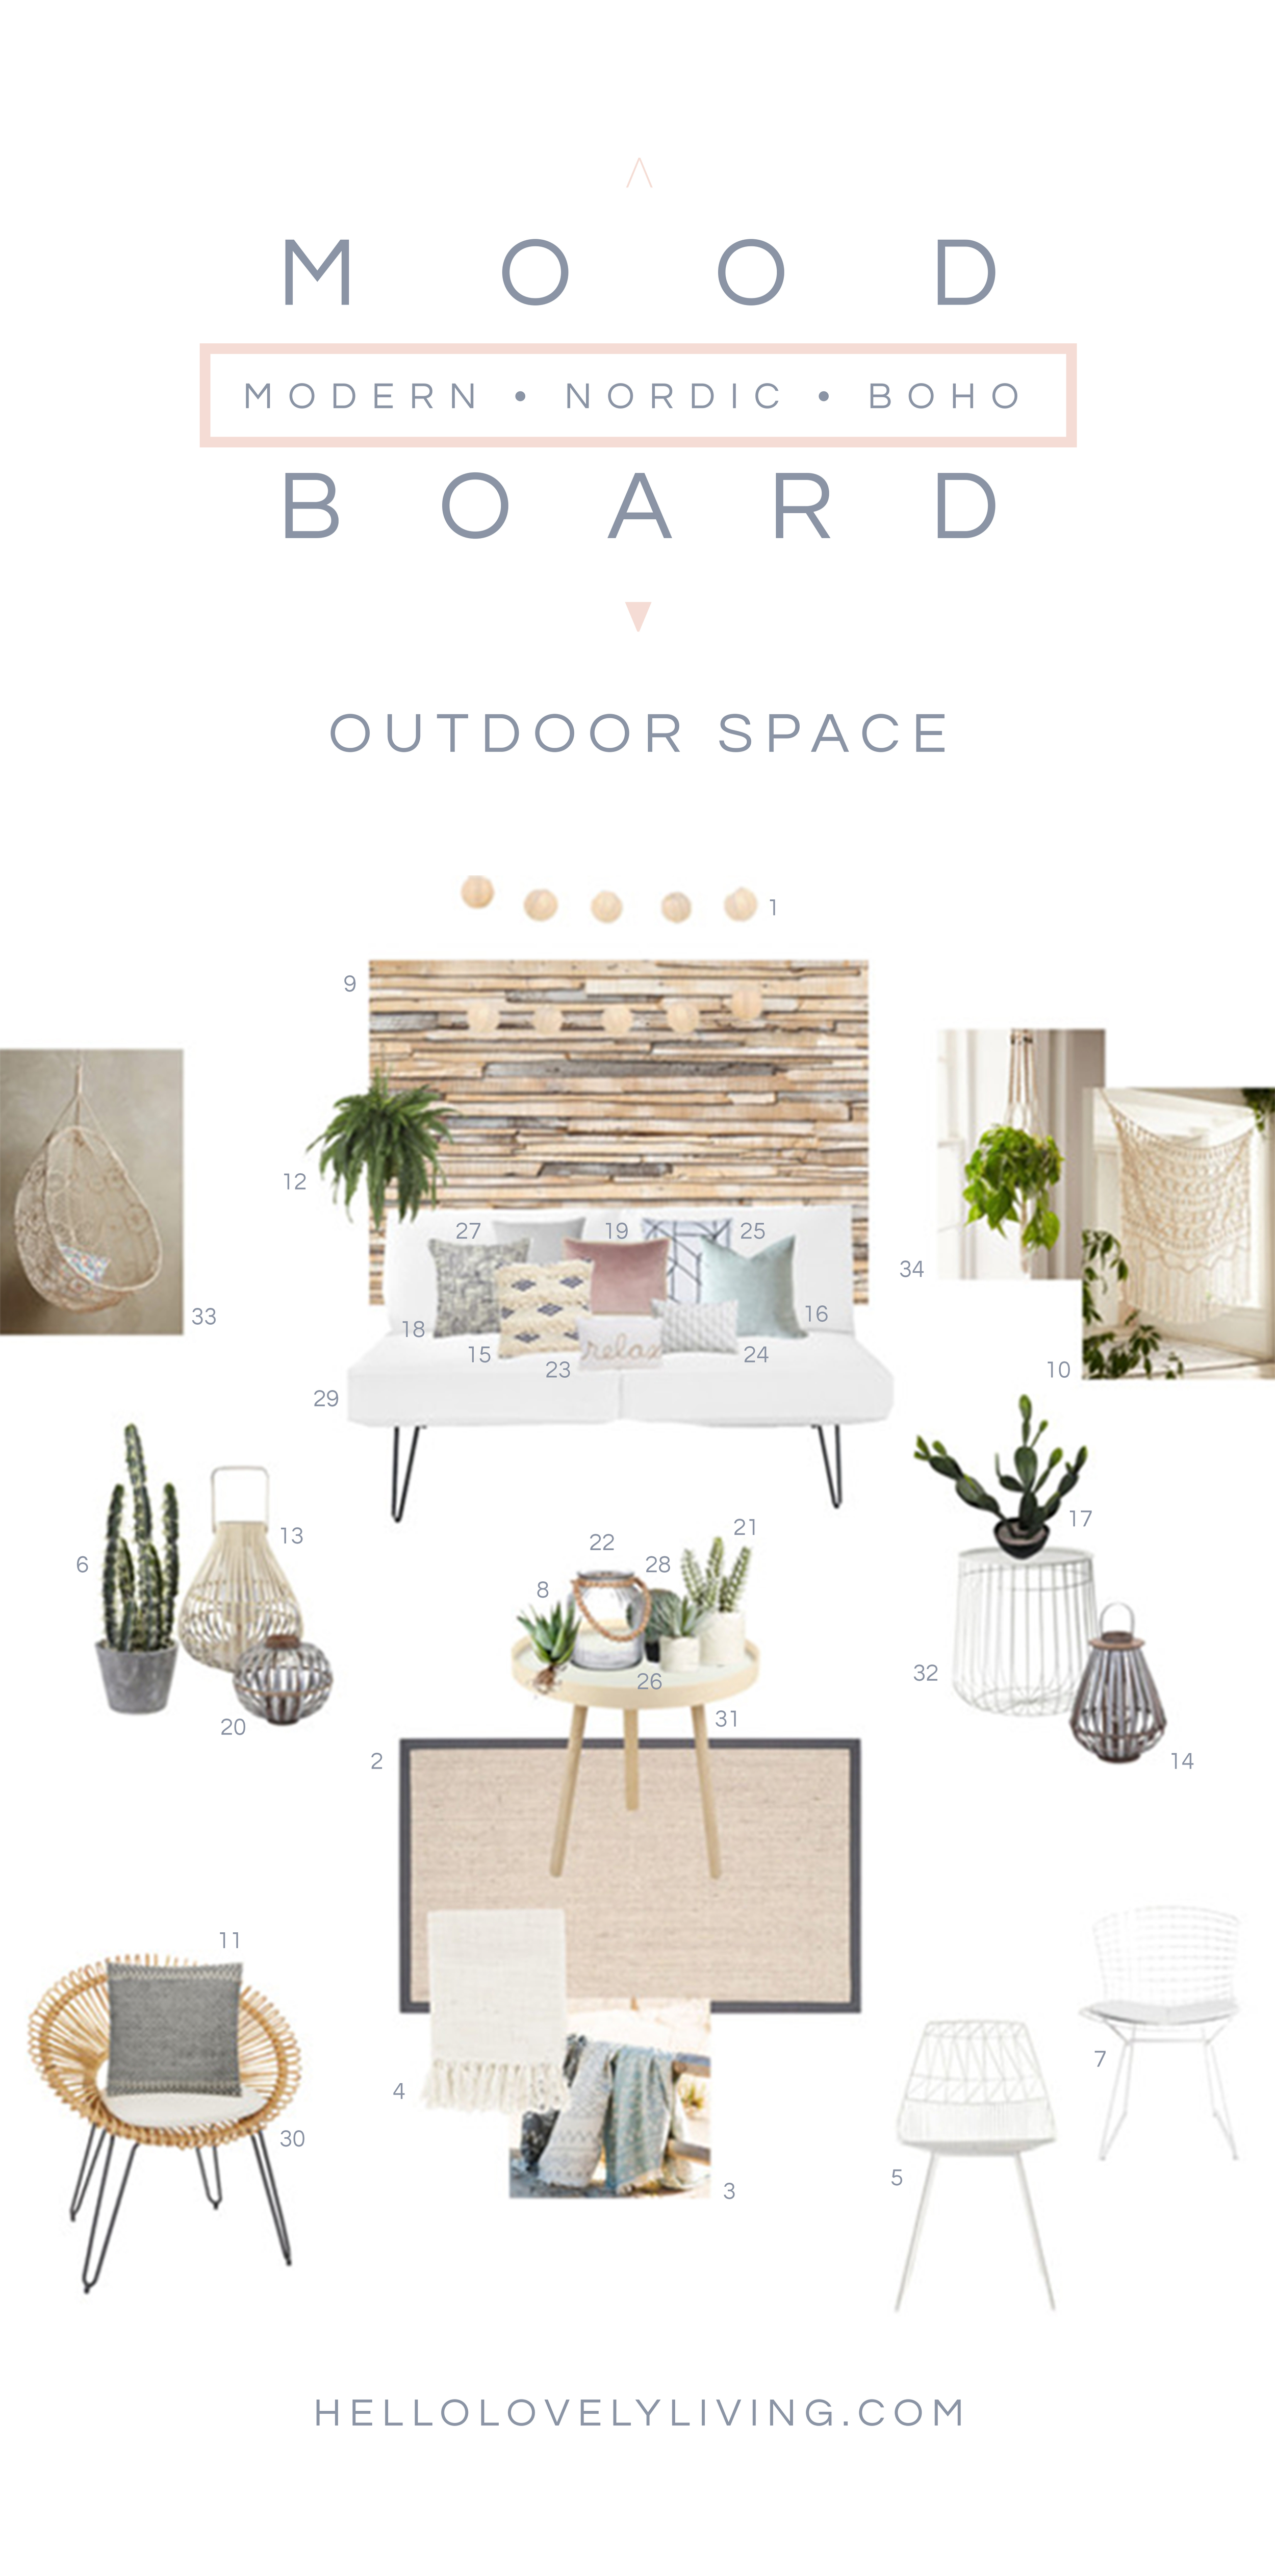
What I decided to create was a space inspired by modern nordic and bohemian design. I've been into a cleaner, more minimalist and airy color palette, so I wanted to stick to warm neutrals and white. I didn't want to stick to a traditional beach feel but create something that was more modern, yet very casual and inviting. Take a look at what I put together and I will go further in depth with my choices toward the end of the post.

 
Moodboard | Modern Nordic and Boho Inspired Outdoor Space | HelloLovelyLiving.com
 

1  |  Round Paper Lanterns* | Target

2  |  Sisal Rug* | Kohl's

3  |  Kilim Turkish Cotton Throw* | Terrain

4  |  Ivory Throw Blanket | Layla Grace

5  |  White Wire Chair* | One Kings Lane

6  |  Cactus Garden* | Overstock

7  |  Bertoia Side Chair* | Design Within Reach

8  |  Ferox Aloe | Weylandts

9  |  Whitewashed Wood Wall Mural | Burke Decor

10  |  Macrame Wall Hanging* | Urban Outfitters

11  |  Tribal Pattern Throw Pillow* | Wayfair

12 |  Boston Fern Hanging Basket* | Overstock

13  |  Pear Lantern* | Amara

14  |  Seafarer Medium Lantern* | Zinc Door

15  |  'Morocco' Pillow* | Nordstrom

16  |  Decorative Pillow Sea Foam | Etsy

17  |  Artificial potted cactus | Selfridges & Co.


18  |  Ink Hatch Pillow - Ink* | Casa 

19  |  Cameo Cushion Amethyst* | Houseology 

20 |  Seafarer Small Lantern* | Zinc Door

21  |  Mini Artificial Succulent* | Norsdstrom

22 |  Tealight Lantern* | Amara

23  |  Relax Rope Accent Pillow | Kirklands

24  |  Quilted White Pillow | CB2

25  |  Art Club Concept Cushion | Superette

26 |  Mini Artificial Succulent* | Norsdstrom

27 |  Two Toned Grey Cushion* | Target

28  |  Artificial potted cactus* | Selfridges

29  |  Bungalow Sofa* | Serena & Lily

30  |  Sunshine Accent Chair* | Dot & Bo

31  |  Reversible Uncover Tripod Table* | Amara

32  |  Wire Storage Table* | Luisaviaroma

33  |  Melati Hanging Chair* | Anthropologie

34  |  Macrame Hanging Planter* | Urban Outfitters

 
via Anne Sage


CREATING MY MOOD BOARD

Before I created my mood board, I put together a Pinterest board of all of the outdoor spaces that I wanted to get ideas from, then used those photos to pick out items that I wanted to incorporate into my space. Since this is a "dream" mood board, I kinda went wild with it (a tad overboard), so fair warning that similar items can be found at cheaper prices. I chose each item based on aesthetics, not price, so I do plan on using this mood board as inspiration to find more budget-friendly pieces or ideas for DIY projects.

Here's the breakdown of how I was able to accomplish creating a modern nordic and bohemian inspired space:


2 | PLANTS

On any given day, you can catch me obsessing over plants, so of course, they had to make an appearance in my Florida Room. Boston ferns are the perfect way to add lush greenery and that pop of color in this neutral space. They're also really easy to care for, so they're a perfect choice for me. I also had to include easy to care for succulents and cactus. I say the more plants the merrier, especially when the weather warms up. Bohemian spaces are all about that jungle vibe, so you can't overdo the plants. I'd say skip the fake plants and just go with the real deal. I've found that succulents and cactus are immune to my plant-killing tendencies, so I can't go wrong with them!


4 | NATURAL FINISHES + METALS

Creating a bohemian vibe called for different natural finishes and textures. For example, I chose a variety of finishes like this Sunshine Accent Chair* with a bamboo and wicker seat and this Whitewashed Wood Wall Mural made from reclaimed boards which has a myriad of different textures and stains. I also incorporated lighter shades of wood finishes like this Pear Lantern made from pine wood and this Reversible Uncover Tripod Table* in light ash and brushed metal in aluminum on the opposite side. The Seafarer Medium Lantern* and Seafarer Small Lantern* are made with a variety of natural materials: galvanized metal, fir wood, plywood, bamboo, and jute. I love that it has a gray tone to it, which can be seen repeating in this space. Other natural fibers can be seen in the macrame decor. The tripod legs of the Bungalow Sofa* and Sunshine Accent Chair* are also where that metal comes into play. For more metal on metal action, I chose the Wire Storage Table*, White Wire Chair*, and Bertoia Side Chair* for that clean modern look.


1 | MODERN MACRAME  

I knew that I wanted to add a boho touch to my outdoor space because I love modern macrame, a zillion plants, natural textures and finishes and a relaxed vibe. So, I added this Knotted Melati Hanging Chair* that is macrame perfection. Keeping with the macrame theme, I wanted to also include this Macrame Wall Hanging* that I thought would be perfect as a wall tapestry or to divide the space. Since this is my dream Florida Room after all, I couldn't go without this Macrame Hanging Planter* as well. Hanging plants are a must.


3 | MIX & MATCH SEATING

I wanted to incorporate a lot of seating, so I went in with a white Bungalow Sofa* with hairpin legs. I actually edited the sofa to have hairpin legs, so the sofa seen actually doesn't exist; The original sofa has a rattan base. I'm loving hairpin legs and thought how pretty it would be to use them as legs for a sofa. It would be great for the outdoors because it would be completely open and perfect for small spaces. They're also a good choice for the outdoors because animals or bugs can't hide under them and nest. The platform for the sofa would probably be some type of wood. I also love the look of wire chairs, so I also added those in to touch on the modern nordic feel I was going for. As you can see, since there are so many areas to sit, you can always create separate seating areas and move furniture around to change up the space entirely.


5 | FINISHING TOUCHES

I wanted to make sure to include a lot of lighting so that the space can also be used in the evening, so the lanterns on the ground level add that perfect touch along with the hanging Round Paper Lanterns*. Tons and tons of pillows are a must as well as varying patterns and colors, but keeping with a soft color palette. The Kilim Turkish Cotton Throw* and Ivory Throw Blanket are to keep warm and bundle up to when it gets cold. I also added a Sisal Rug* to complete the space because I love outdoor rugs and how they make a space feel like an outdoor living space. I can definitely see myself enjoying this space. Every. Single. Day. There would be no reason to stay indoors with how comfortable, relaxing, and welcoming it looks!

I think I accomplished what I wanted for this room and more. It's the perfect space for any occasion and it would definitely make me happy on those days where I just want to get some fresh air in the comfort of my third story porch. I love how everything came together and how it really incorporates everything I want in an outdoor space. Thank you to Douglas Elliman for inviting me to be a part of this challenge. If you are on the lookout for amazing properties across the US, be sure to check them out, and if you're in need for some inspiration, head over to their Florida page. When I did, it just reaffirmed why my husband and I want to relocate there. 

I hope this inspires you to create a mood board for your outdoor space. Not only will it help you get all of your ideas together, but it will seriously make your dream space more attainable because it'll make your vision come to life. If you create a mood board, I'd love to see it! 

So, what do you think? How would you decorate your dream Florida Room? I'd love to hear about it in the comments below!

Disclosure: Links that are marked with an * are affiliate links.


Giveaway | Win a $100 Netflix Gift Card
The Best Things In Life Are Free | HelloLovelyLiving.com

It's giveaway time my lovelies! If you follow along with me, you know that I frequently do giveaways to give you all an opportunity to try out new things. Who doesn't love free stuff! Instagram is where I do most of my giveaways, so do follow along and stay in the loop! For this giveaway, I've teamed up with a group of bloggers to give away a $100 Netflix Gift Card. Netflix and chill, anyone? This would be great for those of you who are hardcore Netflix junkies or if you've yet to jump on the Netflix train. Don't miss out - and since we're on the topic, have you tried my Honey Caramel Matcha Popcorn? I think you'll love it for movie nights. Have an amazing weekend!

$100 Netflix Gift Card Giveaway | HelloLovelyLiving.com

GIVEAWAY DETAILS

Prize | $100 Netflix Gift Card

Giveaway organized by | Oh My Gosh Beck! (Please email becky@ohmygoshbeck.com with any questions.)

Rules | Use the Rafflecopter form to enter daily. Giveaway ends 5/13 and is open worldwide. Winner will be notified via email.

Are you a blogger who wants to participate in giveaways like these to grow your blog? Click here to find out how you can join a totally awesome group of bloggers!

Sharing is Caring | HelloLovelyLiving.com
Stina X


Project Prettify! | Design The Life you Love
Design The Life You Love | HelloLovelyLiving.com

I can't get enough of home inspo on Instagram. I know I talk about Instagram waaaay too much, but it really is the place to go if you want to see what's in and what's trending in interior design - and not just the stuff found in magazines and other published media - in real homes with real people who just love designing and styling. 

Instagram is like a black hole because I could literally get lost for days scrolling through people's feeds, so I usually have to control my urge. It just amazes me how many talented creatives there are on Instagram. That's why I'm so addicted - because it opens my eyes to so much diversity in ideas and creativity, which in turn, makes me a better creative and inspires me to try something different. I've discovered my love for so many interior design styles through it, which brings me to the point of this post.

I've always been into interior design, and looking back, I can see that from early-on, I've always gravitated toward it. One of the first careers that I wanted to pursue was in interior design, and growing up, I was always the one rearranging the house and trying to convince my mom to buy home decor or paint the walls. I'm the type of person that would rather spend money on a pretty piece of home decor first than anything else I love -  and I do love my fair share of girly things like clothes, makeup, bags, and shoes, so that says a lot!

Lately, I've been feeling pulled toward simplifying my home and wanting to start from scratch. Over the years, my design tastes have drastically changed as well as what I value most in life and in my home. My husband and I have really figured out what's really important and what we want out of life in the short and long term. Quality over quantity has always been my motto, so I really want to create a space that represents that. I also want to get rid of the excess and create a cohesive design and style that I feel speaks for me and allows me to really look at my home and say, yeah, this is so me! I remember reading something to that effect in Emily Henderson's book, "Styled". If someone were to walk into your home, would they be able to gather about what type of person you are or would there be a disconnect? With a budget close to zero, starting from zilch seems like shooting myself in the foot, so here comes the why and how.

So, for my why, I really want to start applying the motto "design the life you love" to every area of my life. I also believe in adopting a minimalist lifestyle, which I plan to get into more in another post.  I desire a home that matches my tastes and that I can be inspired by and inspire others with. For so many years I'd always say, maybe someday when I own my own home, I'll do this and that, but I've realized that someday rarely ever pulls through. The only time we have is now. I want my home to represent my family and me, so that is my goal. I want it to be an inspiring place that I can be proud of even if it is just a rental. Home is where the heart is, right!

As for my how, my plan is to sell the old stuff I do have (furniture, misc. items, AKA "junk", etc.) and liquidate it into cash. The money will be used toward projects around the house where I can create a space for less by doing DIY projects and purchasing staple pieces that will go a long way toward the function of my home. The remaining cash balance will go toward debt, which is one of the main reasons I came up with this idea. I mean, why not sell everything, get cash out of it, use it to create a brand new space I actually love - for less - and then have leftover cash to put toward bills? Sounds like a no-brainer to me!

Being that I'm going for a minimalist look, I think I can pull it off. It will be a fun challenge to take on, and I'm excited just talking about it. We will be downsizing greatly and deciding what's more important by restructuring our home, not only in a financial sense but a design sense. I still can't decide exactly what style I'm going for, but I do know that I've been loving modern Scandinavian/Nordic, mid-century modern, and bohemian design. Let's hope that I can make up my mind soon.

Here are some inspiring spaces I've been adoring lately!

Design The Life You Love | HelloLovelyLiving.com

via Gimmii

Design The Life You Love | HelloLovelyLiving.com

via Fjeldborg

In summary, I feel that nothing in life should make you feel like you are stuck with it, so if there's anything you want to ever change, be it as small as the color of your nails or more drastic like revamping your home, always know that you can do it. Life is all about change, and change is necessary for growth. In my case, I feel like taking this step is one of those things. What you surround yourself with, there you are, so why not make it count! Create your best life and live it as authentically you as possible. This is the journey I'm on at this point, and I am excited to share the process with you so that you can gain inspiration from it. Stay tuned for more to come in this series: Project Prettify!

What do you think? Would you be up for selling all of your furniture to create an entirely new space? I'd love to hear what you think in the comments below!

lifestyleStina X


Exciting Updates + New Project
image.jpg

I'm so glad that it's starting to warm up here in Oklahoma City. Being stuck inside for most of the year can get pretty depressing, so Spring makes me so excited! I had the chance to revisit the Myriad Botanical Gardens with my husband and two boys the other day and it was just really nice to see all the blooms and greenery and get inspired by nature again.

image.jpg
image.jpg

The Myriad Botanical Gardens is located in the heart of the city and is directly across the Devon Energy Center - the tallest building in Oklahoma City. I just learned that the original idea of the gardens was to create a space similar to the Tivoli Gardens of Copenhagen, Denmark. How neat! I'm not sure if they accomplished that, but it's really an amazing place nonetheless.

image.jpg
image.jpg
image.jpg

There's also a greenhouse called the Crystal Bridge Tropical Conservatory, which I have yet to go inside of. I always feel so inspired everytime I go to the gardens, and my phone always runs out of batteries because of all the snapping I do! It was a much needed getaway. 

As for the blog, I've finally got around to updating the site, and I am so so motivated to get back into posting more content on here. I've been MIA for about a month, so I've had a lot of ideas for the future of this site running through my head. I LOVE blogging; Life just got so hectic and it took me a while to get back to my creative space. I'm excited to feel inspired again, and I have a few things in the works.

I've been wanting to update the site for a long time and give it a more modern, minimalist, and bright aesthetic to match my changing tastes. So, I created a new logo, changed a few things, and I think I accomplished the new look, which makes me feel really inspired. There's something about changing things up that gets me energized. I've always been that way, and I really get bored of things very fast. You'll probably see a lot of rearranging here because I'm always making things feel new and fresh! I hope you like the slightly new design. Let me know if you like it!

image.jpg

Besides the blog remodel, I have been working on a project since last month. If you follow me on Instagram, I've posted quite a bit about my latest obsession. Why must I get obsessed with so many things all the time! I'm obsessed with getting obsessed. Ha!

image.jpg

So, this latest obsession is with succculents and cactus. Well, I've always been obsessed with them, but since I've been a plant-killer my whole life, I didn't have the guts to try my hand at these babies. That is until someone inspired me on Instagram to start propogating my own succulents, and it helped that my husband surprised me with my first batch of succulents shortly after.  Thanks hubs! I now have about four trays of succulent leaves that I'm propogating.

Caring for succulents has been exciting for me and so I've decided to create succulent gardens as well! I've received so much amazing feedback on Instagram, so it's really something that I want to continue sharing with you guys.

image.jpg

The great news is that I'll be launching a shop here on the site really soon and will be listing mini succulent gardens that you will be able to add to your cart and have shipped to you! I will also be slowly adding more things to my shop as time allows, so more will be in the works for that. If you want to stay current with what's happening, I post more frequent updates on Instagram. 

That's my quick update for now. There's so much more on my mind, but I don't want to overwhelm this post (and you). One last thing: What would you like to see more of here on Helly Lovely Living? More DIY? Home Inspo? Any specific topics? I'm all ears. I have a few things coming up that I can't wait to share with you all. I'll be back at it in a few days! Have an amazing weekend!

lifestyleStina Xupdates


The Danish Retailer That May Rival Ikea
The Danish Retailer That May Rival Ikea | HelloLovelyLiving.com

via Bloomingvile

I am completely and utterly obsessed with this Danish company that just hit the US market. In my latest Mode story, I'm getting a bit controversial. It may touch a soft spot for you Ikea lovers. Nonetheless, I am an Ikea lover myself, and that's exactly why I've fallen for this Scandinavian home goods company I'm about to share with you. If you're on top of the minimalist movement, you'll see what I'm talking about. Their products will make you swoon. Now if only they had a store the size of five football fields so I could spend eight hours inside. Read on for the full deets.

Are you an Ikea addict? How many hours could you spend in their store?

lifestyleStina Xikea


Cute Cactus Crafts For the Cactus Obsessed

via The House That Lars Built

I have not been exempt from this cactus obsession that has swept the world of DIY and crafting. I don't know what it is about transforming something real into variations of utter cuteness, but I'm not complaining. I love anything that adds life and cheer to my world, so if cactus bring any sort of joy to my life, then so be it. I welcome them with open arms in any way, shape, or form! If you're of the same accord, I gathered some cute cactus crafts that are super easy to make and oh-so-adorbs. Check them out in my latest Mode story below!

What is your favorite cactus craft? I'd love to hear about it in the comments below!
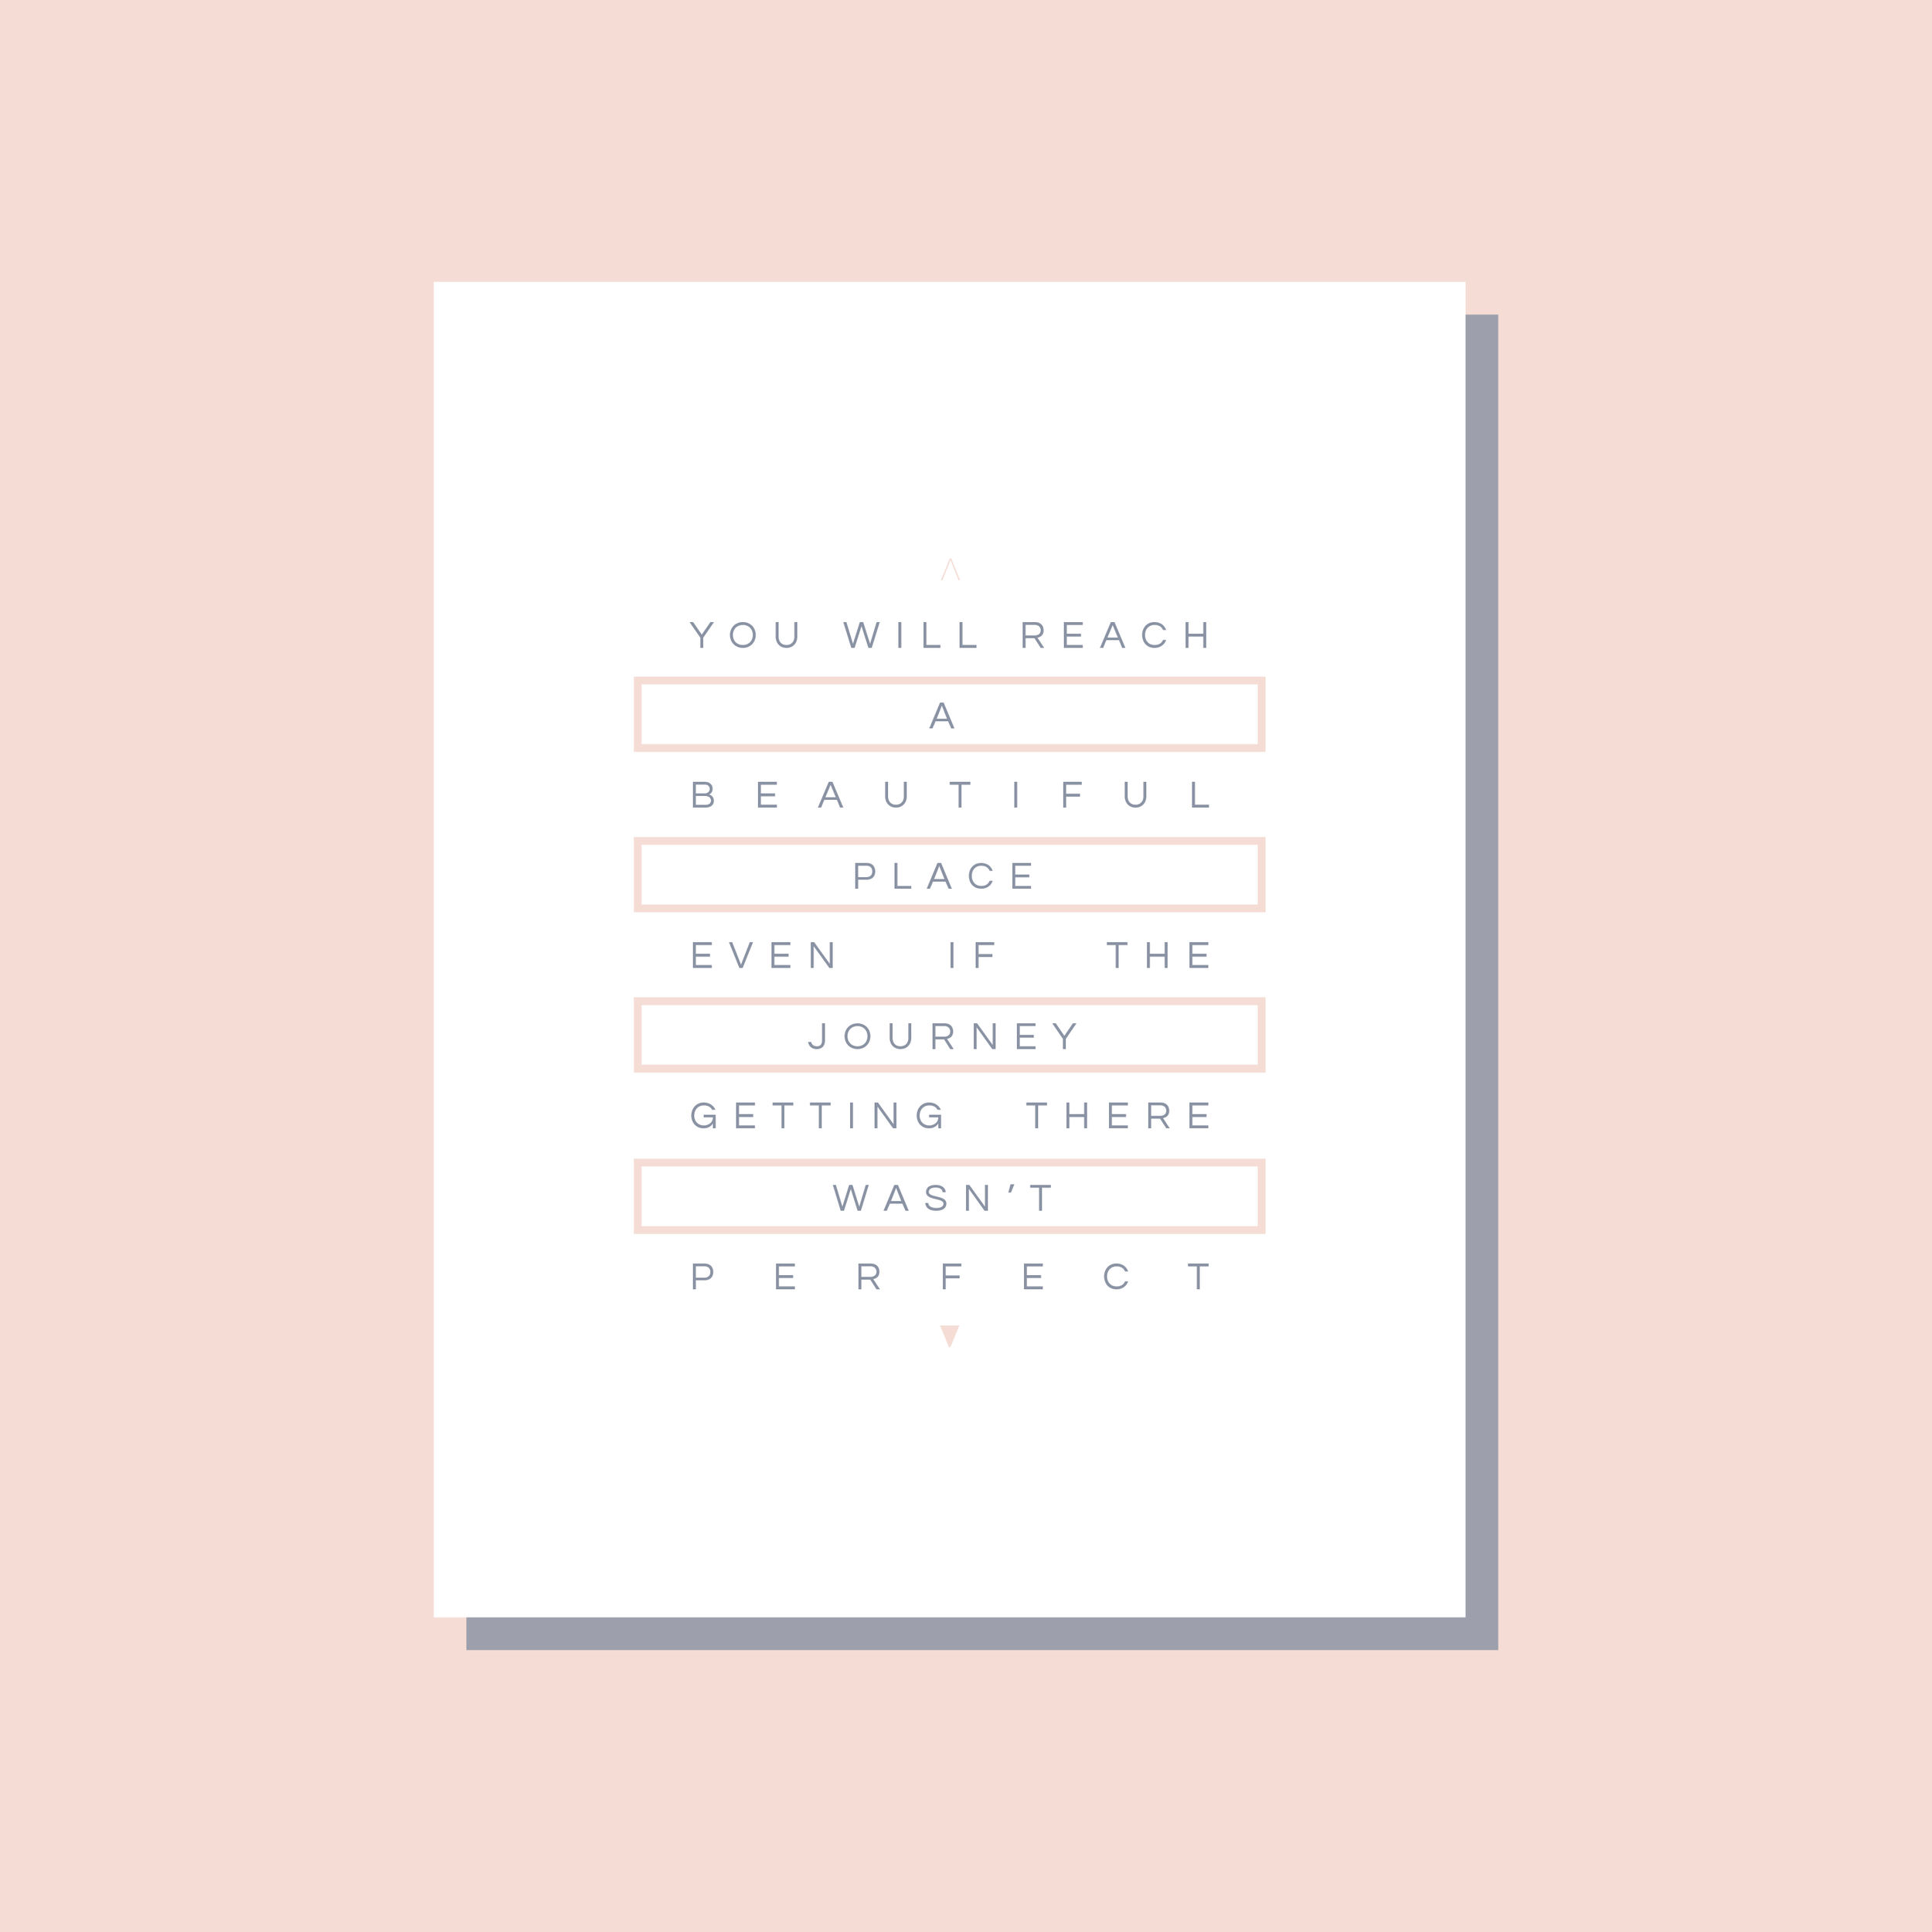
lifestyleStina Xdiy, plants, plant


Natural Skincare | Uprooted Skincare Review
Natural Skincare | Uprooted Skincare Review | HelloLovelyLiving.com

Products were provided for review. Please read disclosure at the end of this post.

Uprooted Skincare was founded by Diana, a mother of two who discovered the healing benefits of herbs after suffering from cystic acne caused by hormone imbalance. With research, she was able to naturally cure her hormone imbalance with herbs and became a firm believer in its effectiveness for the skin.

Natural Skincare | Uprooted Skincare Review | HelloLovelyLiving.com

Her story resonates with me because, I too, suffered from acne and tried everything in the book and more. It was only until I turned to natural alternatives that I found how powerful herbs and natural ingredients were to achieving desired results. What worked for my skin since has been tea tree oil and staying away from harsh cleansers.

Natural Skincare | Uprooted Skincare Review | HelloLovelyLiving.com

Diana creates skincare that is 100% natural, vegan, and freshly ground in small batches for maximum potency and freshness. You won't find any chemicals or fillers in her products, just natural ingredients. Her ingredients are not bleached, stripped, decolorized or hardened with high temperatures. You'll know exactly what comes in each product, and she also lists useful information on each ingredient's properties. 

Natural Skincare | Uprooted Skincare Review | HelloLovelyLiving.com

Uprooted currently carries face masks, blush + bronzers, lip balms, primer, and foundation, with new products being added. I received the rose petal + kaolin clay face mask and pomegranate + alkanet lip balm to try.

Natural Skincare | Uprooted Skincare | HelloLovelyLiving.com

This pomegranate + alkanet lip balm lip balm smells absolutely amazing! I love how it gives a tint to the lips, how it is so moisturizing, and how it contains one of my favorite healing ingredients, castor oil. It also contains beeswax, jojoba oil, pomegranate oil, and alkanet and hibiscus extract. I've never come across a lip balm that had so many natural healing ingredients in it. It'll be hard for other lip balms to measure up to this one in terms of ingredients now that I found it. 

Natural Skincare | Uprooted Skincare Review | HelloLovelyLiving.com

The rose petal + kaolin clay face mask comes in a nice 4 oz size with 15 or more uses. Since it is in a powder form, you do need to mix it with some type of oil like coconut oil, jojoba oil, yogurt, or other liquid of choice to form a paste. I mixed a tablespoon of coconut oil and powder together which formed a thick paste. To apply, I just rubbed it onto my face with my fingers all the way down to my neck and let it sit for 15 minutes. I then rinsed in off with warm water.

Natural Skincare | Uprooted Skincare Review | HelloLovelyLiving.com

I found this face mask to have lovely rose scent as there are actual freshly crushed rose petals in it. Once you rub it on your face, you'll feel that the texture of this face mask is a little coarse, which I wasn't used to, but I do love the raw textures in this face mask. You can actually see the ingredients as you apply it on your face, which makes it feel luxurious. After I washed my face, I did feel that refreshed feeling from the kaolin clay and my face felt very moisturized. This face mask contains several other beneficial ingredients including marshmallow root and raspberry leaf. Diana outlines all of the ingredients in her descriptions so you know exactly what benefits you'll be getting from each product.

Natural Skincare | Uprooted Skincare Review | HelloLovelyLiving.com

What I really appreciate about Uprooted Skincare is that she makes all of her products fresh and in small batches, which shows a high level of care that she puts into every product. You also get the full potency of the ingredients because you are not buying any fillers. Another thing that I really enjoy is discovering new formulations and ingredients that I wouldn't normally find available. It's fun trying new formulas and really knowing that each has a targeted benefit that will go a long way in making every penny worth it.

I encourage you to check out her other amazing products like her blushes, which are colored using natural ingredients such as beet root powder to create beautiful shades. You can view all of her products on her website, www.uprootedskincare.com or go directly to her Etsy shop. We put together a giveaway on Instagram, so make sure you enter for a chance to win a rose petal + kaolin face mask!

 
Natural Skincare | Uprooted Skincare | HelloLovelyLiving.com
 

What are your favorite natural skincare products and which UPROOTED product would you love to try? Share with me in the comments below!


Disclosure: Please be aware that I share my honest opinions here (positive or negative) regardless of if the products that I am reviewing were provided by the company for consideration. The purpose of this column is to help you, my readers, learn about alternative skincare through my honest reviews. I personally select each company that I will be featuring here, so I wouldn't review a company that I hadn't already found to be beneficial or meeting a certain criteria that I'm looking for in natural products. 

HelloLovelyLiving.com


Warby Parker Glasses Home Try-On | Review
Warby Parker Home Try-On - Seymour | HelloLovelyLiving.com

If you're like me and are a part of the four-eyed club, you'll be absolutely thrilled about this life-changing service I'm about to share with you. I don't know about you, but when I try on glasses, it takes me forever, and I mean, FOREVER to choose out a frame. After all, I'm going to have to wear the suckers, so I best like them, and that means hours upon hours of tirelessly trying out frame after frame. I admit, I'm not one to take purchases lightly. And I'm not just talking about big purchases - from lotion to eggs, I'm horrible at picking things out. I research and dwell on what I'm about to buy for a loooong time. I guess it's the indecisive person in me, which irritates the shiz out of my husband! Oh well, he can live with me. 

Warby Parker Home Try-On | HelloLovelyLiving.com

Getting to the point of this post, and not my indecisiveness, I have known about Warby Parker for quite some time but never got around to actually trying them out - until now! I've gone more than a year without glasses, so this is a big deal for me. I'm not sure if they first thought of the idea of home-try-ons, but I first heard about it from them. How does Warby Parker work? It works like this: On their site, you choose 5 frames that you want to try, add them to your cart, then they send them to you so you can try them on at home. You do have to enter a valid credit card, but that's about it. I received my box in less than a week. Once you're finished, send them back in the same box with the free return shipping label, then order your frame(s).

Warby Parker Home Try-On | HelloLovelyLiving.com

So what's so revolutionary about this idea, you ask? Well, it allows you to really try on your frames in the comfort of your home without someone pressuring you to hurry-up-and-buy! Take photos, share with your family and friends, and test them out on the town. At the end of it all (and if you're indecisive like myself), you'll come out of it stress-free and with frames that you truly love. Do as many home try-ons as you need before you commit to buying any.

Here are the frames that I decided to try:

Warby Parker Finch - Striped Molasses | HelloLovelyLiving.com
Warby Parker Mitchell - Whiskey Tortoise | HelloLovelyLiving.com
Warby Parker Welty - Whiskey Tortoise | HelloLovelyLiving.com
Warby Parker Upton - Oak Barrel | HelloLovelyLiving.com
Warby Parker Seymour - Whiskey Tortoise | HelloLovelyLiving.com

I have always wanted to own tortoise frames, so I may have gone a little overboard choosing them, but I am happy with my selections. The quality of these frames is really nice, and for $95 for prescription eyeglasses, it really doesn't get any better in my opinion. Once I really sat down to take a look at how I looked in them in photos, it really made a difference. It's so much better than trying to take a mental note of how each one looked! 

Warby Parker Home Try-On - Finch, Mitchell, Welty, Upton, Seymour | HelloLovelyLiving.com

I honestly love how each of them look, so this will be tough sticking to one! Mitchell and Seymour are very similar, I almost can't tell the difference, and I'm really loving the color and style of Upton! It looks so nice photographed. Warby Parker has a zillion and one amazing frames to choose from, and they're all so pretty, so you may have a hard time selecting which ones to try at first. My advice is to try something new! It can't hurt. That's what I did, and I'm so glad I did. I discovered new styles that I wouldn't normally try, and they actually look good with my face shape. If you want to know which one I went with, follow along on Instagram!

Warby Parker Home Try-On | HelloLovelyLiving.com

It's easy to get your 5 pairs to try on at home for free. Simply visit Warby Parker's Free Home Try-On and you'll be on your way! I also like to check for coupon codes whenever I buy stuff online, so you can see if there is any Warby Parker coupon code currently available here. I hope you enjoyed this post and found it helpful! I love when I find a service that makes life easier, especially when it comes to shopping. If you decide to do a home try-on, I'd love to see what you picked. Tag me on Instagram @hellolovelyliving

A special thank you to my Mom! This was her birthday gift - for me to get me a new pair of glasses! 

Which ones do you like? Let me know in the comments. I'd love to have your input!


Disclosure: Affiliate links included in this post. I always share my honest opinions. All photos were taken by me.


Wallpaper Wednesdays 28 | Artist Feature - Rachel Allene
Wallpaper Wednesdays 28 | Artist Feature - Rachel Allene | HelloLovelyLiving.com

This week, I'm excited to share with you a new artist feature! I found Rachel on Instagram, my go-to place for seeking out other creatives. If you visit her Instagram feed, you'll quickly see why her work stood out to me. Through her work, she shares inspiring and motivating messages and scripture for women. I ended up with a permanent smile on my face after reading them. 

Wallpaper Wednesdays 28 | Artist Feature - Rachel Allene

Rachel is part of the growing movement of women who are creating the life and career they want by pursuing what they love and what sets their heart on fire. She discovered calligraphy and fell in love with it so much that she decided to take a leap of faith and start her own business. Now, she creates calligraphy and hand-lettered print products that allows her to spread her message while living out her dreams.

Wallpaper Wednesdays 28 | Artist Feature - Rachel Allene

Many of her prints share encouraging scriptures that I absolutely love. She also appeals to the mug-loving-types, which is basically every woman known to man. See the rest of her lovely products in her Etsy shop.

Wallpaper Wednesdays 28 | Artist Feature - Rachel Allene

She's also a photographer, which explains why her photos are so beautifully styled and photographed. But the cake-topper is her brush-lettering and calligraphy. Looking at this beautiful form of art is therapeutic in itself. Throw in some light-hearted sayings and you have the perfect framed addition to add to your home. If you're loving her work so far, I'm sure Rachel would love for you to visit her (tell her I sent you). She can be found over on her website, Instagram, and Facebook. Get to know her a bit more below, and then download all of the free wallpapers she created for you at the end. 


Q & A

DID YOU ALWAYS HAVE A PASSION FOR ART AND WHEN DID YOU START PURSUING IT?

Yes, I have always loved art and have found great peace and comfort when creating things! I always loved studying art in high school and college. I considered double-majoring so I could get an Art degree, but I didn’t think I was skilled enough. Back then, I felt as if I never found a craft that I felt I could excel in or do for a living. Enter Calligraphy! Once I learned calligraphy and hand-lettering, I was hooked and knew that it was something that would be a part of my life for a very long time. Fast-forward to today and now I am a business owner selling my handmade goods and hand-lettered products. Life is a crazy ride!

WHERE DO YOU FIND INSPIRATION?

I find a lot of inspiration through my fellow creatives on social media, but I also find inspiration when I am outdoors. I spend a lot of time outside, and most of my good ideas are a result of a good run, walk, or hike. My faith inspires and influences the majority of my work as well.     

WHAT MEDIUMS DO YOU USE?

I use watercolor for most of my brush lettering products, but I also digitize my work. As a result, I sell mugs, note cards, and lots of custom digital projects (like wedding invitations). A lot of times, the work I will eventually digitize starts with a sharpie and scrap piece of paper!

IN THREE WORDS, HOW WOULD YOU DESCRIBE YOUR STYLE OF ART?

Empowering, feminine, inspirational.

DO YOU LISTEN TO MUSIC WHILE CREATING ART? IF SO, WHAT’S ON YOUR PLAYLIST?

Yes! I also listen to a lot of podcasts. My music playlists change a lot, but right now my favorite playlist includes Selena Gomez, Blake Shelton, Jason Derulo, Justin Bieber, Adele, Hunter Hayes, and Beyonce. My favorite podcasts are Radiolab, Serial, Reply All, and Mystery Show, if you were wondering :)

DESCRIBE YOUR MOST TREASURED ART PIECE TO DATE - ONE THAT YOU ARE MOST PROUD OF.

This is a tough question! I recently created a 2016 Calendar and each month has a  verse written out in calligraphy with a watercolor graphic. I love it so much! It was a lot of work, but I am really happy with how it turned out.

NAME ONE ARTIST YOU ADMIRE.

Jackson Pollock

WHAT ADVICE WOULD YOU GIVE TO EMERGING ARTISTS?

Don’t give up! Don’t compare yourself! Be unique! And remember to hold yourself to standard of grace, not perfection.

WHERE DO YOU SEE YOURSELF IN FIVE YEARS?

I hope to have some babies running around the office with me and a team of people working together to empower, encourage and inspire women through my art.

IF YOU COULD BE ANYWHERE IN THE WORLD RIGHT NOW, WHERE WOULD YOU WANT TO BE?

In Italy with my husband, drinking a glass of red wine, and looking out onto a body of water.

 
Free Wallpapers for your Desktop & Phone | HelloLovelyLiving.com

download |

Free Wallpapers for your Desktop & Phone | HelloLovelyLiving.com

download |

Free Wallpapers for your Desktop & Phone | HelloLovelyLiving.com

download |

Free Wallpapers for your Desktop & Phone | HelloLovelyLiving.com

download |

Free Wallpapers for your Desktop & Phone | HelloLovelyLiving.com

1 | 2 | 3 | 4


For wallpaper updates, sign up for my newsletter in my sidebar or simply follow @hlovelyliving and @cheekybillo on Instagram. Search #cheekyliving where Ena and I will be posting when new designs are up and tag us with which wallpapers you picked so we can feature your photo!

My Wallpaper Wednesday partner in crime - the lovely, Ena Chahal - can be stalked over here: Instagram | Blog | Casetify | Society 6 

What designs and artist features would you like to see next? Share with me in the comments below! 

Disclosure: All designs are original and for personal use. Artists retain rights to all designs and they may not be copied or reproduced in any form or likeness. We love when you share, but please link back to the original post. Enjoy!

HelloLovelyLiving.com