Posts tagged raw food
DIY Minimalist Floating Wood Shelf

For a while now, I’ve been shopping for a minimal raw wood floating shelf, but to no success. Knowing that adding shelving to your walls will enhance your space, I always make it an effort to do so. I have always loved floating wood shelves in particular. So, I decided to take it into my own hands and design one that was not only pretty and the exact aesthetic I was going for, but inexpensive and easy to make.

This post is meant to provide the exact measurements and supplies that you will need. I also filmed a video of me making this exact shelf from start to finish so that you can easily visualize each step and refer back to it if you decide to make one for yourself.

Hello Lovely Living

All supplies besides the drill set (which was purchased at Ikea) where purchased at Home Depot, so this is an easy one-stop project. It is a very affordable project as well at under $15 for all supplies, and you could easily make multiple shelves for under $10 with leftover supplies.

Watch the video below for a quick tutorial on how to make this floating shelf!

SUPPLIES


• 1 - 0.75” depth x 5.5” width x 24” length piece of maple wood board

• 60 sandpaper for wood (comes in pack of 5 sheets)

• 2 - #10x3” phillips wood screws (comes in pack of 2)

• 2 - EZ Ancor drywall anchor that hangs up to 75lbs (comes in pack of 4)

• #12-24 Everbilt machine screw nuts (comes in pack of 10)

• 3/4” diameter x 48” length wooden dowel (cut down to 2 - 7” pieces.

• Drill bit and phillips screwdriver

INSTRUCTIONS


STEP 1

Cut dowels

Home Depot has a saw station that you can use to cut down your wooden dowels. Cut 2 - 7” pieces. With remaining wood, you could easily make 4 more pieces depending on if you are making multiple shelves. Of course, you’d need to adjust your amount of supplies if that is the case.


STEP 2

Sand dowels

Sand down the ends of the wooden dowels until smooth.


STEP 3

Drill dowels

Drill one side of each dowel 2” deep and at a circumference that allows for the head of the phillips screw to be completely inserted. I drilled my holes to a width of 1.25 cm since my screws had a lip that wide.


STEP 4

measure your wall

Measure the width of the wall you are planning to hang your shelf on. Since the piece of wood is 24” in length, you will need to leave an equal amount of space at each end in order to center it on the wall. This amount will depend on your individual space. Once you’ve identified how much space you need for each side, measure 3.25” from each edge of the piece of wood. This is where your wooden dowels will be placed and where you will place your holes in your wall. Use a leveler to make sure that everything is even before drilling your holes. I just downloaded a leveler in the app store and used my phone to do this.


STEP 5

Install drywall anchors and screws

With your drill bit, drill your holes into the wall and then screw the drywall anchors in place with a phillips screwdriver. Take your phillips screws and run a screw nut through each before you install them. Screw in until secured and tight (about 1”). Leave a 2” allowance to insert the wooden dowels into.

STEP 6

Insert wooden dowels and hang

Insert the wooden dowels into the screw and nut until secure. Hang shelf and then style with finishing touches. Make sure to keep shelf flush to wall so that all the weight is held up against the screws.

public.jpeg

Wasn’t that an easy project! If you try this project, make sure to tag me @hellolovelyliving on Instagram so I can see!

I also have another hanging wood shelf project you may be interested in too. You can see that here!

What home decor projects have you been wanting to do lately?


Recipe | RAW Matcha Cheesecake With Fig and Almond Crust
HelloLovelyLiving.com | Recipe - Raw Matcha Cheesecake With Fig And Almond Crust
 

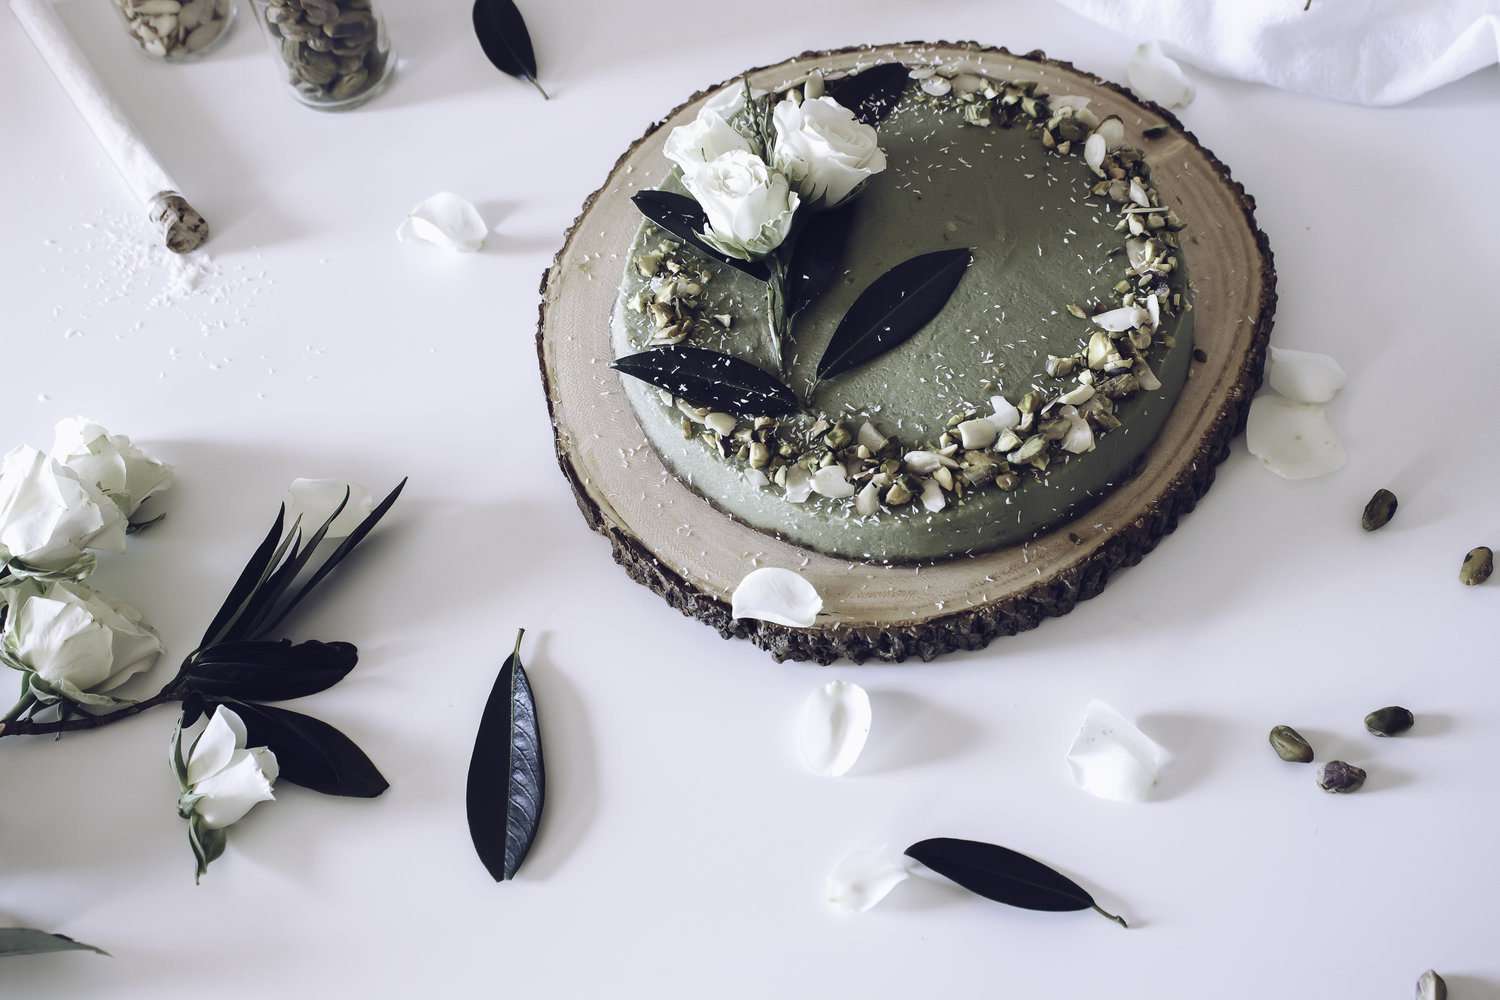
I'm kind of obsessed with matcha. Just a little. Okay, A LOT. The fun part is adding it to every and anything sweet. In this recipe, I decided to get a little creative and come up with a raw cheesecake recipe that included some of my favorite ingredients: matcha (of course), almonds, honey, mascarpone cheese, and figs. I mean, go big or go home, right? I did just that with this recipe. Do I miss regular cheesecake? Not even. Read on for the complete recipe and for more dreamy photos.

 
HelloLovelyLiving.com | Recipe - Raw Matcha Cheesecake With Fig And Almond Crust
 

So, what is a raw cheesecake anyway? For all of you who aren't familiar with it, it's generally made with a date-nut crust and cashew coconut-cream filling. There's absolutely no baking involved and no cheese, but you still get that creamy + fatty consistency without the guilt. Since I did still want to have some of that cheese flavor in this recipe + make it extra fancayyy, I added 4 tablespoons of mascarpone cheese. This is totally not necessary, so feel free to leave it out and just replace it with more coconut cream. But it's damn good with it. Just sayin'. You could even replace the honey and use a plant-based sweeter instead for a completely raw, vegan cheesecake.

 
HelloLovelyLiving.com | Recipe - Raw Matcha Cheesecake With Fig And Almond Crust
 

I also decided to switch it up a little and make a fig and almond crust instead of a date-nut crust that is typical of raw cheesecakes. In my opinion, it tastes even more amazing. Feel free to break the rules with this cheesecake. Make it into what you want it to be - add the types of toppings that you love, remove what you don't. It's completely versatile, and it's food. Play with it. I chose to top mine with crushed pistachios, sliced almonds, desiccated coconut (basically coconut flakes), and a generous drizzle of honey. Can someone just stop me right now?! This is sounding way too delicious. 


HelloLovelyLiving.com | Recipe - Raw Matcha Cheesecake With Fig And Almond Crust
 

What else can I say about this cheesecake so that I can stall and show you more pictures? Hmm ... It's amazing. It's damn delicious. And isn't it just pretty! Another thing I should mention is that I totally made this without having the proper tools. I only had a mini food processor, so this was truly a labor of love. I also didn't have a springform pan, so please please do yourself a favor and get one if you don't have one. It will make your life so much easier!

 
HelloLovelyLiving.com | Recipe - Raw Matcha Cheesecake With Fig And Almond Crust
 

So, there's that, my loves. A ton of photos to get you salivating before you tackle the hard part - running to the store to get all of the ingredients to make this bad boy! Actually, this cheesecake is super simple. Just make sure to soak your cashews the night before so you're not like me, wishing I did so I could enjoy this cheesecake a lot sooner. Happy non-baking. Oh yeah, I forgot to to say that this is perfect if you hate baking or are horrible at it. Sorry, I'm done, let's get into the recipe (finally)!

 
HelloLovelyLiving.com | Recipe - Raw Matcha Cheesecake With Fig And Almond Crust
 

Raw Matcha Cheesecake With Fig And Almond Crust


Servings: 8 servings
Prep: 30 mins
Cook: 0 mins
Total time: 30 mins

Ingredients


Crust

  • 1 cup dried figs
  • 1/4 cup almond flour

Filling

  • 2 cups cashews (soaked)
  • 1 can coconut milk (1/2 of the cream portion only)
  • 2 Tbsp coconut oil
  • 4 Tbsp mascarpone cheese
  • 1/2 cup raw honey
  • 2 tsp matcha powder

Toppings

  • pistachios (lightly chopped)
  • honey
  • almonds (sliced)
  • desiccated coconut

Instructions

  1. Cover and soak the cashews in water for at least 4 hours or overnight. Refrigerate the coconut milk.
  2. Line the bottom of an 8" x 8" springform pan with a round piece of parchment paper. To prepare the crust, using a food processor, mix the dried figs and almond flour until it comes together when pressed. Press evenly into the bottom of a springform pan. Set aside.
  3. Strain the chashews. To prepare the filling, process the cashews until it starts resembling a creamy texture. Open the can of coconut milk and use half of the solid, cream portion only. Do not use the liquid portion. Add the coconut cream to the cashew mixture and mix until well combined, then add the reamining ingredients and mix until well combined and until an smooth, creamy texture has formed.
  4. Pour the filling into the springform pan and spread evenly. Cover with plastic wrap and freeze for at least 4 hours to set.
  5. Remove from the freezer and release the springform pan. Place on a serving dish of choice. You may need to even out the top of the cheesecake with a spatula if it is not completely smooth.
  6. Decorate with toppings around the edges: lightly crushed pistachios, sliced almonds, and a drizzle of honey. Dust lightly with desiccated coconut.

Notes

  • Store in the refrigerator or freeze for longer periods.
  • For a vegan option, remove mascarpone cheese and substitute with the other half of the coconut cream. Instead of honey, use a plant-based sweetener.
  • Organic ingredients are preferred.


Wasn't that just the easiest! FYI, I had a slice for breakfast and it was totally one of those moments where I had to pinch myself. I mean, cheesecake for breakfast!?! What world is this!?! Happy clean eating!

Will you be trying out this recipe? If you do, I'd love to see your photos! Go on, tag me in your photos on Instagram using #hellolovelyliving and @hellolovelyliving so I can get all heart eyes on your photos + share them so others can do the same! 


HelloLovelyLiving.com


5 Refreshing Summer Sweets that will Make you Go Vegan

Refreshing, easy, and colorful is the theme of my curated collection of vegan summer sweets. Cool down, grab something sweet, and enjoy your time soaking up the last of those summer days. I know, I'm sad that it will be over soon, too. Warning: You may just want to eat any number of these recipes immediately - so get ready to head to the grocery store! 

5 Refreshing Summer Sweets that will Make you Go Vegan

1. Summer Celebration Fruit Tart: How pretty is this tart! It's incredibly simple to make, and what makes this tart so summery are the fresh seasonal fruits and delightful toppings like fresh herbs and bee pollen. This picturesque tart is almost too pretty to eat, and it's vegan and gluten-free. What could be any better on a summer's day? (via My New Roots)

5 Refreshing Summer Sweets that will Make you Go Vegan

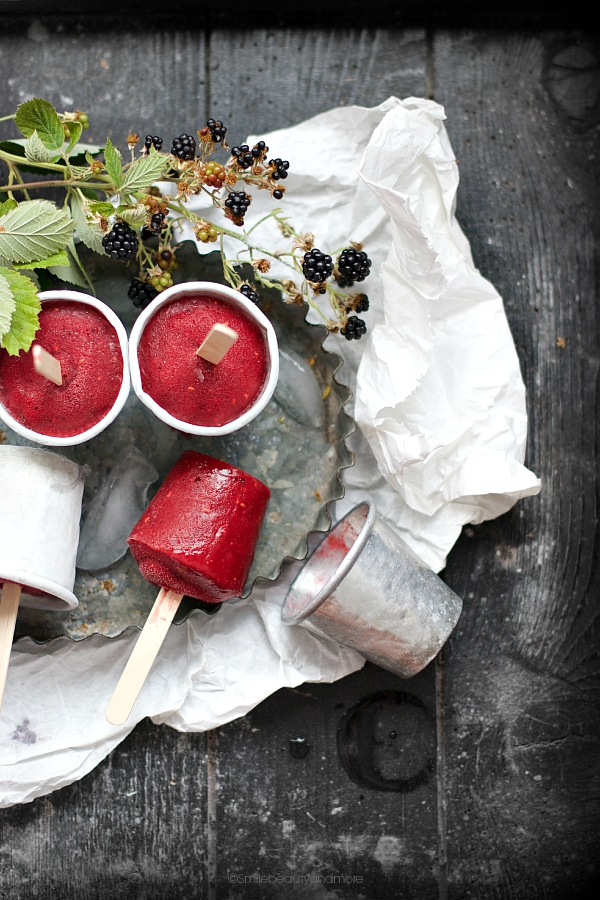
2. Stecco Gelato: This "stick ice cream" as it is translated to contains two of my all-time favorite fruits: blackberries and raspberries. The color of these popsicles are so rich and I am guessing that they taste just the same. These are a perfect treat on a hot, sunny day, or for those mid-afternoon moments when you get a sweet tooth. (via Smile, Beauty and More)

5 Refreshing Summer Sweets that will Make you Go Vegan

3. No Bake Blueberry Lemon Cheesecake: I love how vegan recipes look so beautiful and use the freshest ingredients. Isn't that the best part about eating - eating with your eyes? And I just loooove blueberries. They're so easy to add to anything, they taste amazing, and they are packed with antioxidants among other super-fruit powers! Everything about this recipe takes the guilt out of dessert. The crust is made from almonds and dates and the filling contains coconut oil, coconut milk, and cashew nuts. I can just imagine how creamy this is! (via Call Me Cupcake)

5 Refreshing Summer Sweets that will Make you Go Vegan

4. Coconut Lavender Lemonade: That color - I have never seen a prettier lemonade in my life! It's hard to describe the taste of lavender, but it's really light and refreshing, so don't be scared to try it. Since floral notes are not for everyone, you can get creative with this idea of infusing lemonade with various flavors. Coconut water is very hydrating and will give you that boost of energy on those hot days. (via Confectionalism)

5 Refreshing Summer Sweets that will Make you Go Vegan

5. Cantaloupe in Coconut Rose Cream: The color of this delightful creation screams SUMMER! Doesn't it make you feel refreshed just looking at it? Cantaloupe was made for summer, agree? This is completely dairy-free, too. What's the white stuff, you ask? Coconut cream. Coconuts are so versatile for vegan recipes as you've seen so far. And there's something hidden that makes this recipe so interesting. It's the rose water and cardamom powder that just do it for me. I'm dying to try it! (via Kiran Tarun)

Now that I've officially prepared a feast for your eyes, which recipe are you convinced will make you turn vegan? Haha, kidding. You don't need to become a vegan to eat vegan or feel pressured that you must say an oath. I love that there are so many recipes accessible today that show you that you don't have to sacrifice taste for eating healthy. If anything, you gain so much more flavors because vegan recipes often contain diverse ingredients that you may have never tried together. It's an adventure for your senses, so why not escape for a little bit and try something new. <3

Which of these recipes do you hope to try? Share with me in the comments!